
Leaderboard

Popular Content
Showing content with the highest reputation on 06/08/2013 in Posts
-

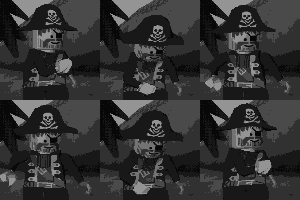
Brown Hair over Eye and Black Eyebrows Pattern (3626bp7a) Texture Pack
lol username reacted to Fifi La Fume for a topic
(Ignore the Sandy Bay skybox backdrop, I was testing things...) Contains all expressions. Download: https://ore.rockraidersunited.org/legacy/LR_3626bp7a_402586.zip Instructions: Replace "XX" in the texture names with the initials of the character desired to be replaced, then copy to "MENUDATA" and "GAMEDATA/COMMON". List of initials and what they replace at: http://www.rockraide...skin-texturing/ Enjoy!1 point -
Extracting the videos
Lair reacted to Brickulator for a topic
It's easy enough to fraps the videos in-game but it'd be nice to get our hands on the original files, wouldn't it? I think it would. And afaik it hasn't been done yet. So I've had a look into the video files and made a little more progress than I have before. Using Riffpad I looked through INTRO.SI, which refers to the following videos and their corresponding wavs: legomed.smk mindscap.smk intro.smk outro.smk badend.smk goodend.smk I think the file names are pretty self-explanatory, apart from outro. I'm not sure what that one is, as goodend and badend are presumably the two Polkacide endings, and the credits video is contained in CREDITS.SI. For anyone who's not familiar with smk (Smacker) files, they are compressed videos designed to be used in games, similar to bik (Bink) files created by the same company. The are usually very easy to play and convert, but I'll get to that in a minute. After a bit of googling on the extraction of files from riffs, I found a little program called mediaextract (https://github.com/panzi/mediaextract). I wasn't expecting it to work at all, but to my surprise, when I asked it to spit out all the smk files contained in INTRO.SI, it instantly gave me 6 of them. As you can see above, there are 6 smk files in the SI file. The command I used was this, if you want to try it: mediaextract -f smk INTRO.SI You'll need mediaextract and the SI file to be in the same folder, I just copied it across. You can specify an output folder if you want, if you go to the link I posted above there's a list of all the options you can use. Now, I had already tried a couple of other commands with this and had ended up with hundreds of tiny mpg variations that seemed to be empty, so I wasn't too hopeful about these .smks to start with. But then I noticed that they had much larger filesizes and so must actually contain something. The original filenames did not survive the extraction though, and they were named as follows: INTRO.SI_01dc0be8.smk INTRO.SI_002a1846.smk INTRO.SI_023c2956.smk INTRO.SI_00000280.smk INTRO.SI_00381a50.smk INTRO.SI_01772eac.smk I can't find those codes in the SI file so I assume they were just generated by the extractor. I tried to play the files with the RAD program but didn't have any luck. I also tried to convert them into avis but either ended up with blank videos or errors. I did have a look into the files a bit more though, and I found their durations: INTRO.SI_01dc0be8.smk - 24 seconds INTRO.SI_002a1846.smk - 11 seconds INTRO.SI_023c2956.smk - 1 minute 44 seconds INTRO.SI_00000280.smk - 14 seconds INTRO.SI_00381a50.smk - 1 minute 22 seconds INTRO.SI_01772eac.smk - 30 seconds This suggests that: INTRO.SI_01dc0be8.smk = badend.smk INTRO.SI_002a1846.smk = mindscap.smk INTRO.SI_023c2956.smk = goodend.smk INTRO.SI_00000280.smk = legomed.smk INTRO.SI_00381a50.smk = intro.smk Which leaves INTRO.SI_01772eac.smk as outro.smk. It's only 30 seconds long so it can't be the credits, but just to check I had a look at CREDITS.SI and extracted CREDITS.SI_00002306.smk, which is 3 minutes 33 seconds and corresponds to credits.smk. Interestingly, it appears that only the text from the credits is in this video, and the pictures are separate bmps contained in CREDITS.SI. That's as far as I've gotten so far. I think the next step is to locate the other video files - the character profile videos etc - and see if any of those work with RAD. And to see if there are any other extra files that don't match up. I might also try hex editing INTRO.SI to see if I can swap outro.smk with legomed.smk or something to see what it is. UPDATE The character videos are in INFOMAIN.SI. I also found the underwater video from the lift but I've lost it now Also, it's not the most interesting video but I extracted the "You need to put the CD in your computer!" video as well. Still no luck playing anything though. UPDATE 2 It looks like the mysterious outro.smk is an unused video showing the power brick flying off the top of the information centre.1 point -

Tutorial: (semi-)Transparency in textures
Sluicer reacted to RobExplorien for a topic
Alpha compositioning in LEGO Racers textures You probably already know how to work with the .BMP files, how to edit them and implement them in the game. If you don't know this, I advise you to check out >this tutorial. What hasn't been explained yet (in a more thorough way), is the use of alpha channels (also known as transparency) in these .BMP formats LEGO Racers uses. Alright, to start off with, you cannot set a colour transparent/opaque in the .BMP files via the editing program you use. A pixel is either filled or clear in LEGO Racers. The alpha channel a .BMP file uses is defined in the files using the .TDB extension in the .JAM archive. Below follow some examples of the structure of a section of a .TDB file: Example taken from MENUDATAPARTDBBODYPART.TDB k_27 // Textures [104] { k_27 // Texture "il_dflt" { k_2A // Bitmap (remove this to denote a TGA texture) k_28 } k_27 // Texture "kk_chst" { k_2A // Bitmap (remove this to denote a TGA texture) k_28 } ... // Other 102 entries cut } This binary file structure is pretty common in the .JAM archive, when viewed with origamiguy's >Binary File Editor. It starts with k_27, which probably functions as to define what we're talking about in the file (which are textures). Under k_27 is a number, placed in square brackets. It defines the amount of entries that will follow between the (mandatory) curly brackets. In our example, we have the IL_DFLT.BMP and KK_CHST.BMP texture files. You already know what these abbreviations mean if you read the skin texturing tutorial. The texture specifications are placed between curly brackets again, to indicate where these specifications refer to (in our case, IL_DFLT.BMP or KK_CHST.BMP). We won't go too much into the k_2A and k_28 now. Just a brief explanation of k_2A: "Denotes the use of a bitmap image, and can be replaced by a TGA (which is a(nother) raster graphics file format).". So this structure is relatively simple to understand. I cannot spot any specified use of alpha channels here, can you? Indeed you can't, because we need a special statement to denote the use of a transparent colour in the designated .BMP file. Take a look at the next example. Example taken from GAMEDATARACEC0R0IGD_MAP.TDB k_27 // Textures [1] { k_27 // Texture "igd_map" { k_2A // Bitmap (remove this to denote a TGA texture) k_28 k_2C // Transparent Color // CONFIRM THIS ONE 0 0 0 } } This .TDB file is much smaller than the former one we've discussed, but that isn't of any issue here. Aside from the specifications 'pointing' to another .BMP file (which is IGD_MAP.BMP in this case), there is an extra statement for this texture. Ofcourse I'm talking about k_2C, and the comments in the code already hint this. The k_2C statement is not hard to understand either. In the .TDB file it is referred as 'transparent color'. Below k_2C are three integers, and you always have to define these integers, when using the k_2C statement (hence the //CONFIRM THIS ONE comment). These three integers stand for an RGB colour code, where the first is for R, the second for G and the third for B. That's right, you can set a specific colour for a .BMP file to be used as transparent. A quick sidenote, the integers defined below k_2C cannot be lower than 0 or higher than 255, because RGB colour codes do not extend beyond these values. In our example, we have IGD_MAP.BMP, which is the texture for the track map displayed in the lower right corner of the race screen. As you can see, the transparent colour for this texture is pure black. Therefore, all colours in the .BMP with pixels of this RGB value are, to simply put it, invisible for the user. Compare the two images below and you see that the blackness in the .BMP is not shown in the actual game. --> in-game --> So, in order to use transparency for a texture, use the k_2C statement. To summarize it shortly: 1. Open the .TDB file and search for the texture (name) you desire to set (partially) transparent. 2. Use/Add the k_2C statement to define the RGB colour code (thus defining which colour will be used as transparent in the designated .BMP file), and save it again. 3. Open the .BMP you wish to texture (partially) transparent with an editor. 4. Select the RGB colour code you defined as to be used as transparent for this specific texture, and edit the texture with this colour to your likings. 5. Save the .BMP (in the right folder) using indexed color (to have the game 'notice' any possible transparency) and recompile and stuff (you know the drill). Now we also have a method for applying semi-transparency to textures, which Brickulator discovered. For applying this we have to include another file, the .MDB file. So, what does the 'inside' of this file look like? Here we have the code for Veronica Voltage her chestpiece. k_27 // Materials [128] { k_27 // Material "vv_chst" { k_29 // Diffuse Color 100 100 100 255 k_28 // Ambient Color 100 100 100 255 k_2C // Texture Name "vv_chst" k_2D k_2B } ... // other 127 entries cut I can see similarities with the .TDB; both start with the k_27 statement, define the amount of entries to follow and denote the texture. So, where and how to apply semi-transparency? For that, we make use of the k_46 statement. Below this statement, we have to set a value ranging from 0 to 255. This value defines the opacity of the texture. The 255 value would be a solid-looking texture, and 0 would be a full transparent texture. Any value inbetween will result into a semi-transparent texture. Note that it is not clear whether it is possible to add 'regional' semi-transparency, e.g. only setting those with RGB values 240;220;0 semi-transparent. So, in order to use this, write the statement below like this: k_27 // Materials [128] { k_27 // Material "vv_chst" { k_29 // Diffuse Color 100 100 100 255 k_28 // Ambient Color 100 100 100 255 k_2C // Texture Name "vv_chst" k_2D k_2B k_46 // Alpa (0-255) 127 } ... // other 127 entries cut Ofcourse you can use another value than 127, but this serves as an example. For her chestpiece, it results into the following output: So, use the k_46 statement to apply the use of semi-transparency to a .BMP in-game. To summarize it shortly: 1. Open the .MDB file and search for the texture (name) you desire to set semi-transparent. 2. Use/Add the k_46 statement to define the opacity of the texture, and save it again in the correct folder. 3. Recompile the .JAM and stuff (you know the drill). If you still have questions, or if you spot a mistake I might have made in this tutorial, I'm open for it.1 point -
Tutorial: (semi-)Transparency in textures
le717 reacted to RobExplorien for a topic
Now added semi-transparency part for this tutorial, with Brickulator's consent.1 point -
I never asked for this.
Wognif reacted to lol username for a topic
... So basically, the LEGO version of this?1 point -
What in the bricks has happened?
Lair reacted to Addictgamer for a topic
What. But but...you forgot about the trickster's grand exciting adventure. He was jumping all over the code, hunting through dangerous bugs and mysterious glitches, all to bring this grand story to us! HE MUST NOT BE FORGOTTEN. No, seriously. What.1 point