
Leaderboard

Popular Content
Showing content with the highest reputation on 10/08/2013 in Posts
-

Somewhat-minor discovery!
ProfessorBrickkeeper and 2 others reacted to Alcom Isst for a topic
Didn't we go over this sort of thing? Lum Odder, I know that you know that file extension similarities does not imply that the actual files are at all similar or compatable.3 points -

Kill Boxes Removed
Biorune and 2 others reacted to Fluffy Cupcake for a topic
http://www.youtube.com/watch?v=Q_Y3K8gyYes Because why not? P.S. I love how the youtube url says "Yes". I will provide a download later when I finish the rest of the worlds. I might also make a 'lowered' version for those people that still want some sort of boundary but want to go deeper in the water. Btw, this was edited in the WRL file, so I will probably add info about it later on in there.3 points -

Custom Cutscenes
le717 and one other reacted to Jimbob for a topic
Creating Custom Cutscenes This tutorial will teach you how to make custom cutscenes in LEGO Racers 2. The only tools you need are a generic text editor, such as Notepad, and JrMasterModelBuilder’s >UNGTC. I have created an example mod to showcase the techniques covered in this tutorial, which you can view >here. Included is the original script, so if you need help with using certain effects, check it out. Additionally, Xiron has compiled a list of all the various script functions, actor names, etc. usable in cutscene scripting. >See the list here. Thanks, Xiron! Note: This tutorial is only half complete as I am still researching into this area of LR2 modding. I apologise in advance for the lack of clarity in some sections of the file descriptions, I’ll be looking into them to learn more (unless anyone can explain them to me, which I’d be very grateful for). 1. Setting Up the Mod Navigate to your LEGO Racers 2 install folder. In it is a file called GAMEDATA.GTC. Select this and drag it onto the ungtc.exe file included in the UNGTC tool; the file will be extracted into a folder called GAMEDATA. You are now ready to start modding! 2. The Scripts All the subtitles in LEGO Racers 2 are contained in the following file: GAME DATA/TEXT/LEGO STRINGS.TXT They are stored along with many other items of text, such as menu item names. However, modifying these strings doesn't change anything in-game, and the other text files aren't particularly pleasant to go through, so for now this tutorial is excluding the editing of subtitles. The cutscenes are stored in GAME DATA/SCRIPTS. Within this are the five locations in LEGO Racers 2 – note that CARCRAZE is Xalax, ADVENTURERS is Dino Island, and SANDY ISLAND is Sandy Bay – each containing dialogues that occur in that location. In the SANDY ISLAND folder is an example file called ANIMS.TXT. This contains example animations for you to use in your cutscenes. The rest of the files are the cutscenes themselves. 3. Modifying a Cutscene To modify a cutscene, first choose the file you wish to edit. It would take too long to compile a list of each file’s purpose just yet (but hey, I may do it some day), so for now you’ll need to use common sense to work out what each file’s cutscene is. In this tutorial we will use INTRO1.TXT as an example. Locate the file in the SANDY ISLAND folder and open it in a standard text editor. Below are the various details it contains, and what they represent (note that currently unidentified headings are best left unchanged). $global $name intro # Not sure where this is used $story INTRO # Not sure where this is used $length 25 # Total time, in seconds, that the cutscene lasts for $setactor PLAYER DRIVE_CENTRE # Players and NPCs are added with $setactor. Firstly, the character is defined, and this is followed by their model. I’m not sure what the models are, however. $setactor SPARKY CB_IDLE # CB_IDLE is the default $carposition intro1_carpos # The player’s car is positioned using this. I don’t know where car positions are defined yet. $nocancel # Prevents the player from skipping a dialogue. Remove this to make dialogues in this particular file skippable. $end After this initial section, the dialogues are implemented. Each follows the same format. IMPORTANT: The times specify when a section begins, not how long it lasts – this means that the final section will continue on until the time specified in the global declarations section. Below is an example segment from the file: $time 0 # The time at which this section starts, in seconds. Can be a half decimal, e.g. 3.5. $actor 1 # Each character is given a number based on the order in which they were listed in the global declarations. The player is always first and is 0, from then on it’s 1, 2, 3, etc. $position intro1_sparkypos # Again, the position of the character speaking $expression TALK 4.5 # Not sure what this is, I’m assuming the texture/model. The number is its duration in seconds. $animation TALK_NORMAL 3.5 1.0 # The character’s animation. This particular one isn’t in ‘ANIMS.TXT’. The first number is its duration in seconds, the latter I'm not so sure. $end # Almost everything must be ended $cinematic # The camera position, I think $shot OBJECT_STATIC SPARKY # I think this means it focuses on Sparky. $startrelative 0.2 1.1 2.0 # Where the camera starts? $endrelative -0.2 1.2 1.8 # If so, then this is where it finishes, for a pan/zoom effect. $targetoffset 0.0 1.2 0.0 # Perhaps to reposition the camera off-center from the character $end $subtitle SPARKY SP_INTRO1 5 # The dialogue itself. ‘SPARKY’ is the name written in the dialogue box, and ‘SP_INTRO1’ is a reference to the ‘LEGO STRINGS.TXT’ file mentioned earlier. This is the part where you can change what the actor says. The number is the time in seconds that the dialogue lasts, and can carry over multiple $time segments so long as no new subtitles are specified before the time finishes. You can use this to have a single dialogue with multiple animations strung together. You can continue adding, editing and/or removing these segments, so long as they are in chronological order and don’t go over the total time you set. So, now you know (well, to a degree) what the various parts of the file do, you can go ahead and modify them! 4. Editing Subtitles Coming soon… 5. Recompiling the Mod Now you have created your mod, it is time to recompile it for testing. Save and close all files within the GAME DATA folder, and navigate back outside it. Then click and drag the blank .GTC file onto the ungtc.exe file to recompile it. The program will compile a new GAMEDATA.GTC file (which is noticeably larger than the original), in addition to new COMPRESS.INF and FILELIST.INF files. Place all three files back into your install directory (or a duplicate directory, if you wish to keep mods separate). Voila, your mod is ready for running! IMPORTANT: Always make a backup of the original GAMEDATA.GTC file, if you are replacing the original install directory’s file. Example Cutscene Mod This mod changes the very first dialogue with Sparky. It replaces Sparky with a doctor and animates him differently, in addition to removing much of the dialogue. The code for this modification is below. This code was placed into INTRO1.TXT. A screenshot of this mod in action:2 points -

UNGTC
pedroj234 reacted to JrMasterModelBuilder for a topic
origamiguy has created a GUI tool to make your game MOD-ready (requires .NET 4.0 framework). UNGTC UNGTC - ATD archive tool. Download Link Description: This tool will extract and rearchive LEGO Racers 2 and Drome Racers archives (the Attention To Detail or ATD LEGO video games). A while back, I started reverse engineering the LEGO Racers 2 and Drome Racers archive file formats (hence forth refered to as GTC). I figured out what almost everything was, but got stuck on the compression used in the GTC. In my extended absence from the site, and have been tinkering with the files, tagging up bytes in a hex editor, determining which bytes were litterals, which were backreferences, and which ones said what did what thorugh experimental byte injection. This would likely have never happened if not for this amazing find by Cyrem. Fast forward to September 1st, I finished writing code that would successfully decompress GAMEDATA.GTC. It didn't extract the files, and couldn't write its own COMPRESS.INF file, but the game would load and play, with some minor speed improvements. Fast forward again to today, and I have finished writing UNGTC, a tool that can both unpack the archives and create new ones! UNGTC is writtin in pure C++, and is very fast. How fast it runs depends on the IO speeds of your drive. With a RAM disk, it can be as fast as a few seconds (5400 RPM drives are much slower). Full source code is included, as are binaries for Windows and Mac. If you are running Linux, compile the source yourself, there are too many processor architectures for me to provide binaries for all of them. Usage: UNGTC is a command-line application, simple give it the folder containing GAMEDATA.GTC, FILELIST.INF, and COMPRESS.INF to extract, or the extracted folder to archive, as the first argument. On Windows, this is easily done by draggin-and-dropping the folder onto ungtc.exe. Some technical notes: UNGTC does create slightly differently than the GTC's that come with the game, but they are 100% compatible, and more efficient. UNGTC does not compress the archives it creates in any way. Since you would not save mush space on modern drives and it would be a slow waste of processor power, I do not plan on adding this ability. UNGTC automatically detects the 2 different formats and uses a meta data file called .GTC to store what version for the file forwat was extracted, for use in rearchiving. It is a plain text file. The Windows executable it 32-bit. As it uses 32-bit opperations, it would not really benefit from being 64-bit. The Mac executable is 64-bit. Compiled using MinGW g++ (Win) and Xcode g++ (Mac). Other Notes Unfortunately, I have tried everything I could think of to make it load the files from the drive instead of from the archive, monitoring the game with Process Monitor for any changes, but it seems to only work with archives. To run the game without having to keep rebuilding the archive, check out this topic. Or this tool by origamiguy (which will also extract the GAMEDATA files). Many of the files are normal files and I expect that many other files have existing tools. Good luck in deciphering the files!1 point -

The Great Kanohi Project
Prototyke reacted to Guurahk204 for a topic
That Great Matatu looks awesome! The shading on the sides makes it look like a 3D model! Good job! why am I still using exclamation punctuation!1 point -
Somewhat-minor discovery!
Fluffy Cupcake reacted to lol username for a topic
Did you actually try it? http://www.rockraidersunited.org/topic/5167-files-looking-common-but-somewhat-altered/?p=948491 point -
The Great Kanohi Project
Prototyke reacted to aidenpons for a topic
Yep, looks great. Those thingies in the top left corner, they don't appear to stick out much. If you know what I mean. I think it's because of the fact that they merge in with the white background. Try lining them.1 point -
The Great Kanohi Project
Car CrazeXVI reacted to Prototyke for a topic
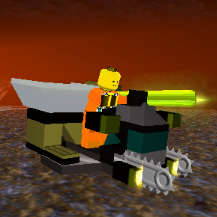
That's a pricey cough drop. I know that I missed a week or two, but I'll try to catch up sooner or later. I finished the great Matatu for this week. Shading white things is surprisingly hard, but this mask looks much better than the Akaku in my opinion. I think I got the angles in the bottom correct, but I'm still unsure about those upper "eyes" on the left.1 point -

LEGO Media Alternate Installers
Yajmo reacted to le717 for a topic
http://www.rockraidersunited.org/topic/3887-li2-bodbob-tools/?p=76170 You're right. That's very interesting. I would have thought that the game would per-cache all textures when it loads a level, but I guess not I've also figured out that the game will try and use as much content as it can from the extracted folders first, but if it can't find something, it looks in the archives. So you could conceivably just put your modified files in the folders, and leave the rest in the archives. This should make distributing mods a cinch, since a mod author would only have to distribute the files they modify, and the end user could just extract them to their game directory. Have fun, Sherlock.1 point -
LEGO Media Alternate Installers
Yajmo reacted to JrMasterModelBuilder for a topic
No, because it works on modern computers and my main goal is to rewrite the ones that give people a hard time I have heard that too, but it has never been confirmed. If it is true, then nobody has figured out where everything goes yet. The files are also contained in BOD/BOB archives. If #2 were true and somebody knew where everything went, then I would get to use legomoe's BOD/BOB tools to extract them all and write a script to arrange everything, and while that would not be impossible, that would take a while to write. Thanks for the question anyway! Does the game run with files unarchived? If so it would be easy enough to find out what is wrong.1 point -
LEGO Media Alternate Installers
Yajmo reacted to le717 for a topic
No, because it works on modern computers and my main goal is to rewrite the ones that give people a hard time I have heard that too, but it has never been confirmed. If it is true, then nobody has figured out where everything goes yet. The files are also contained in BOD/BOB archives. If #2 were true and somebody knew where everything went, then I would get to use legomoe's BOD/BOB tools to extract them all and write a script to arrange everything, and while that would not be impossible, that would take a while to write. Thanks for the question anyway!1 point -

Do You Like Windows Vista
Ayliffe reacted to TheDoctor for a topic
1 point