
Leaderboard
Popular Content
Showing content with the highest reputation on 07/19/2016 in Posts
-
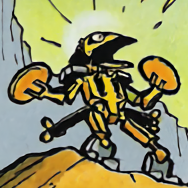
Lego Noticed Funko Pop
Ben24x7 and 9 others reacted to emily for a topic
You gave me ideas!10 points -

LEGO Island REDUX
CrashDSB and 5 others reacted to bphillips09 for a topic
Just wanted to give an update for anyone still interested in this project. v0.9.3 is almost finished and will have lots of new stuff. Here's a short list of the main additions: 3D Interiors for the InfoCenter and Observation Tower Interaction system (for elevator buttons and various interior items) Redefined settings menu (still alpha though) In-game Resolution/VSync settings In-game Rebindable controls GamePad/Controller support (for almost every possible type of controller)! I also wanted to get everyone's opinion on what the future of this game should be. Should it continue to be a recreation of the original game? Or should it become something entirely different (think like a "Garry's Mod map" kind of thing)? I'm all for recreating the original LEGO Island, but probably wouldn't devote as much time into it if not many others share the same opinion.6 points -

LEGO Island REDUX
bphillips09 and 3 others reacted to Dazzgracefulmoon for a topic
man, it's refreshing to see a project on here that isn't overly ambitious and is getting reasonable updates. keep at it, dude.4 points -

LEGO Island REDUX
TheDiplomat and 2 others reacted to Fluffy Cupcake for a topic
A recreation with a few new elements to keep it fresh is a good idea. Think: What could I not do in the original that I really wish I could?3 points -

Lego Noticed Funko Pop
The Ace Railgun and 2 others reacted to dead_name for a topic
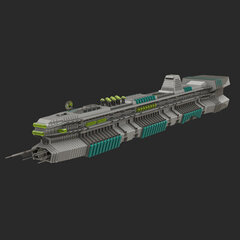
Having a go at recreating Tracer. Turns out her hair is tricky. Here's where I'm up to so far:3 points -
Lego Noticed Funko Pop
Lind Whisperer and one other reacted to Arthuriel for a topic
Welcome back Rock Raider! Collect five Brickheadz in this mission! P.S.: Wow, three pages already. I guess, that we will need a new subforum by next week . P.P.S.: Depending on the popularity* of this theme a new section in the Uploader might be helpful one day (to share the files). *the range goes from "it's just a phase" to "it will stick around forever, forever, forever, forever..."2 points -

Tutorial: Running LEGO Rock Raiders on Windows 10 with VirtualBox
Lind Whisperer and one other reacted to Cyrem for a topic
You have no idea how long I've gone without LRR because I could not get any XP VM running that worked with LRR. At last I can play LRR again you are a legend. For me, to get LRR working I had to have 2D acceleration turned off. Otherwise seems to work perfectly. Unfortunately, XP is not compatibility with .Net Framework 4.5 which is needed for Cafeteria to work it's magic. =2 points -

Tutorial: Running LEGO Rock Raiders on Windows 10 with VirtualBox
Pixus reacted to Jimbob for a topic
Tutorial: Running LEGO Rock Raiders in Windows 10 with VirtualBox This tutorial will show you one method of running LEGO Rock Raiders in Windows 10. This may work for Windows 8 too but I haven’t tested it. Also I cannot guarantee that this will work for everyone as Rock Raiders is arguably the most fickle game to install on RRU, but hopefully it will work for you. There are a lot of instructions in this so I will break them down into steps and explain as clearly as possible. Here is an overview: 1. Download a copy of Windows XP 2. Install VirtualBox 3. Set up Windows XP 4. Install and run Rock Raiders1 point -
The 2001 version loads GAMEDATA & MENUDATA folders if an emtpy, valid LEGO.JAM file is present
Zeb reacted to Iran for a topic
^^^^^^^^^^^ The 2001 version loads GAMEDATA & MENUDATA folders if an emtpy, valid LEGO.JAM file is present Make sure the LEGO.JAM file is a valid file else it gives you an error messagebox. Seems like the game first loads LEGO.JAM and then loads any missing resources from the GAMEDATA & MENUDATA folder if they aren't inside LEGO.JAM MODERATOR EDIT - Here's an empty LEGO.JAM file ready for you to download and use, courtesy of Xiron: http://www.rockraidersunited.com/files/lego-racers-1/lego-racers-empty-jam-r191/ Alternate link (same file, just on the old file hosting part of the site): http://oresome.rockraidersunited.com/download/349 Just putting this in the OP so people can find it easier.1 point -
Lego Noticed Funko Pop
Zed reacted to Fluffy Cupcake for a topic
I've played Blockland, but not enough for it to cross my mind had I not seen it talked about in chat.1 point -

LEGO Island REDUX
Lair reacted to Wognif for a topic
Yep, I think it should continue onward as a recreation of the original with additional features. *wipes dust off of the old game controller*1 point -
Lego Noticed Funko Pop
The Ace Railgun reacted to dead_name for a topic
everyone's favorite Mass Effect character1 point -
Lego Noticed Funko Pop
Fush reacted to Arthuriel for a topic
@Pranciblad: I had similar thoughts yesterday. Maybe we will need "Brickheadz Anonymous" one day XD. Can you imagine the possible impact, this will have on LEGO Ideas?: Employee A (sunk into thoughts and analysing reports and realizing something horrible): "Oh no... ...Oh no!" Employee B: "What's the matter?" A: "Look at these reports!" B (gasps): "This... ...is... ...insane!" A: "At the moment Brickheadz have only overtaken LEGO Ideas, but soon they will control everything... ...EVERYTHING!" B: (falls onto the own knees and rises a fist to the ceiling): "Damn you, LEGO! What have you/we done?!?" P.S.: Do'h!1 point -

Lego Noticed Funko Pop
aidenpons reacted to Pranciblad for a topic
It's amazing how quickly we went from "this is dumb and I'll never touch it" to "I CAN'T STOP MAKING THESE HELP"1 point -
Lego Noticed Funko Pop
aidenpons reacted to Cirevam for a topic
I see these all the time at work and I've never understood the appeal. I still don't. Suddenly, I feel extremely possessive of the grass on my property, and I want to eject anyone who dares to step on it.1 point -
Lego Noticed Funko Pop
Zed reacted to Pranciblad for a topic
Presenting: VooDooHeadz Enjoy. Or don't.1 point -
Lego Noticed Funko Pop
dead_name reacted to Pranciblad for a topic
Always nice to see RRU making the best of a bad situation.1 point -
Lego Noticed Funko Pop
noghiri reacted to emily for a topic
i'm the hero rru deserves1 point -
Pls help me play this game!
Lair reacted to Fluffy Cupcake for a topic
I feel honoured to have even been mentioned. "Don't go around Xiron" they said, "he must be demon possessed" they said, "cast him out" they said.1 point -
Tutorial: Running LEGO Rock Raiders on Windows 10 with VirtualBox
Lair reacted to Cirevam for a topic
I've been trying to get LRR running in an XP virtual machine in VirtualBox for a while now. I followed your steps and the game doesn't launch. It doesn't even try. Anything that requires 3D acceleration acts the same way. Am I missing something?1 point -
Tutorial: Running LEGO Rock Raiders on Windows 10 with VirtualBox
Pixus reacted to Jimbob for a topic
4. Install and run Rock Raiders Now for the final step. Installing Rock Raiders Insert the Rock Raiders disc or, if it’s already inserted, run it from My Computer. Now follow through the installation instructions to install it. You may get a message about a Direct3D accelerator not being found, or something similar, if so just ignore it. When it’s finished, click Yes, I want to restart my computer now. and press Finish to restart the computer. Running Rock Raiders After logging back in you will find two new Rock Raiders shortcuts on your desktop. Right-click on the LEGO Rock Raiders - Enhanced shortcut and select Properties from the menu. Under the Shortcut tab you will see a section named Target:. At the end of this box should be a line saying -best. Replace this with -ftm so that it appears as so: Click Apply, then OK, to save these settings. Now run the shortcut by double-clicking it. After the initial loading screen a Mode Selection window will appear. Choose Window from the Window Size section as Full Screen doesn’t work. Now click OK to launch the game. Congratulations, you have successfully installed and run Rock Raiders! Final notes To install mods or transfer files from your Rock Raiders game to your PC, just place the files in the shared folder and they can be accessed from both Windows XP and Windows 10 systems. The Windows XP virtual machine is only valid for 30 days as it’s a trial. However, it is possible to simply delete the machine and set it up again in VirtualBox (assuming you transfer any important files into your shared folder to save them) to restart the trial, but I’m not sure if that’s legal/in breach of their terms and conditions.1 point -
Tutorial: Running LEGO Rock Raiders on Windows 10 with VirtualBox
Lair reacted to Jimbob for a topic
3. Set up Windows XP Now it’s time to “install” Windows XP on your computer. Create a machine In VirtualBox, select New from the toolbar. In the Name: box, enter Windows XP. The Version: box should automatically change to read Windows XP (32-bit). Click Next to choose the memory size. I recommend choosing 1024MB if you have more than 1GB of RAM on your computer, otherwise go with 512MB. Click Next to select the hard disk. Select Use an existing virtual hard disk file, then click the small folder icon with a green arrow. Choose the VirtualXPVHD.vhd file in your VirtualBox folder. Finally, click Create. You should see the following interface in the VirtualBox main window: Perform the initial setup Click the green Start arrow from the toolbar to launch Windows XP. A new window will appear and Windows XP Setup will promptly launch. Wait for the system to initialise. Before doing anything, right-click the small icon of a mouse with a green arrow in the bottom-right corner. Click Mouse Integration to enable using the mouse in Windows XP, then click anywhere in the window to bring up a dialogue. Check Do not show this message again, then click Capture. To free the mouse again so that you can use it outside of Windows XP, just press the Right Control button on your keyboard. Later you can update this to be smoother, but the system must be set up first. Follow the instructions to set up Windows XP. Upon completion you will probably hit a black screen. Press Right Control to release the mouse, then click File and Close... to bring up a dialogue window. Check Power off the machine and press OK to quit Windows XP. Now click Start again to re-launch Windows XP. You may have to disable Mouse Integration again. Click through the final menus (I turned off Automatic Updates and didn’t install any of the requested hardware) to get to your desktop. Install a Guest Now to make things a little easier. Press Right Control again to free your mouse, then click on Devices from the top menu. Choose Insert Guest Additions CD image... from the dropdown. A window will appear in Windows XP. Follow through the dialogues to install Guest Additions - you can ignore the Direct 3D thingymawatt when given the option to choose it. You may have several Software Installation warning windows appear, just click Continue Anyway on each one. When finished, click Reboot Now and press OK. You’ll probably hit another black screen, so press File then Close... again, followed by Power off the machine and OK as you did before. Now that this is done you can freely use the mouse between your Windows 10 computer and the Windows XP virtual system, without having to turn on/off mouse integration. Link your disk drive Now to link your Windows XP’s disk drive to your physical one. Click Devices from the top menu bar, then highlight Optical Drives and click Host Drive ‘#:’ from the sub-menu. Depending on your hardware setup the # may appear as a D, F, or other letter. If LEGO Rock Raiders is already inserted into your disk drive, it will likely auto-run the installation setup. For now, just click Cancel then Exit Setup to quit out of it. Create a shared folder The last thing to do before installing Rock Raiders is to create a shared folder. This will act as a link between your Windows 10 files and your Windows XP files. Click Machine from the top menu, then select Settings... from the drop-down menu. Now select the Shared Folders tab. Click the small blue folder icon with a green plus sign on it, to the right of the window. An Add Share window will appear. Next to Folder Path:, select Other... and choose where you would like to create a shared folder. I’m putting mine inside my VirtualBox folder. Check Auto-mount and Make Permanent, then click OK. Now press OK again to save the settings. Now if you reboot the Windows XP system (Start > Shut Down > Restart > OK), then go to My Computer you will find a new folder under Network Drives. Files placed in here are accessible through your shared folder on Windows 10 and vice-versa. Change the screen resolution and bit depth Before installing Rock Raiders you will need to change your display settings. Right-click on the desktop and select Properties from the menu. A Display Properties window will appear. Select the Settings tab, then slide Screen resolution to your preferred level - I’m using 1152 by 864. Then, under Color quality, choose Medium (16 bit). Click Apply then Yes to confirm the changes, and finally press OK. Good job, you’ve set up Windows XP!1 point -
Tutorial: Running LEGO Rock Raiders on Windows 10 with VirtualBox
brozo reacted to Jimbob for a topic
2. Install VirtualBox If you don’t already have VirtualBox on your computer you will need to install it now. Click here to go to the downloads page for VirtualBox. I have linked to the test builds as Windows 10 isn’t quite supported on the complete releases, but rest assured that I have tested it the latest build on my computer with no problems. Download the Windows version under 5.0.x builds. Once the file is downloaded, run it and follow the instructions to install VirtualBox. Once installed, launch VirtualBox. Select File from the top menu bar, then click Preferences.... Under the General tab, click the dropdown arrow next to the Default Machine Folder and choose Other.... Then select/create a folder where you would like your Windows XP system to be run from. I have chosen a custom VirtualBox folder in my Documents folder. Finally, move the VirtualXPVHD.vhd file into the above folder to keep things organised. Great, you have installed and configured VirtualBox!1 point -
Tutorial: Running LEGO Rock Raiders on Windows 10 with VirtualBox
Ben24x7 reacted to Jimbob for a topic
1. Download a copy of Windows XP. Credit for this first part of the tutorial goes to download3K for their article here, which I have adapted below. Downloading the File The first thing you will need to do is download a copy of Windows XP. Thankfully this can be done legally with no purchase necessary (at least temporarily). Follow this link to go to Microsoft’s download page for Windows XP Mode, which was designed for Windows 7 but never adapted for Windows 8 or 10. Click Download, then select the checkbox next to the first file: WindowsXPMode_en-us.exe. Then click Next to open the Save As dialogue window. Save the file in your desired location, such as the Downloads folder. This file is just under 470MB so it may take a while. Installing 7-Zip If you don’t have the program 7-Zip already you will need to download and install it. Windows’ own extraction tool isn’t enough and 7-Zip is a useful tool to have anyway. Click here to download the software, making sure you choose the correct type depending on your system (32-bit or 64-bit). I’m going to download the 64-bit .msi file as I have a 64-bit system. If you’re unsure about which one to get, right-click on the Windows start menu icon (at the bottom-left of your screen) and select System. Save the file and run it to install 7-Zip. Extracting the File With 7-Zip installed, look for the WindowsXPMode_en-us file you downloaded earlier. Right-click on it, highlight 7-Zip from the pop-up menu, then select Extract to “WindowsXPMode_en-us\” from the sub-menu. Open the WindowsXPMode_en-us folder that appears when 7-Zip is finished, then open sources to find three files. The top one, xpm, is the file you’re looking for. Right-click on the file, highlight 7-Zip from the pop-up menu, then select Open archive from the sub-menu. A 7-Zip window will appear showing the contents of the file. Select the file named VirtualXPVHD by clicking on it, then select Extract from the toolbar above (the blue minus sign). Click OK on the window that appears to extract the file. Now you can close 7-Zip. Go back to the sources folder and you will find a new VirtualXPVHD file. Rename this to VirtualXPVHD.vhd. Copy it to another folder (I chose Downloads), then delete the original WindowsXPMode_en-us folder and WindowsXPMode_en-us.exe file to tidy up. Excellent, you have downloaded the Windows XP operating system to your computer!1 point