Leaderboard
Popular Content
Showing content with the highest reputation on 01/06/2013 in all areas
-

Racer Importer/Exporter v1.0
Rock Monster and 3 others reacted to Cyrem for a topic
Racer Importer/Exporter v1.0 I've made a tool which will export a racer and his car from your savegame, then allow you to import it back into your savegame. The point of this tool is to allow users to share their created vehicles and characters. Download: https://www.rockraidersunited.com/files/dl-r16/ Requirements: .Net Framework 44 points -

RRU Quotes 2008-2013
Phoenyx and 3 others reacted to Lair for a topic
You are not a vehicle or a computer stop acting like one.4 points -
RRU Quotes 2008-2013
Alcom Isst and 2 others reacted to lol username for a topic
Please stop this nonsense.3 points -

Tutorial: Modding Opponents
MrElephant and one other reacted to Jimbob for a topic
This is a step-by-step tutorial on editing various aspects of the AI opponents. As I learn more (which I plan to do for my overhaul mod), I will update this tutorial. Modding Opponents 1: Changing the Models You can change the model an AI opponent uses in-game, as well as the texture it references, by following these simple steps (assuming you have already extracted the game). This section builds on information discovered by CaptainGolem in this thread. 1. Navigate to GAMEDATACOMMON. 2. Find the pelvis files of the character you want to change your model to, e.g. RRPELVIS. There are three different versions of this file - .GDB, .MDB, and .TDB. 3. Copy these files somewhere else. Rename them to the character you want to replace, e.g. CRPELVIS. 4. Open the .MDB and .TDB files in a suitable code editor, such as Notepad++. 5. (Optional) Find the section referencing the original character's texture, in this example it would be rr_mat. Rename this to the MAT texture of the character you wish to replace. In this example, it would be cr_mat. 6. Save the files and copy all three files back into GAMEDATACOMMON, replacing the originals. 7. You can then modify the MAT textures you referenced to match the new model, recompile the mod and run it (see my tutorial here for help with re-texturing). Enter the relevant race, and the character will be replaced! Note: Sometimes there is more than one reference to the texture in the files. You will need to find all references to it. Also, some MAT textures are also referenced in the GDB file, in which case it must be changed there too. Modding Opponents 2: Changing the Texture Names You can use textures with their own names in your mods, rather than replacing current names. For instance, you could have Captain Redbeard use BOB_MAT.BMP for his MAT texture rather than CR_MAT.BMP. 1. Open all three pelvis files for the desired character in a suitable program, such as Notepad++. These files will be prefixed with the initials of your character (e.g. CRPELVIS) and there are three types - .TDB, .GDB and .MDB. 2. Find all references to the character's MAT texture (in this example, cr_mat). Replace them with your custom texture's file name, excluding the .BMP (so here it would be bob_mat). 3. Save and close the files. Modding Opponents 3: Changing the In-Game Names 1. Navigate to GAMEDATACOMMONENGLISH and open the DRIVERS.SRF file in the SRF Editor. 2. You will see a list of names for all the characters in the game. Simply replace the name of any racer with your desired name. 3. Save the file, and close the SRF Editor. Modding Opponents 4: Changing the Menu Names Note: This only applies to boss racers. 1. Navigate to MENUDATAENGLISH and open the MENUTEXT.SRF file in the SRF Editor. 2. Scroll down about a third of the way, and you will see the names of the boss racers. Replace these names with your desired names. 3. Save the file, and close the SRF Editor. For a downloadable example of all three sections, please see my overhaul mod.2 points -
Download Link For Game
fun and one other reacted to Cirevam for a topic
Topic locked for the moment while the moderators discuss what to do. We don't condone piracy on this forum, which includes download links to the original game. Like Phoenyx said, LEGO and DDI are okay with what we do, and some DDI employees are even members of this site. By the way, calling us names in bad English doesn't make you sound threatening and it gives us a good excuse to moderate your posts to kingdom come.2 points -

LEGO Racers HD (mod project, WIP)
Jack Bluebeard and one other reacted to Kenney for a topic
Alright, particles for sand are done. They need some work do, as do some of the other textures. Test Track is 100% complete though, minus some global things like power bricks. Download: http://www.mediafire.com/download.php?hgkb650e8311q7x2 points -
Tutorial: Skin Texturing
Rock Monster reacted to Jimbob for a topic
For my first tutorial on RRU, I'd like to make a simple guide on modding Lego Racers by creating custom textures for the models. These textures replace current textures, they don't add new textures. I've written quite a lot, you should be able to skim-read through if you don't have the patience. Preparing the Mod This is often standard procedure when modding, but if you're not aware of what to do, follow these steps. You will create a new directory for your Lego Racers game in which you can safely make a new texture mod. 1. Find the install directory of your Lego Racers game. 2. Copy the containing folder (LEGO Racers) and paste it in the same directory. Rename this new folder to something suitable, e.g. 'RacersModded' (I've purposely made it twelve characters for the next step). 3. Inside the new folder, you will find the LEGO.JAM. Download JMMB's JAM Extractor, and use it to extract this file. 4. You should now have two folders inside the main LEGO_JAM folder, 'GAMEDATA' and 'MENUDATA', ready for modding. Making the Skins The texture files for models in LEGO Racers can be found in GAMEDATACOMMON and MENUDATAPARTDB. While both use the same file, the former is for textures seen while actually racing, while the latter is for textures that you see in the menu section of the game. To mod a texture, you first need to download these template texture files, ripped from the PC game. Inside you will find a collection of files including heads, headgear, bodies, and legs. These are the templates you will use to create new textures. The textures are named using a simple system. Files containing 'CHST' refer to the torso, files containing 'DFLT' are the face, 'LEG(S)' are the leg of the model and 'HELMET', 'HAIR' and 'HAT' are obviously those pieces of headgear. In addition, files containing 'MAT' are for in-game AI opponent textures. None of these can currently be viewed, which is why you downloaded the template skins. I've given a small explanation of them below. So, you simply need to draw over the template files in any image editor to create new ones! The files must be saved as .BMP images, but can be in any resolution (so long as it is a power of 2), allowing for textures of a variety of qualities. Remember, the first four textures above will only affect the player textures - it is the MAT texture that is used for AI opponents. Adding the Skins All characters in the Lego Racers game have a two-letter name assigned to them which is used in their relevant texture files. Some characters (mainly bosses) have all four textures, while others will share the standard ones. The naming system for the racers are as follows (in circuit number order, followed by alphabetical order, the two letters to the left are the file names): You just need to change the file names of your textures to match the characters in-game, then copy the files into the GAMEDATACOMMON and MENUDATAPARTDB folders. Original Skin Textures I have ripped all of the skin textures from the game, and you can click the link below to download them (thanks Xiron for the HELMET2 texture). JJ's LR Texture Rips They are saved as BMP images with the exact same names of the game textures for your modding convenience I've kept the original screenshots I took below in case it's easier for people. Bodies Here are all the bodies found in the game. Faces Here are all the faces found in the game. Headgear Here is all the headgear found in the game. Legs This section isn't complete yet, as the method I used to work out the files doesn't quite work with legs. How the Textures Work To help even further, I have begun to determine how the game maps the textures onto the models. So far I have worked out the helmet, body and legs - feel free to use these textures as reference when creating your own textures. Helmet The yellow section is the main area. The white square at the lower-left is used for the rest of the helmet, and the line of colours above this is the visor. Chest The black areas are not used, and you can use the screenshots below to determine the rest. It is worth noting that in menu selection, the game uses the right hand to texture the left hand too, while in-game both hands use separate textures. In addition, the template textures have shading, suggesting that the textures may have been designed to be more advanced before the final release. Legs Again, the black areas are not used. The leg texture has (annoyingly) only three areas to colour. The yellow area is the main portion of the leg (thigh and that-lower-part-no-one-knows-the-name-of), and the green area is used for the belt section. The red area is used for the foot, sides and back, which unfortunately restricts texturing items such as shoes. Screenshots Recompiling The final step in texture modding is to recompile the mod. Once all the modified textures are copied into the folders, you can either recompile the main folder into a JAM file using the Jam Extractor, or run the game without the Jam Archives. Then, voila! You have successfully created a texture mod!1 point -
High-Res Rocket Racer Reskin (256x256)
I Am Not Here reacted to AcePilot90 for a topic
Updated (Reskinned helmet, and some touches on the hair):1 point -

RRU Quotes 2008-2013
STUDZ reacted to Zephyria for a topic
Alien Sideboobs.1 point -
High-Res Rocket Racer Reskin (256x256)
I Am Not Here reacted to AcePilot90 for a topic
1 point -
Download Link For Game
Mr. Skeltal reacted to lol username for a topic
But yeah, what Phoenyx said. We don't distribute stuff like that here.1 point -
Download Link For Game
jg325 reacted to Phoenyx for a topic
We already have consent from both The LEGO Group and DDI to be able to mod LEGO Rock Raiders and even if we didn't we would be able to use fair use as a defense should it become a problem. However, distribution of the stock game is not something we have permission to do. If you really, REALLY want to pirate it, look it up on Google and don't come to us with any installation or DRM related problems. RRU does not condone or support piracy (though some individual members might, you know who you are). I will, however, provide a link for you to buy the game from a previous owner or an online store. http://www.amazon.com/LEGO-Rock-Raiders-Pc/dp/B00002EPYR1 point -
Download Link For Game
evilravenking reacted to Car CrazeXVI for a topic
If you're going to pirate this game, please leave. now.1 point -
LEGO Racers HD (mod project, WIP)
Redacted reacted to Kenney for a topic
Thanks to Cyrem's ongoing efforts I've been able to create the particles, having some trouble with the sand one. Once the sand particle is complete I will offer all textures of the test track up for download.1 point -
El Scorcho's LEGO Racers HD Reskins (Updated: HD Nova Hunter!)
AcePilot90 reacted to Cyrem for a topic
Good work. Looking forward to using the Rocket Racer texture.1 point -
High-Res Rocket Racer Reskin (256x256)
AcePilot90 reacted to Cyrem for a topic
Very nice. Now, post in here: http://www.rockraidersunited.org/forum/279-custom-textures/ :P1 point -

LR Debug Keys?
Mr. Skeltal reacted to dead_name for a topic
I know I'm being slightly hypocritical here, but can we lock the thread now, instead of posting replies that add nothing to the (already solved) discussion?1 point -
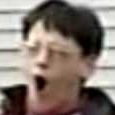
Uh, Laura? You okay?...
Lair reacted to Zephyria for a topic
Another Dat Ass face. Again.1 point -
Uh, Laura? You okay?...
Lair reacted to Cirevam for a topic
Probably that it would be funny. Is funny to me.1 point -
LR Debug Keys?
Mr. Skeltal reacted to Cyrem for a topic
There are none.1 point