Leaderboard
Popular Content
Showing content with the highest reputation on 06/11/2013 in all areas
-

The Great Kanohi Project
Car CrazeXVI and 2 others reacted to Lair for a topic
This topic is absolutely beautiful.3 points -

The Great Kanohi Project
The Ace Railgun and 2 others reacted to Prototyke for a topic
For some reason this mask took me an unusually long time to finish. I could not get it just right. But after about four or five hours of tedious redrawing I finished the Miru, the mask of Levitation. I have now completed 4 of the 6 original Toa masks Unfortunately, I still couldn't get the palette just right, so I'll keep working with it. When I finally get it, I will post the finished Miru. Feel free to give you opinion on how the color should be improved and any errors with the mask in general.3 points -

Papa defeats Studs Linkin'
Wognif and one other reacted to Fifi La Fume for a topic
This is why we don't let Studs leave the racetrack...2 points -

LI2 environmental art and buildings
Fifi La Fume and one other reacted to lol username for a topic
You sure it was even intended to go in-game? It's completely out of scale with everything else in the game, and it doesn't appear to be optimized like any of the other in-game models - it's got tons of round, exposed studs and such. Looks more like a personal test model or something along those lines to me, not like something that they'd actually consider including. I'm not saying that's what it is for sure... But I certainly wouldn't call it an obviously unused vehicle or anything like that.2 points -

Additional Brick Colors Mod
dy_enforcer reacted to Oboe Shoes for a topic
As you may already know, It's possible to edit the .LEB files in the PIECEDB folder to change what bricks are available in what color in any given category. (Or, by editing a small bit of binary, add additional bricks.) So for those of you who don't wish to mess with these files yourself, or if you just want a nice base for editing with some of the more common ones already there, I've compiled this little mod which will add the following bricks to your game without overriding anything: 11 new basic bricks in beige to the Johnny Thunder menu 14 new green bricks to the Veronica Voltage menu (The 12 basic brick types, plus the flag and spoiler) 1 new green brick to the Castle menu (the Castle theme flag) As for why I didn't split the green bricks up between the Standard and Racing menus, there's an unfortunate hard limit of 30 bricks per menu, forcing me to add to menus with smaller amounts of bricks. Download This is fairly basic for now, but I plan on adding additional pieces that could benefit from additional colors that I can find space for, and it's a good place to start if you want to edit these menus yourself. Remember, you can always edit these files to get any brick you want in any color temporarily, and then switch it back when you're done. I'll also look into any possibilities of getting around the limit of 30 bricks per menu, but for now, enjoy.1 point -
Map Creator (0.9.11)
ShadowDraikana reacted to Cyrem for a topic
Map Creator (0.9.11) Map Creator is a tool to build new LEGO Rock Raiders levels. Things to know: Import/Export single map files by clicking the "Options" button in the correct map mode. Press [shift] while placing to speed place. That this is a BETA and you should report all bugs and errors. The Arrows on the bottom right hand corner change the mode. In the Monster Editor Right Click + [shift] will clear that tile. Import original game maps with the specific Original Map Importer. Paths and Rubble cannot be hidden. Screenshot: http://i.minus.com/izwI0JwMKmVBQ.jpg v0.9.11 Added Crystal to Object Mode Set Quantity of Rock Raiders or Crystals on one tile. (Position is randomized on that tile when exported) Download1 point -

LEGO1.DLL Documentation
Yajmo reacted to Wognif for a topic
I did some experimenting with LEGO1.DLL recently, and here's the results. Only the swaps that did work are listed. Objects that can be used as hats: Buildings, which can be hats, (and plants!) : Head textures: Chest textures: Body colors: Hats: Some interesting things I found while viewing LEGO1.DLL in a program called DLL Export Viewer (not listing all of them, because some I'm uncertain about what they are) : class LegoEntity * __cdecl PickEntity(long,long) 0x1003ddc0 0x0003ddc0 84 (0x54) class LegoSoundManager * __cdecl SoundManager(void) 0x10015710 0x00015710 112 (0x70) class LegoVideoManager * __cdecl VideoManager(void) 0x10015720 0x00015720 123 (0x7b) class MxBackgroundAudioManager * __cdecl BackgroundAudioManager(void) 0x10015730 0x00015730 34 (0x22) class MxDSObject * __cdecl CreateStreamObject(class MxDSFile *,short) 0x100c0280 0x000c0280 40 (0x28) class MxEventManager * __cdecl EventManager(void) 0x100acf40 0x000acf40 50 (0x32) class MxMusicManager * __cdecl MusicManager(void) 0x100acf30 0x000acf30 77 (0x4d) class MxNotificationManager * __cdecl NotificationManager(void) 0x100aceb0 0x000aceb0 78 (0x4e) class MxTransitionManager * __cdecl TransitionManager(void) 0x10015900 0x00015900 120 (0x78) public: __thiscall LegoWorld::LegoWorld(void) 0x1001ca40 0x0001ca40 3 (0x3) public: __thiscall MxDSAction::MxDSAction(void) 0x100ad810 0x000ad810 8 (0x8) public: __thiscall MxDSFile::MxDSFile(char const *,unsigned long) 0x100cc4b0 0x000cc4b0 9 (0x9) public: static void __cdecl LegoAnimationManager::configureLegoAnimationManager(int) 0x1005eb50 0x0005eb50 124 (0x7c) public: static void __cdecl LegoBuildingManager::configureLegoBuildingManager(int) 0x1002f8b0 0x0002f8b0 125 (0x7d) public: static void __cdecl LegoModelPresenter::configureLegoModelPresenter(int) 0x1007f660 0x0007f660 126 (0x7e) public: static void __cdecl MxOmni::DestroyInstance(void) 0x100b0690 0x000b0690 41 (0x29) public: virtual __thiscall MxDSAction::~MxDSAction(void) 0x100ada80 0x000ada80 25 (0x19) public: virtual __thiscall MxDSFile::~MxDSFile(void) 0x100bfed0 0x000bfed0 public: void __thiscall MxDSObject::SetObjectName(char const *) 0x100bf8e0 public: void __thiscall MxTransitionManager::SetWaitIndicator(class MxVideoPresenter *) 0x1004c470 0x0004c470 111 (0x6f) Some of it seems obvious, such as the Sound and Video Managers. The MXTrasitionManager seems to be what controls the transitions that occur when entering/exiting a vehicle or building. I'm not quite sure about the MXDS file(s) it mentions.1 point -
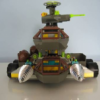
Random low poly astronaut Bill Ding
Wognif reacted to Car CrazeXVI for a gallery image
From the album: Glitch City
Well, I guess that's what he is.1 point -
Infoma~1.png
Wognif reacted to Car CrazeXVI for a gallery image
From the album: Glitch City
I broke it.1 point -
Again with the camera?
Wognif reacted to Car CrazeXVI for a gallery image
From the album: Glitch City
Again with the camera? Again with the camera? Again with the camera? Again with the camera? Again with the camera? Again with the camera? Again with the camera? Again with the camera? Again with the camera? Again with the camera? Again with the camera? Again with the camera? Again with the camera? Again with the camera? Again with the camera? Again with the camera? Again with the camera? Again with the camera? Again with the camera? Again with the camera? Again with the camera? Again with the camera? Again with the camera? Again with the camera? Again with the camera? Again with the camera? Again with the camera? Again with the camera? Again with the camera? Again with the camera? Again with the camera? Again with the camera? Again with the camera? Again with the camera? Again with the camera? Again with the camera? Again with the camera? Again with the camera? Again with the camera? Again with the camera?Again with the camera? Again with the camera? Again with the camera? Again with the camera? Again with the camera? Again with the camera? Again with the camera? Again with the camera? Again with the camera? Again with the camera? Again with the camera? Again with the camera? Again with the camera? Again with the camera? Again with the camera? Again with the camera? Again with the camera? Again with the camera?© Again with the camera?
1 point -
New Skyboxes
Rock Monster reacted to Creator for a topic
I'm not sure if this belongs here, since Skyboxes are gradients, rather than textures, but they change in-game visuals, so it's sort of fitting, I suppose. Anyway, I created some personal in-game backgrounds (skyboxes), based on the backgrounds from box deisgns and catalogues. Since LR1 skyboxes are defined by a mere three colours, the possibilities are sort of limited, but I chose to share this anyway... NEW DOWNLOAD-LINK: https://ore.rockraidersunited.org/legacy/Skybox_291626.zip SCREENSHOTS:1 point -
Matt's General Gameplay Tips + Techniques
coffins reacted to Matt for a topic
Matt's General Gameplay Tips + Techniques Foreword These tips are designed to make your Rock Raidering as efficient and effective as possible. However, these are just my experiences on what works best. If you personally think that what you do is better, by all means think that, and if you wish, you can post your tips. I may also have left some things out, so please do post if you have anything else to add to this guide. This guide should also be helpful when approaching levels not done before. While I guess most people have done all the levels on the original game, we are starting to see new levels coming from the overhaul mods, and so most of these techniques I used whilst playing through Baz's Mod. (In fact, some tips may relate more to his mod than the original game, as that's what I've been playing most recently.) Gameplay Interface Tips Changing the Game Speed This is one of the most useful things. I personally didn't know about it for ages, only stumbling upon it relatively recently. To change the game speed, just click on the question mark, next to the 'action stations' Then you can click on the + and - buttons to speed up/slow down the speed the game plays at. You should probably also turn automatic game speed off as well. If it's left on, it means that every time something happens, such as a monster emerging, or just a rock raider getting injured I think, then the game speed will return back to the default speed. I find this annoying, so personally I always turn it off. To do this: Press Esc, to bring up the 'paused' menu. Then click on 'Advanced Options', to go into the advanced menu. You can then click to turn automatic game speed off. Being able to change the game speed when you want makes your raidering a lot more efficient. I usually speed the game up more than the default 4 bars, (usually to 6-8), and increase to the max when I'm waiting for my raiders to do something and I don't have other instructions to give at that time (e.g collect resources far away, or even just whilst building a building). If I'm exploring a new cavern, or trying to pay attention to something, then usually I slow the game speed down a bit. Once you get used to changing the speed to suit your actions, you should find it a very valuable asset. Using the Individual Raider Display By pressing space bar, you will bring up the health bar, current action and hunger for each of your raiders. This is fairly useful: Using the health bar: If you see that the health bar is too low, you should teleport up the Rock Raider. This is useful if you have 'skilled raiders' that have been trained and can carry several tools. If you teleport him up before he loses all his health, then he won't 'die', and you can just teleport him back down again. He will have full health back again, and then you won't run this risk of him 'dying', which if he does, you won't be able to teleport him back again. Using the hunger meter: If all of the four quarters of sandwich around the raider disappear, he is hungry, and will then run off to the support station to feed. By seeing how much hunger each raider has, if he is about 1 quarter left, you can choose to manually feed him by clicking on the sandwich at the top of the menu when you click on a raider. This will save time in him running back. Also, if you do see raiders running back hungry, or even if they're halfway through eating at the support station, you should manually feed them. By manually feeding them, they are full in just one sandwich, whereas when they eat at the support station, it will usually take them five to become full. Using the current action: Not that much added use by seeing it, but I guess it's always nice to see what your raider's intentions are. (Although usually it's just an arrow until they get to the square that the action they want to do is on.) Using the Radar The radar is a very useful tool. I find it's easier to navigate around the cavern by clicking on the radar, instead of using the mouse at the edge of the screen. To navigate using the radar, you need to click and drag on the radar to move your screen to that point. You can just navigate through the cavern radar by clicking on parts of it, and the screen won't move to that spot. This is useful when you're trying to find things like monsters (all creatures appear as red dots on the radar). Also, the radar becomes a lot more useful once you have geologists. This allows you to see rock further behind the face rock. This is useful if you're trying to find hidden caverns, or just to see if drillable rock extends out that way. It can take awhile to get used to if you don't usually use the radar, but once you get in the habit of using it, it should become a useful asset. To bring out the radar, just click on the icon of the two bracket things, on the left side of the screen. It's best if you zoom out as much as possible, as this enables you to navigate the quickest. Priorities These are very useful to organise. Each mission has them organised in a certain order, which I usually don't like that much, so if you organise it the way you want at the start of the mission, it should help. You can open the priorities menu by clicking on the '123' button next to the action stations and options menu at the top of the screen. Building, reinforcing and drilling should all be at the top of your list. Recharging crystals is good to have at the top if you will be doing some in the mission, but if you won't, don't bother about it. Clearing rubble should come before collecting ore/energy crystals. It's good if the raiders clear the rubble before collecting the materials, as it means there are extra materials lying around for your small transport trucks to collect. Which way round you prioritize ore/energy crystals is dependent on the situation. Generally at the start of a mission, I'm wanting ore for all my buildings, and so energy crystals aren't much use to me then. However, once you need some energy crystals for the buildings, and then the objective, I put it in front of ore. You may need more ore again when you're wanting to upgrade vehicles, but usually you have heaps by then. The 'use vehicle' and 'repair building' priorities don't really matter, because as I manually get my driver's into their vehicles (explained later), and I hardly ever need to repair a building. If one does need repairing, then the raiders seem to do it automatically, even if it's at the bottom of my priorities. What to do on the First Gameplay of a Mission Tree This is what I think you should do on the first mission you do of a level tree. (I say this as you may be starting an overhaul mod.) This is best done on a mission where you don't have to worry about a diminishing air supply. Teleport down the max amount of raiders (should be nine in a mission without an air rate.) Upgrade them all to the max level at the tool store. This may seem to take awhile, but if you put the game speed up to max, it shouldn't do. It's probably best to name them at this stage, just so you can tell he's an upgraded raider in future missions. They don't have to be clever names. I personally just call them names like Bob1-Bob9 Now build up a base. This could be difficult in a mission like Driller Night, so if that's what you're doing, I'd wait until a more decent mission when you can build all up a decent base. You need to build a Teleport pad, Support Station, Geological Centre, Upgrade Station, Tool Store UP2, and a Dock. The dock can be hard to do in a mission without water, so this can wait until you do a mission with water. Go train those raiders! You want to end up with nine raiders that have been trained at every station. Once these are done, you should take advantage of the buildings, and teleport down 10 more raiders to go through the same process. 19 maxed raiders should be enough to get you through the entire tree. Some people may not bother with this process, and just train when needed, but personally, I like to have everyone ready, so I'm not fluffing about with training a driver or whatever to drive the chrome crusher, and I can just do it instantaneously. Mission Gameplay Tips/Techniques/Strategy This is just a general strategy that I use when I'm doing a standard, 'build up your base and collect' mission. Especially so when I was working through the levels of Baz's mod. The amount of raiders you should use to start with (in an air mission) is debatable. I personally use 5/6, and have no problem getting a support station before the air runs out. I guess you'll find the optimum number for you. First just drill the walls closest to your base. Just focus on building the Teleport Pad, Power Station and Support Station. You don't need to spend time drilling more walls than you need to, as you can get the ore needed for those three buildings in just nine walls. (Not counting power paths though.) However, if there's a lack of energy crystals, then you may need to drill some more. I suggest getting a small digger if there's still lots of drillable walls around, but it's best to then spend your energy crystals on small transport trucks. Remember that vehicles can be teleported back up again for their same crystal value. In terms of what else to build, I build the upgrade station, super teleport, and then usually another support station. The extra support station allows for you to take advantage of those 19 maxed raiders that you have. The upgrade station is good for using up all the extra ore you accumulate, and the upgrades to the vehicles are useful. The super teleport, well, everyone wants a chrome crusher don't they? Planning out where to place your buildings before you build them is good practice. Placing them side by side facing each other is often what I do. You can see me doing this partially here (apart from the teleport pad ), in this screenie of the Tunnel Transporter glitch: As you move later into the mission, you should build power paths. Power paths only cost 2 ore each, and it gives you something to do with all that ore that you accumulate. If you build a huge power path from your base to an area of lots of resources, it can help those poor little raiders that haven't managed to get themselves a small transport truck by this stage. In terms of the vehicles that you will end up using, one or two chrome crushers can do most of the work, and then you just need several small transport trucks doing the collecting. The Loader Dozer is sort of useful, but I've found that a raider on his own can clear rubble almost as quickly, and can do other things as well. So personally, I don't use the Loader Dozer, but you still might like doing so. Defence Tips/Techniques Dealing with Monsters The best beam against Ice and Rock monsters is the laser beam, and the best beam again Lava monsters is the freezer beam. You should get in the habit of placing an electric fence around your base. Allow for base development, and place the fence in every two squares, so there is a little light crystal thing in the middle square. Having an electric fence is useful, as if a monster emerges close to your base, you could probably leave action stations off and leave the monster to walk towards your base and get fried. This means you don't have to disturb your raiders from what they're doing. However, this only works if there aren't any energy crystals around where the monster emerged. You can kill monsters with the laser beam on the chrome crusher. While it can be hard to aim, if you get the hang of how it works, this can be a useful method of getting rid of monsters without turning on actions stations. (However this works better in Baz's mod as I don't think the original Chrome Crusher laser is as powerful.) Dealing with Slugs An important thing to remember with slugs is that they only seem to come out once you collect more than 10 energy crystals. So one way of completing slug missions, is to get the required amount of crystals out of the rocks and close to your base, and then collect them all at once. The slugs will be too late to stop you. Another strategy is to turn your power off until they go away. In my experience this doesn't work as well, as when they go back to their holes, they will just come back once you turn the power on. This to me gets annoying, and so generally I don't use this method. Other people may find this more successful for them though. A third strategy that I utilized is more useful in slug missions where the crystal target is very high (mainly Baz's mod here.) I've noticed that slugs will only move towards your base from their holes if their hole is within a certain distance of your base. So if you move your base far away from any holes, the slugs will emerge once you're past 10 energy crystals, but they won't move towards your base. This does require you to find a suitable spot though, as Slimey slug holes do tend to be in most cavern rooms. A fourth strategy is to build the support station against a wall and build everything else around it so there is no path for the slugs. Then turn off everything but the support station. (Make one of the buildings surrounding it the tool store so the raiders can go through, but not the slugs.) - Thanks to INB681 and Lord Zakida. A variation of the above strategy is to build buildings like Teleport Pads or Mining Lasers around the Slimey Slug Hole, so that they can't get out and move towards your base. Make sure the power is turned off in them. - Thanks to Grank. You can use the Laser and Pusher beams to do damage/move the slugs around. (By turning on Action Stations.) You shouldn't need to use this if you're using one of the above strategies, but this could be useful if you're not using one of the above strategies and you are becoming overrun. - Thanks to Grank. General Tips for Raidering Miscellaneous tips that can improve the efficiency of your Raidering: What tools to carry For each raider, I recommend you carry a drill (default), shovel and hammer as well as a laser/freezer beam if doing a monster mission, and a sonic blaster if doing a slug mission. The hammer isn't a necessity, but it allows you to reinforce walls easier (instead of waiting for someone to go back to the tool store and get one.) Reinforcing walls is useful for the obvious stopping landslides, but it can also be used to stop monsters emerging. If that wall keeps spawning monsters, it is useful to reinforce it, so they don't keep disturbing you. You don't really need a sonic blaster if you're employing one of the strategies mentioned above. However, it can be useful if a slug gets to your base and starts draining (and you don't want to turn the power off.) When getting a raider to enter a vehicle I've found it's easier to click on a raider that's close to the vehicle, and manually tell him to enter the vehicle. This seems to be more responsive than if you just click on the vehicle and click 'get driver'. If I do this, it usually takes ages for the driver to enter the vehicle you want, as the game seems to choose the furthest away raider to get in. If you're using the maxed raiders technique, then whatever Raider is nearby should be a driver, and you can start using the vehicle straight away. Generating Free Ore If you have an ore refinery upgraded to the max, and enough ore to build another building, you can essentially generate free ore. Take a support station, which usually takes 15 pieces of ore to create, and build it using studs (takes 3) - essentially building it for 6 ore instead of 15. But if you teleport the building out once it's been built, it gives it back as 15 pieces of ore (rather than the six you actually spent on it), and your team turns it into even more studs. - Thanks to Itchytasty and Grank. When Electric Fence Lights are in the Way If you have an electric fence one square away from a building and you try to make another building in-between, it won't come down as the little yellow decoy light prevents that from happening. However, you can teleport up the fence, build the building, and then bring the fence back down. - Thanks to LMS Engineer Deter Raiders from Crossing Lava Something that I found helpful on levels with lava pools placed so that the Rock Raiders tend to take a shortcut across lava: build a Teleport Pad (or really any building, but teleport pads are of course the cheapest and fastest to build) next to the corner. It tends to stop *most* shortcuts through that particular corner, but has the disadvantage of making the rare few idiot Rock Raiders that still decide to take a shortcut take more damage because they have to stay in the lava a little longer to get around the Teleport Pad. - Thanks to Glaedr Guide History: March 2012: Guide reposted as part of forum changes 2011: Images reposted Early 2010: Second edit, tips added from other members of the community Late 2009: Guide first posted1 point -
The Great Kanohi Project
le717 reacted to Prototyke for a topic
I have decided to kill myself. Rather, I have decided to draw EVERY Kanohi mask. All of them. I have the names and powers for 106 109 masks (plus heads) right now. If there is something wrong, or I have forgotten something, let me know. We have enough insane people around here someone is bound to actually read through that. I plan to make at least one Kanohi a week until I have them all and then do something with them. Perhaps I'll make a poster. But it's the dedication and practice that I actually need, so I can show all of you guys my art, and in return you can all yell at me if I'm not making the masks. Every Monday (excepting times where I am unable to access a computer on a Monday) I will post the Kanohi I made the week before. If anyone wants to, they can critique it, or I will just use this as a more enjoyable reminder for myself to practice. As it is not yet a Monday, I won't post any new Kanohi, but here are the Kraahkan I made previously. Is it Kraahkan or Kraahkans for the plural? Completed Masks are displayed in the spoiler below. Edits- Added Avohkii / Kraahkan Combo mask to the list. Added Mask of Elemental power (from Bionicle: The Game) to the list. Added Kraahkan Face to the list. Do not use any of my art without permission and crediting me. Thank you.1 point -
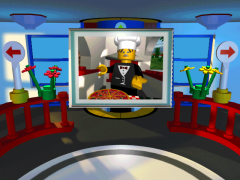
Extracting the videos
Lair reacted to Brickulator for a topic
It's easy enough to fraps the videos in-game but it'd be nice to get our hands on the original files, wouldn't it? I think it would. And afaik it hasn't been done yet. So I've had a look into the video files and made a little more progress than I have before. Using Riffpad I looked through INTRO.SI, which refers to the following videos and their corresponding wavs: legomed.smk mindscap.smk intro.smk outro.smk badend.smk goodend.smk I think the file names are pretty self-explanatory, apart from outro. I'm not sure what that one is, as goodend and badend are presumably the two Polkacide endings, and the credits video is contained in CREDITS.SI. For anyone who's not familiar with smk (Smacker) files, they are compressed videos designed to be used in games, similar to bik (Bink) files created by the same company. The are usually very easy to play and convert, but I'll get to that in a minute. After a bit of googling on the extraction of files from riffs, I found a little program called mediaextract (https://github.com/panzi/mediaextract). I wasn't expecting it to work at all, but to my surprise, when I asked it to spit out all the smk files contained in INTRO.SI, it instantly gave me 6 of them. As you can see above, there are 6 smk files in the SI file. The command I used was this, if you want to try it: mediaextract -f smk INTRO.SI You'll need mediaextract and the SI file to be in the same folder, I just copied it across. You can specify an output folder if you want, if you go to the link I posted above there's a list of all the options you can use. Now, I had already tried a couple of other commands with this and had ended up with hundreds of tiny mpg variations that seemed to be empty, so I wasn't too hopeful about these .smks to start with. But then I noticed that they had much larger filesizes and so must actually contain something. The original filenames did not survive the extraction though, and they were named as follows: INTRO.SI_01dc0be8.smk INTRO.SI_002a1846.smk INTRO.SI_023c2956.smk INTRO.SI_00000280.smk INTRO.SI_00381a50.smk INTRO.SI_01772eac.smk I can't find those codes in the SI file so I assume they were just generated by the extractor. I tried to play the files with the RAD program but didn't have any luck. I also tried to convert them into avis but either ended up with blank videos or errors. I did have a look into the files a bit more though, and I found their durations: INTRO.SI_01dc0be8.smk - 24 seconds INTRO.SI_002a1846.smk - 11 seconds INTRO.SI_023c2956.smk - 1 minute 44 seconds INTRO.SI_00000280.smk - 14 seconds INTRO.SI_00381a50.smk - 1 minute 22 seconds INTRO.SI_01772eac.smk - 30 seconds This suggests that: INTRO.SI_01dc0be8.smk = badend.smk INTRO.SI_002a1846.smk = mindscap.smk INTRO.SI_023c2956.smk = goodend.smk INTRO.SI_00000280.smk = legomed.smk INTRO.SI_00381a50.smk = intro.smk Which leaves INTRO.SI_01772eac.smk as outro.smk. It's only 30 seconds long so it can't be the credits, but just to check I had a look at CREDITS.SI and extracted CREDITS.SI_00002306.smk, which is 3 minutes 33 seconds and corresponds to credits.smk. Interestingly, it appears that only the text from the credits is in this video, and the pictures are separate bmps contained in CREDITS.SI. That's as far as I've gotten so far. I think the next step is to locate the other video files - the character profile videos etc - and see if any of those work with RAD. And to see if there are any other extra files that don't match up. I might also try hex editing INTRO.SI to see if I can swap outro.smk with legomed.smk or something to see what it is. UPDATE The character videos are in INFOMAIN.SI. I also found the underwater video from the lift but I've lost it now Also, it's not the most interesting video but I extracted the "You need to put the CD in your computer!" video as well. Still no luck playing anything though. UPDATE 2 It looks like the mysterious outro.smk is an unused video showing the power brick flying off the top of the information centre.1 point -
Legos in Space: The Movie: The Fanfic
Ben24x7 reacted to lol username for a topic
hi guys i mad a fanfic based on my movie i own YES ITS A FAN FIC EVEN THO I ROTE IT AND THE MOVIE TWO FIRST THE MOVE REA WATCH THIS FIRST OR U WONT UNDERSTAND FANFIC IT EXPLANS ALL ORIGINAL CHARACTURS! https://www.youtube.com/watch?v=1fTQTBWhOFQ watch it CHAOTER ONE it was a warm day in legolandville. but not THAT warm day LOL. stevnesnon wolk up in his bed (not the floor ). the phone rang: STEVNSON WE NEED UR HELP AN ASTROD HIT EARTH IN TEN MINUTS. so stevnson jumped out o bed BUT THEN stevneons litle brother wlked up . HI STEV CAN U READ THE STORY I ROTE FOR U. now stevenssons litel broteh ALWAYS rote BAD BAD BD stores. but stevensen deceded to reed it anyways. and her is what it sed; FRKIN PRODUCT PLACMENT BRO I TOLD YOU NOT 2 DO TATH NO MORE THIS IS COMPLET RUBISH strevnson yelled . then he reaised that if he didnt hurry the everybody woud dye from th astrod. so he hurried and jumpde in2 his car and vrooooooomed of. CHApTER TOO STEVNSON THNK GOODNS YOUR HEAR yelld the guy at the spess port. but wait i forgot r u old enoug to fly shutle ? YES sad stevnsoon, im 13 now. so they went into spess. I SE THE ASTRIOD yelld robo I DO TO yelld the other guy. WE MUST CHAS IT so they did. but it hid . IN AN ASTOID FELD! so stenson flew RITE IN!!! but robo had a sad and sed 'sir the posibilitty of navigtaing an adstroid field is aprox. 1,000000000,00,,00 to 1. NER TEL ME THE ODS U STUPID ROBOT but sir well DYE oh crud man so they turned aroud and went 2 earth agin CHApTER Thre they all dieded. FIN...for now!!! sowhat do u think guys?? i spent ALL DAY sory i wont improve it its perfct alredy JAMSSTRU OUT1 point -
Rocket what you doing here
Aokpisz reacted to Lair for a topic
No, I'm pretty sure you're Ben24x7.1 point -
Invisible Flower Car?
Wognif reacted to Lair for a topic
Being short isn't supposed to blow up everyone around you.1 point -
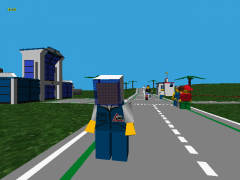
LI2 environmental art and buildings
STUDZ reacted to lol username for a topic
Found this while poking around today. Full gallery, lots of cool stuff: http://www.behance.net/gallery/Lego-Island-2/1468073 http://behance.vo.llnwd.net/profiles24/454201/projects/1468073/597ff1a0acdbba1dbc886a3eed2b00f9.jpg http://behance.vo.llnwd.net/profiles24/454201/projects/1468073/ef12ddd86d3f7b220b390d1dc5082e85.jpg http://behance.vo.llnwd.net/profiles24/454201/projects/1468073/f905db2d6cbe7f1e49e365ffc940be6e.jpg http://behance.vo.llnwd.net/profiles24/454201/projects/1468073/c1cc3aa3196da7ff0909e5e481e0ee97.jpg ... The heck is that last thing? Edit: http://www.behance.net/gallery/Sketchbook-3D/1436487 http://behance.vo.llnwd.net/profiles24/454201/projects/1436487/37bf2b7a47de352feade437ad846441a.jpg Edit 2: http://www.artwanted.com/imageview.cfm?id=39865 http://images.artwanted.com/large/58/5659_32558.jpg Some early box art with Pepper sort of half way between his LI1 and LI2 appearance... How does his hand connect with his arm there? ... why is Mr Bimble from LEGOLAND in the place of Nick? Edit many years later - Jeremy said on the RRU Discord that he was in touch with the artist in the first link, who said this about the unused vehicle:1 point -
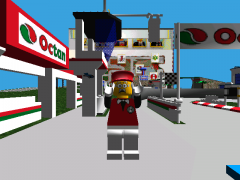
I don't trust this pizza...
Lair reacted to Fifi La Fume for a topic
That's what we're all afraid of. Well don't put your dog by the pizza. Don't put the pizza by my dog!1 point -
Star Wars Imperial Pilot Head Skin
Fifi La Fume reacted to Lair for a topic
Thanks I will try to not let you down. Oops.1 point -
Star Wars: Chancellor Palpatine (Clone Wars) Minifigure (+ different faces)
STUDZ reacted to Lair for a topic
I like the one where his face is upside down1 point -
LegoRR.exe has stopped working after I edited TextureUsage #
Car CrazeXVI reacted to Lair for a topic
Fixed. On everything that isn't the CFG, AEs, OLs, and PTLs. Otherwise, notepad is fine.1 point -
LegoRR.exe has stopped working after I edited TextureUsage #
Wognif reacted to Car CrazeXVI for a topic
You edited LegoRR1.wad in Notepad? Well, there's your problem. You tried to use a Text Editor when you should have used a Hex Editor. "Recompile"? Sounds like we're talking about wad extractor/compilers. You should use those. Makes life easier. Although, you don't have to recompile them. As for run... run program? You know, run LegoRR.exe? It's not a line in the cfg. As for TextureUsage, I remember Addictgamer saying duplicates of 8 work best.1 point -
LegoRR.exe has stopped working after I edited TextureUsage #
CharlieGunz reacted to Cyrem for a topic
Ok, I think you've missed a few things. Before editing Texture Usage, did you first extract LegoRR1.wad using the WAD Tool ? Secondly, don't use Notepad to edit these files. Use something like PSPad to edit them. TextureUsage will be in the Lego.cfg file (this file is extracted by the tool above) After you have saved the Lego.cfg file, you can rebuild it using the WAD Tool. However there is a different method of modding called the DATA method which means you don't have to rebuild the WAD. Read This Topic if you haven't yet also. (It has a video link to the DATA method)1 point -

Sort of Rock Raiders Remake
Car CrazeXVI reacted to Bartemis for a topic
Fixed a lot of bugs and made a simple menu: [Download]1 point -

CHI Eris, LEGO does an accidental rule 63?
Wognif reacted to The Ace Railgun for a topic
The more I look at it, the less LEGO I see. Must be all the fat from non Lego stuff, I mean since Chima means slow in Japanese it must be fat right? Hey I know! Maybe it ate all of the Bionicle characters,then threatened to eat the Lego corp guys if they didn't make it's army! It's so clear now...it's an in invasion...of the Chima! That is one 'big' bird...1 point -
The Great Kanohi Project
Lair reacted to Prototyke for a topic
Wow... Thank you Alcom for your advice and compliments; I can't believe I was that much off... The mask was about 7 px too tall. New version- And transparent Just realized the Kraahkan has to be drawn twice, so I am up to 109 masks now. *sigh*1 point -

The Island, Upside Down
aidenpons reacted to PeabodySam for a topic
It seems that you've stumbled upon the leaked beta of the upcoming Wii U game, Super LEGO Island Galaxy.1 point -
Seeing the backdrop through bubble explosions?
le717 reacted to Cirevam for a topic
The thunder bubble powerup creates an explosion when used. It grabs the sky texture and overlays it on top of the explosion to make it look more interesting. I'm pretty sure that's what's happening.1 point -
Calcite Copter VS Cybernetic Rock Monster
Lair reacted to Cyrem for a topic
1 point -
It's just a brick
Wognif reacted to Cirevam for a topic
You enter their domain and you do not return.1 point -
Invisible Flower Car?
Lair reacted to Cirevam for a topic
He's not heavy, he's just practicing how to be short.1 point -

Height: The same as everyone else?
Lair reacted to McJobless for a topic
I CAN'T STOP LAUGHING AT HIS SMILE. WHY DO YOU DO THIS TO ME?1 point -

3 headed dragon
Lair reacted to Drill Master for a topic
Ben24x7, please let the Moderators handle the, well Moderating. I have nothing against you, but your post sounds like you are trying to Moderate this topic. As for the dragon, I like it but its back needs to be a little less flat I think.1 point -
The Great Kanohi Project
Lair reacted to Prototyke for a topic
It's Monday. Time to put up some masks. The Hau seems to be the mascot mask for Bionicle, so what better to start with? The Hau's shape is used for three masks: The default Hau And the Aki ~This image was removed somehow. The corrected Aki is shown is a lower post.~ I started on the infected Hau as well, but without the actual mask, I can't get the stains just right. I'll buy it eventually to finish it. There is something wrong with the Hau's shape, but I can't lay a finger on it. If anyone can figure it out, let me know. I have just stared at it for too long. The updated masks are shown below1 point -
1973 LEGO Animation Re-Released
Lair reacted to Cyrem for a topic
Amazing, I love it! It's so smooth, so much better than a lot of the brickfilms made today. Back when TLG were more approachable.1 point -
Editing saved games
Wognif reacted to Car CrazeXVI for a topic
G#.GS LEGO1.DLL EXRicky has his own documentation on this now. Players.gsi History.gsi I have also found things get even more bizarre with multiple players. Note to EXRicky: This is unfinished and inaccurate. I really need to pick up on it.1 point -
Lego City: Undercover
Lind Whisperer reacted to McJobless for a topic
BULL. F***ING. S***. THE CHARACTER HOLDING A GAMEPAD IS NOT "WOVEN TIGHTLY INTO THE STORY". IT'S A F***ING REFERENCE THAT NO-ONE WOULD MIND ON THE OTHER PLATFORMS. THIS GAME WOULD WORK BETTER ON ANYTHING OTHER THAN THE WII F***ING U. STUPID. F***ING. C***S.1 point -
New Skyboxes
aidenpons reacted to lol username for a topic
It's amazing how simply changing the sky can alter the entire feel of a track. Cool stuff.1 point -
Rocket what you doing here
Aokpisz reacted to lol username for a topic
brb crying all night1 point -

I Am Confused...
Jack Bluebeard reacted to le717 for a blog entry
Confused, Confused, Confused. I'm not sure if many of you have seen JrMasterModelBuilder's YouTube video showing him racing as Rocket Racer's car in LR2. If you haven't, than watch it before you read anymore. http://youtu.be/vsLFAGBnI54 Anyway, with that video and Jamesster's recent thread that showed him texture swapping (which was based off the above video), I am thinking that I might be possible to swap not only my car with RR's but also someone else's car too. I am not very far into the game (I've only done half the races in Dino Island, haven't even done the boss or explored), so I'm not very high up in the game. So, I decided to change Workman Fred's digger to RR's car. I PM'ed JMMB on YouTube asking him if this might be possible. Here's a transcript: "You have made a video showing how to race as RR and have provided a working tutorial on how to do it. Jamesster made a video that showed him swapping textures. Well, I'm trying to swap cars too, but Adventure Mode cars. I found that by following your tutorial, I can race in other cars, but only in Arcade mode. I want to swap cars in Adventure mode, to make another milestone in LR2 modding, and because I have a video I want to do. I want to replace the digger with Rocket Racer's car. I don't need to swap them, just write RR's pointer over the digger's pointer.. I found that RR's car is made of three parts, and each one has two files in the GTC. The digger also has three parts with two files each in the GTC. So, this should work because they have the same number of parts. I swapped the pointers like I wanted to in HxDen, but every time I tried to load the game, it would crash. The movies would play, but the game itself wouldn't load." I had to provide more info after this, because I forgot to add this info in the first PM, and because he needed to know this. "Yes, the Digger is in Adventure Mode, and I am hoping I can swap both my car and my opponent's car. You see, I have a game save where I drive a Digger, (See attached video), and what I want to do is swap both my digger and Workman's Fred's digger (AKA my opponent) with RR's car. I am thinking that both he and I use the same digger models, because when I put RR's car on the digger, it did not work in Adventure Mode. I was only able to race as RR in Arcade Mode. And because the files listed in the text document are all of RR's and the Digger's car models. So if both he and I use the same models, I am thinking that if RR's car pointers were pasted on the digger's files, both of us would drive RR's car in Adventure mode." His reply: "Alright, I tried a few different things. I found that changing the digger's .CCD pointer to Rocket Racer's .C[C]D file will replace your opponent's car to RR's (in the race, not in the construction site on Sandy Bay), but not the inverse for any of the cars you would race. Here's my untested (not sure how to) theory as to why: When you created the car you used in Sandy Bay or just used a default model it saves the part configuration to you save file (and remember if it was default or not to know if it should add it to your car list). Whenever you race on Sandy Bay, it used the model you saved rather than load the original digger. So maybe it would work if the digger were replaced with RR's car before creating a car to use in Sandy Bay (and it would then save RR's part configuration). That's my guess. As for those other files you were trying to replace. My guess is that they aren't compatible with each other. As they aren't in the same places on the vehicle there's probably more to it." JMMB, I have got to tell you that your theory is spot on. I tested it by swapping the pointers then creating a new game save. I now have a game save with which I can race with RR's car in Adventure Mode! Now that I can race with RR's car, it was time for me to race Workman Fred in his "Digger". But when I want to race him, this happened: I am racing Fred, but he has his digger. This is the complete opposite of what JMMB said above: "I found that changing the digger's .CCD pointer to Rocket Racer's .C[C]D file will replace your opponent's car to RR's (in the race, not in the construction site on Sandy Bay)" He was only able to get Fred drive RR's car (from what I understand), but not able to get himself to drive the same car. But I am only able to race with RR's car, not get Fred to race with the same car! So I am confused completely. JMMB, if you read this, will you perhaps explain what I am doing wrong? I want to combine both my test results and yours, but I have no idea how. EDIT: What a way to start a blog. Well, you have to start somehow. ;)1 point