Leaderboard
Popular Content
Showing content with the highest reputation on 10/09/2013 in all areas
-

wow such accomplish
Lair and 3 others reacted to IceHusky for a blog entry
very finish wow ore doge wow such accomplish4 points -

wow such accomplish
Brigs and one other reacted to Fush for a blog entry
It took me FOREVER to get that chain threaded properly but I DID IT. I AM NOW THE MASTER OF ALL CHAINS2 points -
LEGO Magazines!
Sadie Meowsalot reacted to emily for a topic
Hello! Have you ever wished you could read old LEGO magazines? Probably not. But I sure love to put old LEGO magazines on the internet anyway! I recently received a small collection of LEGO Adventures!, Bricks n' Pieces and LEGO World Club Magazin issues courtesy of Cyrem and jamesster. Only two of them have been made available in English in their entirety online prior to now, so I am pleased to present what I have for your viewing pleasure. As with my LEGO MANIA Magazine scans, I will be uploading these frequently, but probably not daily. LEGO Adventures! LEGO Bricks 'n' Pieces LEGO World Club Magazine Issue 16 LEGO Magazine LEGO Shop at Home1 point -
Mafia: The Game
The Ace Railgun reacted to aidenpons for a topic
If we've only got seven or eight people (if @le717 turns up) then I don't think we should have a detective. More players, then yes. P.S. Xiron, you STILL haven't corrected (in the first post) 'rolls' to 'roles.' It annoys me.... merely by existing.1 point -

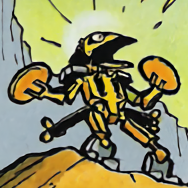
Docs Concept Art
Car CrazeXVI reacted to Ben24x7 for a gallery image
From the album: Pictures made using Blender
I am busy working on a project and I need some concept art so here is a little bit I rendered. The picture took around 25-26 minutes to render since I was using 'Cycles render' (Blender users will know what I am talking about). Sorry for any rough edges, Blender doesn't like to 'Smooth' any 3DStudio objects, which is what I use to import Bricksmith (*Winks at Le717*). And sorry that I don't have a higher quality picture, My guess is that if I do so my computer would reach meltdown.1 point -

Mafia: The Game
aidenpons reacted to Fluffy Cupcake for a topic
The night has passed, and no murders occurred. The town is saved, and the murderer has been found! La fin. (Yeah, lame ending...) GAME END Registration for round 2 is now open.1 point -
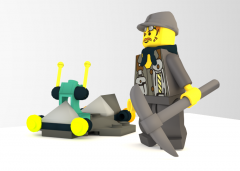
Minifigure dance
Zed reacted to Yajmo for a gallery image

From the album: Doodles
Flipnote Studio is fun1 point -
Fortunately, Unfortunately
lol username reacted to Yajmo for a topic
Unfortunately there was no room in modern society.1 point -

i suck at drawing
Zed reacted to Wirza for a gallery image
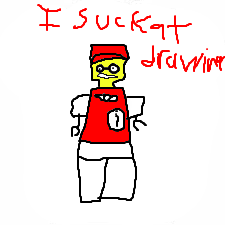
From the album: random junk
how not to draw1 point -
Xir's LR2 Mod Hub
Cirevam reacted to Fluffy Cupcake for a topic
Good news for my Devastated Island texture! I found a way to make it not use the same material as Sandy Bay's water via WRL editing!1 point -
Main Menu - What do you want to see in it?
Guurahk204 reacted to Prototyke for a blog entry
I'll add my input even though I'm a few days late if that's OK. Maybe its just me, but because I am used to reading left to right then down it would make more sense to me to have it laid out as- (PLAY GAME) (LOAD GAME) (MULTIPLAYER) (SETTINGS) (EXTRAS) (CREDITS) ( ) (EXIT) instead of (PLAY GAME) (EXTRAS) (LOAD GAME) (CREDITS) (MULTIPLAYER) ( ) (SETTINGS) (EXIT) Also, if you put the exit button at the bottom right (or left or center) and the copyrights at the bottom left (or right) you could still have it fairly symmetrical without needing an eighth button.1 point -

Custom Cutscenes
Fluffy Cupcake reacted to Jimbob for a topic
Advanced Cutscene Modding Not satisfied enough with simply swapping around characters and animations? Check out these advanced modding mini-guides. Camera Tricks The aspects of a game camera that can be modded are: position, pan and zoom. You can use any combination of these, allowing for simple cuts and more elaborate shots (say you wanted an establishing shot of the town). Additionally, you can add fade effects instead of having the camera cut between shots. Declaring a Camera Shot Camera shots are defined within the $time segment of a script. This allows multiple camera shots to be used throughout a cutscene. A camera shot must be declared in the first $time segment, and that shot will be used continuously until another one is declared. Below is an example script: $cinematic $shot OBJECT_STATIC doctor $startrelative -2.0 0.0 0.0 $endrelative 2.0 0.0 0.0 $targetoffset 0.0 0.0 2.0 $end Placing the Camera The first part of camera editing is to place the camera on an object. In this case, the camera is focused on a doctor actor that was added in earlier on in the script. The object you focus on must be declared at the beginning of the script using $setactor. Positioning the Camera Next, you tell the camera where to begin, using $startrelative. Three decimal coordinates follow. The first is the X-position, then the Y-position, and finally the Z-position. Modifying the X-position will change how far to the left/right of the object the camera goes (it is relative, so moving left on one object will likely not be moving in the same direction as moving left on another object). The Y-position changes how far up/down the camera goes, and the Z-position changes how far forwards/backwards it goes. Note that a coordinate of 0.0 is centered on the object (generally inside it), negative values move it left/down/backward and positive values move it right/up/forward. Also note that, on a minifigure, the centre is considered its… groin area. For this reason a Y-value above 1 is recommended for good composition. Panning/Zooming the Camera If you do not wish to move the camera, you must set the $endrelative values of the camera declaration to be identical to the $startrelative values. If you would like a pan or zoom effect, then this is done through a combination of $startrelative and $endrelative. To create an effect, all you have to do is set the start and end points of the camera ($startrelative and $endrelative respectively) to the desired start and positions of your camera effect. To zoom in to an object, for example, you might use: $cinematic $shot OBJECT_STATIC doctor $startrelative 0.0 0.0 5.0 $endrelative 0.0 0.0 1.5 $targetoffset 0.0 0.0 0.0 $end This places the camera in front of the doctor and moves towards him. By keeping the values positive, the camera doesn't go into him. Alternatively, you could have the camera pan from left to right: $cinematic $shot OBJECT_STATIC doctor $startrelative -2.0 0.0 1.5 $endrelative 2.0 0.0 1.5 $targetoffset 0.0 0.0 0.0 $end Note how both Z-values here are set to 1.5 – this doesn’t create an effect, as the values are the same, but instead positions the camera in front of him to avoid going into him. A combination of the two is hence possible by adding the values together: $cinematic $shot OBJECT_STATIC doctor $startrelative -2.0 0.0 5.0 $endrelative 2.0 0.0 1.5 $targetoffset 0.0 0.0 0.0 $end Camera Duration The duration of a camera effect isn't directly defined, but rather is set by the $time values of the camera’s segment and the next segment. So, if the camera was declared in a segment starting with $time 0, and the next shot had a different camera at $time 5, the camera would last 5 seconds. This can be used to create camera effects of varying speeds. If no camera effect is declared in the next shot, the camera will continue its effect until another camera is declared. If you wish to have a camera perform an effect for a certain time and then hold its final position, set its effect in one $time segment, then create a second $time segment with both the $startrelative and $endrelative values identical to the $endrelative values of the first time segment. Example Script If all this isn’t quite clear, the following is an example script (a modified INTRO1.TXT) showing different camera effects discussed above. You can copy this into the INTRO1.TXT, recompile it and launch a new adventure in the game to see it in action. Note that the change from $time 0 to $time 5 isn’t quite crisp, the latter segment jumps forward slightly. In situations like this you just need to play around to get the positioning perfect (e.g. change the values in the second segment from 1.5 to 1.7). Camera Facings Positioning the camera and moving it about is all well and good, but the fact that it’s always focused on an object isn’t always useful. The final section of the camera declaration, $targetoffset, tells the game where to face the camera. This can be used to create camera shots from all sorts of angles, effectively nullifying the fact that it’s relative to an object. Camera facings use coordinates too, but not in exactly the same way to the camera positioning: $targetoffset 0.0 0.0 0.0 The values are the same in that they are X, Y and Z values respectively. However, this doesn’t change the camera’s position, but rather the point it faces. Take the following for example: $targetoffset -5.0 0.0 0.0 This would have the camera facing over to the object’s left. Likewise… $targetoffset 0.0 1.0 0.0 …this would make the camera look up to the object. To better understand this, imagine that a node is created at the coordinates defined in $targetoffset. Just as the camera is repositioned using the coordinates in $startrelative, so is the node positioned using the coordinates in $targetoffset. The camera always looks at this node, not the object, which is why a $targetoffset of 0.0 0.0 0.0 is focused on the object. Hence you can have any camera shot you wish, ignoring the objects the camera is bound to. Camera Zoom It’s also possible to change the zoom level of the camera. This is done by adding in the following to the camera declaration: $zoom CUSTOM_SIZE 3.0 Do not confuse this with an actual zooming effect; rather this is like zooming in or out on a camera before taking a picture. The zoom value starts at 0.0 and increases. Note that, with zoom values, negative and positive values are counted as the same, so a value of -1.0 is the same as a value of 1.0, the game measures its zoom based on the value’s difference/distance from 0. A zoom value of 0.0 sets the camera to the closest it can get, zooming right inside the object. As you increase the values distance from 0, the camera zooms further and further out. This can be used in combination with various other effects too. The following are two examples of its implementation: $cinematic $shot OBJECT_STATIC doctor $startrelative 0.0 1.0 4.0 $endrelative 0.0 1.0 4.0 $targetoffset 0.0 0.0 0.0 $zoom CUSTOM_SIZE 3.0 $end This first cinematic would originally be positioned facing the doctor, slightly away from him to get a full-body shot as well as showing the environment behind him. By adding the $zoom part, it is instead zoomed out slightly. $cinematic $shot OBJECT_STATIC doctor $startrelative -3.0 0.0 0.0 $endrelative -3.0 0.0 0.0 $targetoffset 3.0 0.0 0.0 $zoom CUSTOM_SIZE -1.0 $end The zoom in this cinematic is a negative, yet it is the same as having it set to positive 1.0. The camera is positioned to the left of the doctor and uses the offset to face him. The zoom then forces the camera slightly outside his body. And that’s about it for camera modding, have fun playing around! Sound Effects Sound effects can be added into cutscenes too. This is how the characters laugh in the Sandy Bay gathering intro, for instance. Adding Sounds Sound effects must be declared at the beginning of the script, in the $global section. This is generally done after declaring actors and positions, but before extras such as $nocancel. Declaring a sound is done using $setsound, and the game is actually very nice in that any sound can be used. Consider the following: $setsound LARF1 $sample Game Datasoundsvoicesspeciallaf4ppl.vag $bindto PLAYER $end The modder can set the name of the sound. This is done in the first line, next to $setsound, and works like declaring any variable in a program – it must be unique, for example. Next, you input the path of the sound file. This is great because it allows you to place custom sounds files in custom folders. For example, I created my own sound file in the following path: $sample Game DataCUSTOM SOUNDSmysound.aif IMPORTANT: The sound file can only be in the formats .vag and .aif. Other formats, such as .wav, cause the game to crash. The easiest way to get around this is to have your file (in whatever format it originally is), open it in a program such as Audacity, change its rate to 11025Hz, set it to mono, export it as an AIFF file, and finally rename this file to .aif. These files load and work fine. For more information on sound effects, see le717’s >Custom SFX Tutorial. After the sound file has been determined, the sound must be bound to an object. This is done using $bindto. Note that the sound doesn't actually come from that object, it just plays normally rather than positionally. Finally, as always, the sound declaration is finished with an $end. Playing Sounds Sounds are played very easily. They are set to play using the following: $sound WHATTHE This is placed at the end of a $time segment, after any actor and cinematic sections. If the sound is long (for instance, a music track), it will continue to play until the end of the cutscene, and will even continue to play after the cutscene if it is longer than the time set in the $global declaration. Sound Effect Example The following is a script which plays a sound. I chose to use a music track from LEGO Rock Raiders, converting it to an AIF file and renaming it to mysound.aif. And there you have it – custom sounds! More advanced modding coming soon!1 point -

LEGO Magazines!
BerixMaster2010 reacted to lol username for a topic
Wonderful, now that space port technician guy has at least three names. Great going LEGO.1 point -

LEGO Magazines!
aidenpons reacted to Pranciblad for a topic
You gotta love how Harry escapes with the power of FOOTBALL. I mean, he was able to kick a ball straight up with enough force to break a window while tied up on the floor, and somehow avoid getting a face full of broken glass. How the heck does that even work? HOW?! Also, it's always nice to see a little more about rocket racers. Oh, and major laffs at chief brick(ster)'s bio.1 point -
LEGO Magazines!
aidenpons reacted to emily for a topic
Issue 19 is posted. That finishes up the issues of Adventures! that hadn't been shared before. I'll move on to the sole new issue of Bricks n' Pieces next, then take on the task of translating the two issues of World Club Magazin. After that, I'll scan my copies of the Adventures!/Bricks n' Pieces issues already online. Once I'm done with that, I think that I will move on to the US LEGO Magazine, or more specifically the first few years of it (2002 - 2005). Previously I hadn't undertaken the task of uploading them as it seemed as if more people had access to them than other magazines, and as a result making them available online would be relatively useless. I now feel that uploading them could potentially do at least some good, so why not? Huh, I didn't notice that. I imagine that it is possible that the script used Axle, and whoever was creating the art for the panel confused the characters. Funny that nobody noticed the problem, though (especially since it occurred twice). Good thing the laser didn't instantly melt the laser like it would actually if this were realistic. Good thing Jet managed to deflect the laser at precisely the angle necessary to knock the Rock Monster off of its perch without damaging it or the HQ. You've made me curious - why is it you dislike the existence of another Brickolini?1 point -
LEGO Magazines!
aidenpons reacted to lol username for a topic
Sure a good thing Jet happened to have that convenient mirror on hand.1 point -
BIONICLE 2: The Game [Developed by Guurahk Entertainment for SolisMagna.com]
IceHusky reacted to lol username for a blog entry
That's because he's been advertising this on BZPower for a while and he's mostly got people from there with this. Anyway, I'm a bit concerned that you didn't give any information on what sort of game this is, how you're creating it, what tools, what engine, etc. I've seen countless LEGO fan games that advertise like this until the person or people behind it realize they haven't actually been working on a game.1 point -
Map Creator (0.9.11)
aidenpons reacted to Cirevam for a topic
You have to do this: Object2 { type Hoverboard xPos 8.578496 yPos 28.591185 heading 348.541010 } Object3 { type Pilot xPos 8.578496 yPos 28.591185 heading 348.541010 driving Object2 } What we're doing is placing the Rock Raider (Pilot) directly on top of the Hover Scout (Hoverboard) and make sure both are pointing in the same direction (heading). Then we say that the Rock Raider is driving the Hover Scout with the "driving Object2" line. You cannot do this directly in the Map Creator. It must be done in the map's OL file after the level is created. Hint for a new feature, Cyrem...1 point -

Map Creator (0.9.11)
aidenpons reacted to McJobless for a topic
Next quick update he's going to release a .flh creator.1 point -

LRR Reloaded
aidenpons reacted to Leumeister for a topic
Nice, looks good! I hope it doesn't take as long as RtPU did/does/doing whatever1 point -

Map Creator (0.9.11)
aidenpons reacted to Addictgamer for a topic
1. When I am placing objects/buildings and I use the arrow keys to scroll, they also rotate the object. 2. Ok. Mouse scrolling is making me want to take the flaming sword of pwnage to the map creator. How do I disable it if that can be done? If it can't be disabled, please make it disableable.1 point