Leaderboard
Popular Content
Showing content with the highest reputation on 02/03/2014 in all areas
-

2014 LEGO Sets
STUDZ and 5 others reacted to Jimbob for a topic
That spaceship... Wow, the popping out of the wings (like Buzz Lightyear), that... that sold it for me. I'm getting one. LEGO's producing quite a few sets this year that, for the first time in a long time, I actually really want to buy. I've bought maybe two or three new sets in the past several years, all the rest are the good oldies. But now, LEGO's actually interesting me again. Dang, and I thought my wallet was safe.6 points -

Something a little different...mock LEGO Space print ad from the 80s...
Ayliffe and 5 others reacted to TalonCard for a topic
What do you do when you have only two Classic Spacemen and Photoshop? >This, apparently. The kitchen in my house has a little light that looks a bit like a flying saucer...I thought it'd be fun to take a picture of two LEGO astronauts exploring the vast kitchen counter, and seeing the lamp from below. It didn't turn out quite as well as I liked, so I tried to spruce it up by creating a magazine-style LEGO ad. I'd like to do more in the same style, probably featuring Pirates since I actually have those sets, definitely using actual magazine dimensions. Thoughts? TC6 points -
The LEGO Movie Sequel
PindaPixel and 3 others reacted to lol username for a topic
The LEGO Movie's theatrical release is only days away, and early reviews have been quite positive from both film critics and LEGO fans lucky enough to attend early screenings. The projected success of the movie, combined with the directors saying they much more story material where it came from, leaves it as no surprise that a sequel is already in development, with Jared Stern writing a script. Oh, and don't forget that Ninjago movie coming sometime in the next few years, too! And probably video game tie-ins. Weeeeeeee. Sources: The Wrap4 points -
Tutorial: Make Your Own 360 Gallery
Brigs and 3 others reacted to Jimbob for a topic
This tutorial will show you how to make your own 360o-view gallery for whatever you like, including creations made on LDD and models made traditionally, using Flash - with no programming skills whatsoever required! Okay, so this tutorial might seem a little wordy, but it really isn't difficult at all. And while this may be better suited for some programming forum, I thought it might be nice for members here to post 360o MOCs if they wanted to, and having a topic on this forum to use a a guide would therefore be helpful. Anyway, onto the tutorial. An example of a gallery made using this guide can be found here. This is Fushigisaur's >Snow Shredder MOC, which I will be using to demonstrate the steps in the tutorial. Note: I have written A LOT in some places, simply because Adobe programs can be a little overwhelming at first if you've never used them before, so I've written the instructions very clearly so that you can understand them should you never have used one before. Step 1: Gathering your Images First of all, of course, you will need to have a series of images representing different angles of your model. I recommend not doing a full 360 degree rotation of it (i.e. 360 images), rather anything from 30-100 images should be fine. The more you have, the smoother it will look, but equally the bigger the file size will be. As mentioned earlier, I will use the Snow Shredder MOC in this tutorial as an example. Fushi took over 160 images for this, by simply taking screenshots in LDD rotating the model a little bit each time. But to save space, half of them were cut. Next you will need to decide upon an appropriate size for the models. If you model is to be displayed on RRU, I recommend scaling it to 640x480, but other resolutions such as 1024x600 are nice too. Just don't put it above 768 pixels high, as you risk cutting it off in your viewer's browsers. Again, it's finding the balance between image quality and file size. Note: If you don't want to spend ages going through each individual file and editing it, I recommend using XnView. It's free and can batch-process many images, which is what I used for this tutorial. Got your images? Great! Below is a screenshot of my the images used in Fushi's 360 MOC. They were resized and cropped to 640x480 dimensions, and renamed in number sequenced. Step 2: Acquiring the Tools I have programmed this using ActionScript 3.0, and hence you will need a Flash editor to program it. Don't fret if you don't have one though, there's no need to fork out loads of money. If you do have a copy of Flash Professional, you can skip this step. You can download a free trial of Adobe Flash CS6 here. I think this lasts for 30 days, more than enough time for this. Just follow the steps to download the trial listed under 'Flash Professional CS6'. Note: this is a legitimate link - although it's not the Adobe website, the linked files are, it's just that with the release of Adobe Creative Cloud they removed previous links to those files but kept the files. If there's a trial for Creative Cloud you could get that too, but I just prefer CS6. Once downloaded, install the trial following the provided instructions. If you're getting problems here, this topic isn't the place to ask for help - you'll have to post on the website for that. Quite a few issues have already been resolved in the comments though. Step 3: Setting up the Gallery Launch Flash Professional. The main screen will present you with many options, but for this you will want to select ActionScript 3.0 under Create New. This will create a new project for you. Next, to make things easier, click on Window at the top tool bar. Hover over Workspace in the drop-down and select Developer from the pop-out. This will change the arrangement of the toolbars and menus. Now, on the right-hand pane under Properties, you should see the word Size: followed by two numbers. Set these to the width and height of your images - in this example, I used 640 x 480 px. Next, look for the word Stage: just under Size:, and click on the white box. Here you can select an appropriate background for your gallery. This isn't just for the area you see in the middle of your screen, but also everything around it should the viewer's window be larger than your previously set resolution. Now, click on the Timeline tab in the bottom pane. You will see a line of white blocks next to Layer 1. This can all be left as-is. Now click File from the top bar, hover over Import from the drop-down, and click Import to Library... from the pop-out. Select all the images you wish to use in the 360 gallery, and Flash will import them into your library. Below is my example after finishing Step 3. Step 4: Adding the Images This is the most tedious part of the process, and involves a lot of clicking, just to warn you. Firstly, click on the Library tab at the top of the left pane to show all your imported images, if you haven't already. Click on the first image you wish to use, and drag it onto the stage. Once loaded, the Properties tab in the right pane will change to show information on the image. Change both the X: and Y: values under Position and Size to 0, to place the image central to the stage. Now, right-click on the image. Select Convert to Symbol... near the bottom of the pop-up menu, and a new window will appear. You can change the Name: field to whatever you like (I'm going to leave it as-is) and leave everything else as it is. Make the sure that the Registration: point - the nine little boxes in a square - is highlighted at the top-left box. If it isn't, click on the top-left box to select it. With all this set, click OK to close the window and convert the image to a movie clip ready for programming. The Properties tab will change again, with a lot more information this time. Leave everything as it is, except from the very top field entitled <Instance Name>. In here, type 'main' exactly like that, without quotation marks. This is important as the code later on refers to this name. Now double-click on the image, and some fancy little box will zoom up at you. Not much will have changed, but you will be brought inside the movie clip. You can make sure it worked by looking at the top bar of the main window, where it says Scene 1 - next to this it should say Symbol 1 or whatever you called your symbol. If so, it worked, if not you need to go back and follow the instructions carefully again. In the bottom pane, next to Layer 1, you will see the line of white boxes again. They are labeled with numbers above, in the form of a very simple number line. Click on the second frame, at which point it should be highlighted in blue. Now hold the Shift key and click on the frame under the total amount of images you have - I have 83 in my example, so for me I click on 83. This will highlight all of the frames in between (sometimes it won't work first time around, just try going from the last frame to the first one or clicking a few times). Right click on any frame under the selection, and select Convert to Blank Keyframes from the pop-up menu. If all is correct, you should now see the following: Now to the fun part! *sarcasm* Just as you brought the first image onto the stage and centered it, you will need to go through each frame, add the image to that frame, then center the image on that frame. The process is: Select next frame from Timeline > Drag next image from Library onto stage > Edit Properties to set X: and Y: values to 0 > Repeat Do this for all of your images. When you are finally done, all frames in the Timeline should be coloured grey to show that they contain images. If you click somewhere on the stage and press the Enter key, it will rotate to show you a preview, but it'll likely be glitchy as it's not been compiled into an application yet. Screenshot of my example after being filled in: Step 5: Programming Time! Contrary to what you might think, this is actually the easiest step, as I've done pretty much all the programming for you already. But first, while still inside your symbol, select the first frame. Right-click on it and select Actions at the very bottom of the pop-up, to bring up a new window. Just type in the following, exactly as-is: stop(); And close it again. This prevents the images from trying to rotate before the user actually tells it to. Now, click on Scene 1 at the top, next to Symbol 1 or whatever you named your symbol, to go back to the main stage. Just as before, select the first frame, right-click it, and choose Actions from the pop-up menu to bring up the programming window. Copy and paste the following code into the window: stop(); This tells the application to stay still on the current frame. It's not really important when you have just one frame, but should you want to expand your application it's necessary. stage.scaleMode = StageScaleMode.NO_SCALE; stage.align = StageAlign.TOP_LEFT; import flash.ui.Keyboard; import flash.events.Event; import flash.events.KeyboardEvent; First this tells the program not to scale, i.e. when the user changes their window size, this prevents the movie from scaling in some funny way along with it. You want to keep your picture at its optimum resolution, rather than going blurry. Afterwards the program is aligned to the top-left of the browser window, just like with text. The import statements simply tell Flash what coding is in use in the program, which it then selects and saves with the program. var lastFrame:Number = 83; //This is all you need to change var changeRight:Boolean = false; var changeLeft:Boolean = false; The first line creates a piece of data that is remembered while the program is run, and holds the total number of frames in the application. It uses this later to ensure that you can rotate more than 360 degrees. The second and third lines remember whether or not the right and left arrow keys are currently being pressed. stage.addEventListener(Event.ENTER_FRAME, ongoingEvents); stage.addEventListener(KeyboardEvent.KEY_DOWN, keyPressed); stage.addEventListener(KeyboardEvent.KEY_UP, keyReleased); Here we add three events to the program - ongoingEvents takes place many times each second, effectively it is run constantly throughout the program. The keyPressed and keyReleased events are triggered whenever you press a key - not just the left or right arrows - and release a key. These don't do anything by themselves, but tell Flash what to look out for in order to activate the code later on. function ongoingEvents(e:Event):void { if (changeRight) { if(main.currentFrame == lastFrame) { main.gotoAndStop(1); } This is the function that is called many times a second. The second line checks whether or not the left key is pressed, something that is set later on. It basically says that, if the right key is pressed, then go to the next line. This next line checks if the images you have set is currently on its last frame - if so, it needs to jump to its first frame, because a full 360o spin has been performed. else { main.gotoAndStop(main.currentFrame + 1); } } else if (changeLeft) { if(main.currentFrame == 1) { main.gotoAndStop(lastFrame); } else { main.gotoAndStop(main.currentFrame - 1); } } } The first line says that 'If the right key is pressed, but we're not on the last frame, then do the next bit of code'. This code just advances the images forward a frame. The next line says 'If the left key is pressed instead of the right key, do this'. The next few lines of code are the same for the right key's presses, except that the shift the frames left each time, and also go from the first frame to the last frame if a full spin has been completed. function keyPressed(e:KeyboardEvent):void { if (e.keyCode == Keyboard.RIGHT) { changeRight = true; } else if (e.keyCode == Keyboard.LEFT) { changeLeft = true; } } This is the event that occurs whenever a key is pressed. The second line checks if the key that is currently being pressed is the right arrow, and if so, tells the program to change the frames right as coded above. Then it checks whether, if it wasn't the right arrow, it was the left arrow - and if so tells the program to change frames left. If any other keys are pressed, Flash ignores them because no other code has been associated with them. function keyReleased(e:KeyboardEvent):void { if (e.keyCode == Keyboard.RIGHT) { changeRight = false; } if (e.keyCode == Keyboard.LEFT) { changeLeft = false; } } This is identical to the previous function, except that it is triggered whenever a key is released. If the key was an arrow, it stops the program from moving in that direction. Simples! And that's it, folks. Now close the coding window. Save the project (Control + S on Windows) and test it out! (Control + Enter) Below is my example project, once finished: If all went well, you should have a shiny new SWF file ready for use. Pressing the left and right arrow keys will rotate your model left and right. Simply upload this somewhere (such as Dropbox) and you can share it with others! And thus concludes this tutorial, congratulations! I hope that you are able to make good use of it, and enjoy seeing whatever you may produce with it. A note on credit: You really don't need to give me any credit if you used this tutorial to make a 360 gallery yourself. While I would obviously appreciate a note of thanks, it's not at all necessary and I won't mind it if you don't in the slightest. Besides, I learned all the Flash programming I know by following other people's tutorials!4 points -
2014 LEGO Sets
eagleeyedan and 3 others reacted to lol username for a topic
http://www.youtube.com/user/Atamaiidotcom/videos http://www.youtube.com/watch?v=tHzhDtaq9bw http://www.youtube.com/watch?v=sY2r20qhyaI A good look at Johnny Thunder about two minutes in.4 points -

New version of ROCK RAIDERS - update
Car CrazeXVI and one other reacted to Antillies for a topic
Rokreder, you don't have to apologize; Extreme is the last person you could possibly offend Your concern was commendable and your intentions in the right place. Whether due to culture or simply personality you misunderstood. It's OK. Everyone does that from time to time. Just learn from it and continue contributing to this fantastic community.2 points -
Rock Raiders Snowmobile
Cirevam and one other reacted to Fush for a topic
2 points -
2014 LEGO Sets
ProfessorBrickkeeper reacted to lol username for a topic
The German Toy Fair has arrived, and we have pictures thanks to this Fedro dude. Check 'em out! http://www.flickr.com/photos/61839591@N08/ Things of note include Ultra Agents, a new cyberpunk-esque secret agent theme heavily tied into comics and apps, and a new Arctic theme - or rather, a subtheme of City. The new Arctic sets are very reminiscent of the 2000 sets, though there seem to be crystals in the meteors/ice chunks rather than ancient aliens. Also, Johnny Thunder has back printing. Sources: Fedro Dude1 point -
Rock Raiders Snowmobile
aidenpons reacted to Fush for a topic
^exactly. I tried putting grates there but they hold the bucket in place so I removed them. Go ahead. I'd love to see it in the game, but I don't know enough yet to be able to do it myself. Couple questions about that: 1. Is it at all possible to make it so it can only be used in ice biomes? I have a feeling it can't, but if it can then do that 2. More realistically, can it be set to go really slower over rubble and power paths? 3. Will it have to replace one of the existing vehicles or can it be added separate? EDIT: Also, here is the .LXF file if you need it. EDIT Again: changed some things, see below. I had been referring to it as the Snow Slider (suggested by JJ) but Shredder sounds a lot cooler, and more in line with the names of other vehicles of the theme. Not at the moment, since i have yet to make a vehicle-carrying-car yet. However, since this is a 'small vehicle,' once I make said car, there is no reason why it should not fit. BTW, I updated the Rail Runner several days ago and I don't think you ever saw the changes. EDIT: JJ made a nice 360 view of the model, seen here. I will add this to the O{P when I get around to updating the OP. EDIT Again: When shopping for parts on bricklink I realized I made some mistakes, here is the fixed Snow Shredder 1.4.1 ->Teal 2x3 plates now Dk. Grey ->Teal 1x1 clip now Black ->Round 2x2 plate now square EDIT AGAIN AGAIN: Was not satisfied with this color scheme. Snow Shredder 1.4.2 Has a little less grey and a little more yellow, and a thing between the tread housings for increased stability. As of now, I am done with this model, completely. I am fully satisfied with it, and will not be revising it anymore. I am in the process of buying the parts off of Bricklink and will build this model IRL when they arrive.1 point -
Something a little different...mock LEGO Space print ad from the 80s...
STUDZ reacted to TalonCard for a topic
You know, that may be exactly what's missing from this picture...I tend to think LEGOs ought to be lit with warm, yellowish hues, but that's probably due to my obsession with Pirate ads like this one. I'll have to play around with it a bit more. I do! Adventurers is the only other theme besides Pirates that I've committed to collecting in its entirety, so as you can imagine, I actually have a lot of Johnny Thunders. I even took an >Adventurers inspired picture for a class back in college, but I wasn't completely happy with it. The original idea was to have Johnny, Indy, and Jake Raines from Pharaoh's Quest in the picture, but it was just too cluttered and Indy was hogging the spotlight with his iconic silhouette. Adventurers is a great choice for a future follow-up, since I have many of those sets too. The only question is whether to stay in the 80s or aim more at the 90s...I kind of like the idea of creating an alternate set of ads where LEGO continued making all the sets we know now, but never dropped the LEGOLAND banner and style... TC1 point -

Something a little different...mock LEGO Space print ad from the 80s...
TalonCard reacted to The Ace Railgun for a topic
Sweet, I love the UFO effect with the light.1 point -
Something a little different...mock LEGO Space print ad from the 80s...
TalonCard reacted to Aokpisz for a topic
This is one of those 'dang, I should have thought of this before you' sorta ideas. Nice work.1 point -
Something a little different...mock LEGO Space print ad from the 80s...
STUDZ reacted to Jimbob for a topic
Excellent! As jamesster said, I'd never have thought of something like that, and you've executed it very nicely. I Look forward to what you come up with next. Do you have a Johnny Thunder minifigure by any chance?1 point -
Something a little different...mock LEGO Space print ad from the 80s...
TalonCard reacted to lol username for a topic
Hah, I never would have thought of doing something like this, it's really neat. I'd love to see more.1 point -

Something a little different...mock LEGO Space print ad from the 80s...
TalonCard reacted to Shadowblaze for a topic
Oh, me likes. The feel in the picture is amazing too, it really looks like something from the 80's. I would have slightly changed the colors to blue too, to make it more "spacey", but that's just me.1 point -
Rock Raiders Snowmobile
aidenpons reacted to Fush for a topic
Managed to lower the tread housings by 1 plate height, the shape is nicer however it took a hit in stability. The dish behind the light is good, I'm keeping it. I had to redo the entire body practically to make the changes work, though.1 point -
RRU Quotes 2: Reckoning
The Ace Railgun reacted to Cirevam for a topic
[10:13:21 PM] origamiguy: fun fact: the welsh count sexual partners to go to sleep [10:13:57 PM] Doc: Aren't you clever [10:14:07 PM] origamiguy: I came up with that on the spot [10:14:11 PM] origamiguy: and I'm proud of it [10:14:59 PM] Doc: I'll try not to pop your happy bubble for this one [10:15:21 PM] origamiguy: thanks, I guess? [10:15:26 PM] Cirevam: Doc counts the number of dreams he's crushed to go to sleep [10:15:30 PM] Doc: It only sounds a little odd [10:15:39 PM] Doc: Yay dream dust [10:15:44 PM] Doc: SSSSSNNNNNNIIFFFFFFFFFFFFFFFFFFF1 point -
2014 LEGO Sets
BerixMaster2010 reacted to Jimbob for a topic
The arctic sets do look pretty good, but other than the lack of a greater range of colours (as previously mentioned), I think they need more buildings. I remember getting the big base set when the 2000 theme was out - I tended to save up for one big set rather than getting all the smaller ones, for some reason - and loved all the buildings. But just one here (plus the mobile one)? I think that's a shame. They do however have a nice selection of vehicles, so perhaps I'll get one or two. Maybe even make a diorama like theirs using a foam base or something. The agents seem okay, but I did instantly recall the set that Alcom pointed out. I won't really comment until more sets are revealed.1 point -
Cargo Cruiser
aidenpons reacted to lol username for a topic
I like this thing. Very sturdy looking. In fact, I'm gonna look at the model for myself to- OHWADWHATBUTTONDIDIPRESSHOWDOIUSEDEVELOPERMODEPROPERLY1 point -

Hi, I'm Alcom, and I want everything the world of LEGO Has to offer!
le717 reacted to Lair for a topic
1 point -

Drill Thingy I Made.
aidenpons reacted to Minifig9292 for a topic
I made this a long time ago and it's been sitting on my shelf gathering dust, better post pictures of it. Isn't it beautiful? Deadly lazor drill. Pew! Pew! Who the hell let Docs drive? Cargo bay/work station. Removable grate. OH s*** RUN! IT'S COMING RIGHT AT US!1 point -

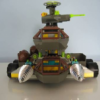
Very Large Mobile Laser Tank
Car CrazeXVI reacted to RockmoddeR for a topic
The Very Large Mobile Laser Tank is the pride and joy of the Laser mining task force on the LMS Explorer. Not only does it have 1.5 times the range of a large mobile laser cutter, it consumes 50% less crystal energy with each shot, while mining all types of rock 25% faster. It also serves as a massive threat to the ambient life on the planet, due to the fact that it can be equipped with different beam filters, like the Battlemech. This incredible functionality comes with a hefty price though; The total crystal cost exceeds the cost of a tunnel transport by 50% at a cost of 9 crystals. With a speed 80% that of a Chrome Crusher, it is an invincible, but nearly immobile juggernaut. It also contains experimental Rockets that work to the same effect as dynamite, with a range of nearly 70 feet.1 point -
Motorized Chrome Crusher!
aidenpons reacted to Aki Dazrold for a topic
bow chicka b- User was exploded by migraine bomb1 point -
RRU Hover Scout
aidenpons reacted to Cyrem for a topic
I made this one in LDD, ordered the parts. A month later got them, found I was missing the rocker bearing in the packet, waited another week for them to fix up their mistake and finished it. And yes that is the RRU logo on that minifig.1 point -
The Motherload
aidenpons reacted to Matt for a topic
Hey guys, I haven't been very active lately, and so I thought I'd repost the pictures of my creation that I made for the design a RRU vehicle competition on the old forums, just to let people know I'm still around. Just trying out these new subforums as well. So yea, here are the pictures again of "The Motherload": Angle views: Front view: Back view: Side views: Top view: With some LEGO people in it: This is what remained of my sets: __________________________________________________________________________________________ As an update to since I took these, I did leave the Motherload left up for quite a few months, until I finally got the urge to rebuild all my other sets again. So my collection basically looks like this again: This was taken awhile back, just after I joined RRU, and when I was taking pictures of the instruction manual and original box. I won't post those as I think I've posted enough images already.... (but I guess I can if people want me to.) ~Matt~1 point