
Leaderboard
Popular Content
Showing content with the highest reputation on 05/08/2014 in all areas
-

Misc. renders and such [WARNING: HUGE IMAGES]
bradleybrand and 4 others reacted to dead_name for a topic
Figured I should collate all of these in one place:5 points -

Xirp Dnarg Lairepmi
someswedish and 3 others reacted to Yajmo for a topic
http://youtu.be/SpFj0INVz98 I did a thing4 points -
Misc. renders and such [WARNING: HUGE IMAGES]
bradleybrand and 3 others reacted to dead_name for a topic
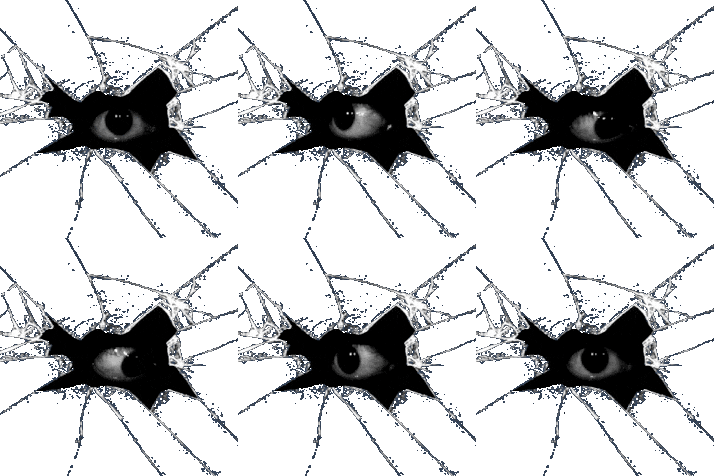
No idea! ​ Maybe once it's less of a hacked-together mess. I (badly) hacked LR2 model support into my raytracer. Runs really slowly, but enjoy:4 points -
BoB Rock Raiders Vehicles
Lind Whisperer and 2 others reacted to Fush for a topic
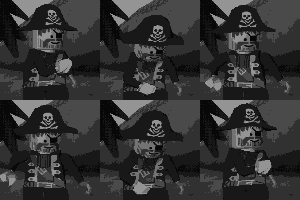
Hey guys, been a while since you've seen this topic hasn't it? Well Sadie recently supplied me with higher quality pictures of the box of the LRRHQ, so I'm redoing these models to fix mistakes, and laugh at how wrong I was the first time. First up, the crane vehicle. Just... I was nowhere close on this one. EDIT: AAAAAAAAAH IT'S STILL A BIT OFF HOLD ON LEMME FIX THIS EDIT2: Eh, fixing the small mistake I noticed created bigger issues. I'll have to redo the whole structure, but for now this is close enough. EDIT3: I did the buildings as well. Still working on the big one but I've got the other two done. Putting my custom baseplate to good use ^_^3 points -
Garage Search = LEGO game I never knew I had
lol username and one other reacted to Brickulator for a topic
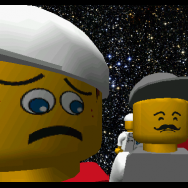
Wow, really? I have at least one demo CD with the extended Rock Raiders intro on it, watched it loads as a kid. All my lego CDs and stuff are back home and I won't be there for a few weeks but I'm 90% sure I have the original avi pulled straight from one of the discs somewhere on my hard drive. I'll see if I can find it and upload it somewhere but I won't be able to tell you which disc it's from for a while. Boom, found it. Enjoy - https://ore.rockraidersunited.org/legacy/rock_689891.avi2 points -

LEGO Ideas Is Live!
eagleeyedan and one other reacted to ProfessorBrickkeeper for a topic
I'll take the CUUSOO site (name and all) any day over what it has (in my opinion) been degraded to. In addition to some of the things you mentioned, they have made it so you can start submitting creations at age thirteen- another double edged sword, certainly. They also made a rule that it gets deleted after a year, no matter how much support you have received. This also makes it even harder than it currently is to have projects without a supporting IP behind them get to 10,000.2 points -
Tutorial: Scene Modding and Object Moving
ShadowDraikana reacted to Brickulator for a topic
LEGO Racers scene modding tutorial In this guide I will explain how to edit the various scenes in the game, such as tracks and cutscenes. This will include placing and moving 3D objects and animated models. There are a couple of tools you’ll need so if you don’t already have them, download them here: LEGO.JAM file extractor Binary file editor You may also find this tool useful to help with positioning objects in tracks: In-game Coordinate viewer The first thing you’ll need to do, if you haven’t done so already, is extract the LEGO.JAM file. You can find instructions on how to do this in the LEGO.JAM file extractor thread I linked above. I’d recommend copying LEGO.JAM to another folder first and working on it there, since your computer might shout at you if you try to work within Program Files. Once you’ve extracted the JAM file, you’ll have a folder called LEGO, and inside it, 2 folders: GAMEDATA and MENUDATA. In terms of scenes, GAMEDATA contains the tracks and MENUDATA contains the cutscenes. The track folders are named as below: Imperial Grand Prix - RACEC0R1 Dark Forest Dash - RACEC1R0 Magma Moon Marathon - RACEC0R3 Desert Adventure Dragway - RACEC0R2 Tribal Island Trail - RACEC1R1 Royal Knight’s Raceway - RACEC0R1 Ice Planet Pathway - RACEC1R3 Amazon Adventure Alley - RACEC1R2 Knightmare-athon - RACEC2R0 Pirate Skull Pass - RACEC2R1 Adventure Temple Trail - RACEC2R2 Alien Rally Asteroid - RACEC2R3 Rocket Racer Run - RACEC3R0 Test drive track - TEST And the cutscene folders are these: Captain Redbeard intro - CIRCUIT1 King Kahuka intro - CIRCUIT2 Basil the Batlord intro - CIRCUIT3 Johnny Thunder intro - CIRCUIT4 Baron von Barron intro - CIRCUIT5 Gypsy Moth intro - CIRCUIT6 Rocket Racer intro -CIRCUIT7 1st place in circuit race - C_AWARD1 2nd place in circuit race - C_AWARD2 3rd place in circuit race - C_AWARD3 4th, 5th, or 6th place in circuit race - C_AWARD4 Win a car set - WINCAR Beat Rocket Racer - WINRRCAR Beat Veronica Voltage - WINVVCAR These are the main scene folders. The splash screen is also a cutscene (LEGAL) and there are cutscene versions of the standard FMVs in the PC demo and N64 version of the game (LEGOINTR, HVSINTRO, MAININTR). There are also a couple of other scenes from the character and car builders and the track selection screen (CB_SET, GARAGE, SINGRACE) if you want to do anything with those (every model of a track in the race selection screen, SINGRACE, is actually a cutscene as well). Now, there are a few important binary files contained within each of these folders, and you’ll need to edit these in order to make the modifications you want to. You can open and edit these files with origamiguy’s binary file editor that I linked to at the start. The types of binary files you’ll probably be working with are: 3D scenes (.WDB) Texture lists (.TDB) Material lists (.MDB) 3D models (.GDB) Skeleton structures (.SDB) Skeletal animations (.ADB) Material animations (.MAB) Cutscene files (.CDB) Cutscene event files (.CEB) You won’t need to edit all of these, and if you’re only modding tracks you won’t need the CDB or CEB files (although it may be possible to script events during the race by using cutscenes, but I haven’t tried anything like that yet). I’ll try to keep this simple. Once you start playing with these files you might realise that there’s a lot of cool stuff you could do so I’m not going to try to cover it all. 1. Moving objects This is probably one of the easiest ways to modify a track. I’ll go through an example of how to do this, and the same method should work for any object on any track. For every section of this guide, I’ll be working with Imperial Grand Prix. To demonstrate how to move an object, I’ll start with something small and simple - some boxes. There’s a few crates in the corner here. I’m going to try to move them to the right a bit. To do this, I need to open the .WDB file for Imperial Grand Prix. This is the “scene” file and it determines which objects are in the scene, and where they are placed. You may find that there is more than 1 WDB file, and in fact Imperial Grand Prix has 5. The one you want should be the biggest WDB file. You can see here that TEST.WDB is the biggest file, and this is the one I’ll be editing. Now you need to open the WDB file with origamiguy’s binary file editor. When you do, you’ll see something that looks like this: In the “GDB files” list, you should be able to find the model you want. I can see “boxes” in there, so I assume that’s the one I want. Underneath these file lists are “static models” and “animated models”. You need to find your model in there so either look for it yourself or press CTRL+F and search for it with the name listed under GDB files. You can see the listing for the “boxes” model in the middle here: The only part I’m interested in at the moment is the position of the boxes. This is determined by this part of the code: k_31 // Position (float)-316.3805 (float)-591.2501 (float)-66.41721 Those 3 numbers are the x, y and z coordinates of the model. To demonstrate this, I’ll borrow a couple of images from RobExplorien’s start and power-up position tutorial. All you need to do to change the position of an object is change these coordinates. I won’t be worrying about the z position because I only want to move the boxes along a flat surface. But how do I know how much I need to change the x and y values? Well, there’s a couple of ways to do it. The first is good old trial and error (and this is what you’ll need to do if you’re moving an object not on a drivable surface). I could just change the values a bit, then launch the game and see how it looks, then change them again until I’m happy. But a much easier way to do it is to use grappigegovert’s coordinate viewer that I linked at the start. I’m going to use the coordinate viewer. You need LEGO Racers to be running for it to display anything, so you can either run the game in windowed mode or ALT+TAB to switch to the viewer while you’re playing. I’ve driven a little bit further and I’m going to try to move the boxes to where I’m parked right now. You can still see the boxes in their little corner there. I’ve switched to the coordinate viewer: The location coordinates now show the x, y and z values for the position of my car. I’m going to copy the x and y coordinates straight across to the WDB file. Hopefully, this will move the boxes to the current position of my car. Let’s see if it worked. I’ll save and overwrite the WDB file, close the game and rebuild my JAM. Then I’ll launch the game again and see where the boxes are now... Well, the boxes are no longer in their original position. This looks promising (note - the collision mesh is unchanged, if you drive into that corner you’ll bump into invisible crates, you can edit the collision files if you want to try to change things like that but I won’t be covering it here). There they are! Exactly where I wanted them to go (note - because the collision files haven’t been changed, you can drive straight through the model). That’s pretty much all there is to it when it comes to changing the location of objects. You can change the z coordinate to move things vertically in the same way, and you can change the rotation values too. For example, this is the result of increasing the z coordinate and making up some random rotation values: Just try messing around with these values and see what you can do. 2. Copying objects Now that we’ve been able to move objects around the track, we can try duplicating them. I’ll go back to my Imperial Grand Prix boxes, still floating in the air from the first part of the tutorial. Because you can never have too many floating boxes, right? This, again, requires editing the main WDB file. Open it up and find the model you want to copy. In my case, that’s “boxes” under “static models” again. In order to copy the model, I need to copy the “boxes” entry and paste it as a new model listing. I’ll just paste it underneath the original. But now we have 2 models called “boxes” and the game won’t like that at all. So I’ll save it some confusion by calling the copy “boxes2”. You can call the model whatever you want. Now, you may think it’s just a case of repositioning this copy, but there’s one thing you need to remember to do. Scroll back up to the start of the “static models” or “animated models” list, depending on the type of model you’re using. You’ll see a code that looks something like this: k_2E // Static models [19] The number in square brackets tells the game how many models of that type are in the scene. By default, Imperial Grand Prix has 19 static models. Because I’ve just added a new one, I need to change this number to 20, like this: k_2E // Static models [20] These square bracketed numbers are very important and appear in all the binary files. If I left my static model number as 19, the game would insert the first 19 models in the list and ignore the last one. And if you set the number too high, the game will crash and you’ll get a syntax error message. It’s such an easy thing to forget, but it’s vital that this number is correct to ensure everything works properly. (Note - on the subject of error messages, pay attention to them. More often than not, when you crash the game by messing with these files, you’ll get an error message that should help you understand exactly what went wrong, or at least the file that caused the problem) Now that I’ve copied the model and updated this number, the level should load both copies of the boxes model. But they have the exact same coordinates so they’ll just be on top of each other and you won’t be able to tell there’s more than 1. So I’ll open up the coordinate viewer again and use the process I described in part 1 of the tutorial to move the second boxes model. Et voilà! 3. Copying objects from other tracks I’m quite proud of the floaty box environment that I’ve created so far. But wouldn’t it look much cooler with the addition of...a UFO? Of course it would! So let’s get to work. Now, this is where things start to get a little more complicated. So far the only file we’ve needed to edit is the main WDB file for the track we’re using. Unfortunately, the number of files we need to mess with to insert an object from another track is...well, more than one. Once you’ve decided on an object to copy into a track, you’ll need the files that make up that object. So open the folder for the track that this object was originally in (the folder names are listed in the first post) and start by finding the GDB file of the object. If you’re not sure what it is, you could use the process from part 1 to move objects around and work out which is which. The object I want to use is the big UFO from Alien Rally Asteroid that hovers in place just before the finish line. The ARA folder is RACEC2R3 so I’m going to open that and sort the files by type to find the GDB files. The one I want is UFOHOVER.GDB. Once you know which GDB file you need, open it with the binary file editor. You’ll see a list of “materials” at the top. These materials correspond to textures and solid colours that the model uses. Either leave this window open or make a note of the materials listed here. The list for my UFO looks like this: k_27 // Materials [7] { "araufo1" "araufo2" "araufo3" "araufo4" "araufolg" "arawndow" "plainmat" } Now that you know what materials you need, you’ll need to open the track’s main MDB file (the track you’re copying the object from). This will be called COMBINED.MDB, and it lists all the materials used in the scene. Look through the file (or use CTRL+F) for the materials listed in the GDB file and copy them into a word document or something (you can copy them straight into the other track’s MDB but it might be easier to do it this way first). You should end up with a list of materials like this: All of these apart from “plainmat” reference a texture. Plainmat appears to be a solid colour material that appears in other tracks but is not always the same colour in every track. Find the plainmat material in the COMBINED.MDB file for the track you want to copy the object into and see what values it has. In my case, Alien Rally Asteroid has the same plainmat colour as Imperial Grand Prix, so I don’t need to copy it into IPG. If your destination track has a different plainmat colour to your source track, try the following: 1. Copy the source plainmat material code into COMBINED.MDB for the destination track. Do not overwrite the existing plainmat. 2. Rename the plainmat you just copied to “plainmat2” 3. Copy the GDB file you’re using into the desination track’s folder and edit it so that its material list includes “plainmat2” instead of “plainmat” If you do have to do that, make sure you update the square bracket number in the MDB accordingly, and don’t overwrite your edited GDB file with the original when I tell you to copy the model files later. Now you’ll need a list of the textures that match the materials you just found. Each material lists a “texture name” and these are the things you’ll be looking for. The texture name and material name will not always be the same, so be careful. Open the COMBINED.TDB file in the source track. This lists all the textures used by the materials in the scene. You need to find all the texture files that correspond to your object’s materials, so go through the file the same way you went through the MDB file, and copy the texture codes. Here are the ones I need: You should have a list of material codes, and a list of texture codes. You now need to copy the material codes into the COMBINED.MDB file of the destination track, and copy the texture codes into the COMBINED.TDB file of the destination track. Remember, if the plainmats are the same you don’t need to copy that one, and if they’re different and you’ve already added a plainmat2 material, don’t copy it again. Make sure you know how many materials you’ve added, and how many textures you’ve added, because you need to update the numbers in square brackets at the top of each file. I’m copying 6 materials and 6 textures, so I need to add 6 to both numbers. Save both files when you’re done. Now the game will know which textures to look for when loading the model. But it doesn’t know how to load the model itself yet, so we need to start editing the main WDB file (for the destination track). Near the start of the file, you’ll see 3 lists - GDB files, SDB files, and ADB files. The GDB files are the 3D models. If you’re copying a static model (or an animated model that you don’t want to be animated), you only need to worry about the GDB. For an animated model, you’ll need all 3. I already opened my GDB file earlier to find the materials, so I know the one I want is called UFOHOVER.GDB. This means I need to add “ufohover” to the list of GDB files, like so: (make sure you add it to the bottom of the list or it will mess everything up) I also need to add 1 to the bracket number, so it’s now [21]. If you’re using an animated model, add the same filename to the SDB and ADB lists as well (and update the bracket number!). Once you’ve added the files to these lists, you need to add your model to either the “static model” or “animated model” section (and update the bracket number for that section!!!). You can type the code out yourself but it’s easier to copy it from the source track’s WDB file. This is similar to the “copying objects” part of the tutorial. This is what my model code looks like: k_2F // Animated model "ufohover" { k_33 // GDB/ADB/SDB reference 6 2 2 (float)800 k_31 // Position (float)-637.4066 (float)-124.6511 (float)219.7383 k_32 // Rotation (float)1 (float)0 (float)0 (float)0 (float)0 (float)1 k_35 0 } If you’re using a static model there will be a couple of parts missing - the ADB and SDB references, and the k_35 part which tells the object to animate (if you’re copying an animated model from a cutscene, it won’t have the k_35 code, so you’ll need to add this part yourself). The 3 numbers under the “GDB/ADB/SDB reference” heading determine which files the model uses. These will probably be wrong, so you’ll need to change them. They refer to the GDB, ADB and SDB lists at the start of the file. Each number is that file’s position in the list. But it is very important to note that in these lists (and other lists like these in these binary files), the first item in the list is number 0, the second is 1, the third is 2, etc. So if you wanted to use the 10th file in the list, that would be number 11. Work out which numbers you need by counting (starting from 0) the position of the files you’re using in each list. The ADB and SDB numbers should be the same. You should have added the filenames to the bottom of the lists, so the ones you want will be the number of files in the list - 1. If you added more than one model, you’ll need to work it out yourself. There are 21 files in my GDB list, and ufohover is at the bottom, so that’s number 20. Here is my model code with corrected file references: k_2F // Animated model "ufohover" { k_33 // GDB/ADB/SDB reference 20 8 8 (float)800 k_31 // Position (float)-637.4066 (float)-124.6511 (float)219.7383 k_32 // Rotation (float)1 (float)0 (float)0 (float)0 (float)0 (float)1 k_35 0 } Apart from moving the object around, that should be all you need to do with the WDB. All you need to do now to get the object into the scene is to copy its files from the original track. These will be the GDB file, ADB and SDB files if it’s an animated model, and the textures. If you can’t remember the filenames, have a look through the WDB and TDB files again to remind yourself which ones you added. These are the files I’m copying: Copy these into the folder of the destination track. Everything you need should now be in place, and the object should be loaded into the track. I won’t go over how to reposition it again. If everything worked, your model should now be in the track you want it to be. If something went wrong, like I said earlier - pay attention to the error messages. Check you’ve copied all the textures and check all the square brackets - it’s probably something small. You should be able to insert and move different models in tracks by using the information I’ve given so far, but there are a couple of things to note. Models will often not be textured all the way around, because they are usually only viewed from a certain angle. The bottom or back of objects may be invisible so you should keep this in mind when inserting them into tracks. Another thing is getting minifigs into tracks. They can be awkward to work with and position, much more than other objects. Some seem to be easier to use than others. I easily managed to get a dancing King Kahuka into a track, but the best I could do with Johnny Thunder was having him fly around in the sky. You might need to experiment a bit. 4. Cutscenes Now that I’ve been through how to modify scenes, let’s look at a special type of scene - the cutscene. There are several cutscenes in the game and I listed the folders for them in the first post. They contain WDB files just like the tracks, but they also have CDB and CEB files. CDB files include things like the models and cameras, CEB files contain transitions, sound effects and subtitle events. As this is a “scene modding” tutorial, I’ll be focusing on the CDB files. I’m going to copying a model from one cutscene and inserting it into another. Specifically, I’m going to copy King Kahuka from his circuit cutscene to Captain Redbeard’s circuit cutscene. It should work for any object, just like with the track models. Firstly, you’re going to need to copy the model’s files and edit the WDB, MDB and TDB files the same way as in the last part of the tutorial. As far as I can tell, when you’re working with a cutscene, the model location coordinates in WDB are completely ignored, so don’t bother trying to change them. They are controlled in the CDB file instead. The Kahuka model I want is located in CIRCUIT2, so I’ve copied his model files and textures into CIRCUIT1 and edited the binary files accordingly. The only issue I found was that CIRCUIT1 already had materials called “torso” and “legs”, so I renamed Kahuka’s materials to “torso2” and “legs2” in the MDB and GDB. If you’re copying a character model and you want the face to be animated the same way as it was in its original cutscene, you’ll need to edit the MAB file. This also applies to other animated textures, but so far I’ve only tried faces. It should be a similar process. If you don’t want/need animated textures, you can skip this step. The MAB files contain all the frames for animated textures used in a scene. King Kahuka wears a mask and so does not have a very visible face during the cutscene, but his face is animated nonetheless so I’m going to copy that animation across. To get your model’s original animated texture frames, open the MAB file for its folder in the binary file editor. You’ll see something that looks like this: You can see the names of different materials listed here, with frame numbers in between. This determines which texture is shown, and when. You can edit these if you want to but to keep things simple I’ll leave mine as they are. The bottom part of the file contains the animation sequences that use those frames. I’m going to copy the frame list and paste it into that part of the MAB for CIRCUIT1, and I’ll copy the animation sequence and paste it into the animations part of the MAB. Make sure you paste them at the bottom of their sections. You’ll need to update the square brackets for both parts. At the moment, my game would use Captain Redbeard’s expressions for King Kahuka, and I don’t want that. Have a look at the k_27 part of the animation sequence entry. It will look something like this: k_27 // Material Frame(s) 0 15 This tells the game which frames to use in the animation. The first number represents the first frame of the animation (again, starting from 0). The second number is the number of frames in the animation. To correct the first number, count the position,starting from 0, of the first frame of the list you just copied. It’ll be the one with a 0 underneath. Then count how many frames are in the animation, including the first. In my case, the first frame of Kahuka’s animation is 14. You shouldn’t need to change the second number unless you’ve added or removed frames. So now my k_27 looks like this: k_27 // Material Frame(s) 14 15 The game will still play the first sequence instead of this one, but we’ll fix that in a moment. Now you need to open the CDB file in the folder where your model came from. This is the one for CIRCUIT2: Scroll down until you find the entry for your model. It will look something like this: k_2E // Model(s) "dummy00" { k_30 // Model Name "dummy01" k_34 // Model Rotation (float)0.999048 (float)-0.043618 (float)0 (float)0 (float)0 (float)1 k_2D // Animation Sequence ID 0 k_33 // Model Location (float)33.26736 (float)-35.13164 (float)-8.161795 k_2B // Start Frame 0 k_2C // Duration (or end frame if this is on a light) 480 k_36 [1] { 0 0 0 1 0 } } Static models, and models without material animations will not have all of these sections. Copy the entry for your model and paste it into the CDB of your destination cutscene. Remember to update the square brackets under “k_2E // Model(s)” at the start of the model list. As I said earlier, the coordinates listed in the CDB file are the ones used to position the models. But before you do that, if your model has an animated material we’ll need to tell the game which sequence to use. Look at the k_36 part of the code: k_36 [1] { 0 0 0 1 0 } The number we’re interested in is the third one. This determines which sequence to use for the animated material (I don’t know what the other numbers do). If the animated you added to the MAB was the second in the list, you’ll need to use a 1 here. This is my updated K_36 code: k_36 [1] { 0 0 1 1 0 } Now the only thing left to do is to change the model’s position in the cutscene (not in the WDB!). We can’t use the coordinate viewer here because it’s not a track we can drive around, so look at the other models for reference. I’m going to copy Redbeard’s location and rotation values and paste them over Kahuka’s. Then I’ll change either the x or y coordinates slightly and see what that does. This is the result of having Kahuka +5 on the x-axis from Redbeard: And that concludes this tutorial. From what I’ve covered you should be able to add models into any scene. The possibilities of what you can do are much more than just the things I’ve shown here, so experiment with the files and see what kinds of crazy stuff you can do. By messing with the binary files you can remove or replace models, change camera angles and timings...there’s probably not much you can’t do with a bit of trial and error. I’m sure you can come up with something a bit more creative than a UFO in a pirate level If you have any questions or problems, feel free to ask, but I’m not sure if I’ll be able to help. It really is just a matter of experimentation.1 point -
30 Screenshots #2: The Infomaniac's Revenge
Brigs reacted to legoracer91 for a topic
Out of 138 Only 30 recieved this fate To enter in 30 Screenshots 2 Which I present to youuuuuuu: No, not the LI2: Brickster's Revenge... 30 SCRENSHOTS 2: THE INFOMANIAC'S REVENGE!! Yay. Yay. EDIT: 300 Views, 30 Screenshots #3! Check it out: '?do=embed' frameborder='0' data-embedContent>>1 point -
BoB Rock Raiders Vehicles
Lind Whisperer reacted to Fush for a topic
First note: BoB is an acronym I personally use, standing for Back-of-the-Box or Back-of-the-Booklet, for those models that are shown on the back of a LEGO set's box or booklet that serve as 'idea' models and lack instructions. I don't know if there is an official or fanon term for these models but that's what I call them. I wanted to recreate some of the BoB models from the Rock Raiders sets, so I found some instructions online and took a shot at it. However, only the RRHQ set had BoBs on it, and the pictures were incredibly low-res, but I did my best. The images I was working from can be found here, on the last three pages. Here we go. Note that all these names are made up by me, feel free to suggest better ones. Tall Dumper This one is I'm about 90% certain about. It was one of the clearest pictures, and was shown from two angles. I find it interesting, but I don't like it much. Side Dumper This one I'm less certain about, but it seems relatively accurate. This is a truck, similar to the Small Transport Truck, but with a larger bed and which dumps to the side (obviously) Small Mobile Crane this one was the smallest, blurriest picture, so it's probably the least accurate, but also the one I'm most proud of. I like this model, but it doesn't seem balanced. IT looks like it'd fall over all the time. Blue Hover This one was the clearest picture, so I'm certain it's almost completely accurate. A boring blue hovercraft. Energy Craft This one gave me trouble, as the picture is a little confusing, but eventually I figured out exactly what was going on (the box on the left wing is open, which threw me off). The 'cockpit' is too blurry to see, but the rest of the craft I'm certain of. Landing Craft This was another really small image, I had to improvise a bit but the bulk of it is accurate. I have no idea what's going on in the front though. So what do you guys think?1 point -

Alpha Sapphire, and Omega Ruby
RockRaiderWolf reacted to Nishliau for a topic
Since this was just announced, I'm feeling 1000 times more amazing. Gen 3 is best gen.1 point -
MaelstromIslanderLDD
Yajmo reacted to MaelstromIslander for a gallery image
From the album: MaelstromIslander's LDD Creations
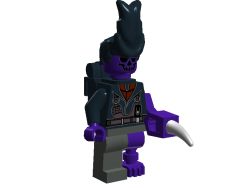
A signature figure of myself. Feed me your snacks.1 point -

◄[LR2] Voiced Scripts►
Quisoves Potoo reacted to Fluffy Cupcake for a topic
I was going to put some voices in the game today, but when I went over your lines ...ouch! Some ear breaking parts. You clipped the sound! This is in your Slyboots line: See how the audio goes over the top and bottom of the box? That's the problem. The word being said there is "Sanister". Actually, the first word said on there is on the verge of clipping too! This also happens on Geoff's Dinosaur's line. I think everything else is okay. I originally was going to just send this in a private message, but I figured it would be good for everyone else to learn at the same time too.1 point -

Extracting the videos
Brickulator reacted to le717 for a topic
Or, you know, check the project's website. http://panzi.github.io/mediaextract/1 point -
Xirp Dnarg Lairepmi
aidenpons reacted to Cyrem for a topic
I can just hear the words of the other dude as you fly past: 'Stuff you Tommy' *fist shake*1 point -
Alpha Sapphire, and Omega Ruby
aidenpons reacted to Fush for a topic
>The hype is real. >I was convinced it would never happen, but it did. >The hype is real >How dare you refer to the games out of order? Ruby is always first. >The hype is real. >Speaking of, I guess the new abbreviation is ORAS. >The hype is real. >I'm actually looking forward to these. >The hype is real. >I'll probably get Alpha Sapphire. Blue is my color. >The hype is real. >I wonder if they will incorporate elements of Emerald the way that HGSS included some elements form Crystal? >The hype is real. >I also wonder if you will be able to customize your trainer like in XY? I hope this becomes a standard feature of the series, but on the other hand RSE already has preset characters. >The hype is real. >How much you want to bet the secret bases will make a return with streetpass functionality? >The hype is real. >Excited to see Hoenn in 3D. >The hype is real. >They will probably add new areas. This will be interesting. >The hype is real. >THE HYPE IS REAL.1 point -
King Kahuka Artwork
Yajmo reacted to MaelstromIslander for a gallery image
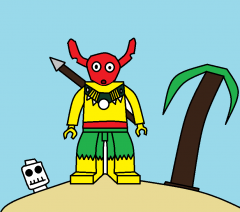
From the album: Artwork
This, is, awesome.1 point -
Tahu Mata Set
Yajmo reacted to MaelstromIslander for a gallery image
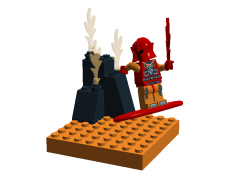
From the album: MaelstromIslander's LDD Creations
LEGO BIONICLE Playsets, just with actual minifigures.1 point -
Blacktron Spider Walker
Commander Cold reacted to MaelstromIslander for a gallery image
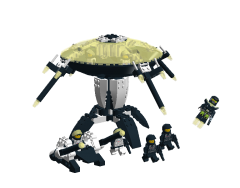
From the album: MaelstromIslander's LDD Creations
Ever wanted to mix Blacktron 1 and 2, and use the design of Insectoids?1 point -
Trolling Pizza
Yajmo reacted to MaelstromIslander for a gallery image
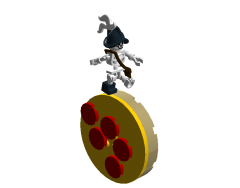
From the album: MaelstromIslander's LDD Creations
One of the most annoying this on the race track.1 point -

RRU Quotes 2: Reckoning
Alcom Isst reacted to STUDZ for a topic
[18:55:47] jamesster: '?do=embed' frameborder='0' data-embedContent>> I'm in this topic again [18:56:46] Alcom Isst: What if someone bumped the topic? [18:57:12] McJobless: I'd send f****ing hornets to their grave. [18:57:39] Alcom Isst: Why would they be in a grave? [18:57:46] jamesster: because of the hornets [18:58:23] Alcom Isst: I was hoping for a more "because I killed them with hornets". [18:59:14] McJobless: Because they'll have a heart-attack because of how funny the topic will become, and then when my hornets grow up to be too old to take care of, I'll send them to that grave. [19:00:00] Alcom Isst: Thinking of things I could type. "In 2014 this topic is still not funny." "I miss Lair" "hi" [19:02:45] Alcom Isst: I WANT TO DO IT! I WANT TO REPLY TO THIS TOPIC! But no... I have too much self control.1 point -
Battletech Loki Prime
aidenpons reacted to Alcom Isst for a topic
Battletech has giant mechs which I love and it makes me want to recreate them in LEGO so I built this. Images link to the Bricksafe page. LDD File1 point -

What are you listening to right now?
Ayliffe reacted to McJobless for a topic
https://www.youtube.com/watch?v=M6PIZ0kSgNw May the Fourth Be With You.1 point -
The LEGO Movie Franchise
Wognif reacted to STUDZ for a topic
Well, frankly put, it won't be as big. Honestly, TLM was a great advertisement which was disguised. It was created as a glorified commercial, and the guys put in charge of making it decided to go the extra mile. Do you see ANY of them on the production team for the sequel? No? Exactly. Now, I'm not saying TLM2 will be BAD. It just won't be as big. I mean, look at The Adventures of Clutch Powers. It was by its very nature a commercial. I only watched it because it was LEGO. Do people remember it, even when TLM was still in pre-production? Not really. Should they watch Clutch Powers? Probably not. TLM was, by critics' standards, a "decent" film. The only reason it took off like it did is because of what its core was: LEGO. It was the first of its kind, and it was carefully and lovingly made by people who cared about both the product and the making of the film. If you took out the LEGO in The LEGO Movie, what do we have? A B-rated cartoon which would otherwise be forgotten before a couple years. People will catch on to this and move on. Or maybe they won't. You see the Marvel films? They are currently the SECOND largest movie franchise (Recently beating James Bond and second only to Harry Potter). These films have a deep, interesting plot to them. TLM was no more than fan service done well. Like I said, without the LEGO, most of us wouldn't even be talking about it, on ANY social medium (or even have WATCHED it). Basically, what I'm saying in this late hour is that TLM won't be a HUGE franchise. We'll have the sequel, some sets, and that's it. TLM can become too much of a good thing. It might take off in a completely consumer-oriented way (like the LEGO TT games), with the masses blindly buying the same reheated formula under a different name. Maybe the new producers and director will continue to do TLM justice. It's too soon to put the chips down yet. What I am saying is, if TLM becomes a massive franchise, it's all thanks to it being just that: A LEGO movie. Something people wanted, and now that it's been delivered, the novelty is gone. Make too many sequels and spinoffs, and TLM will feel more thrown in one's face than something enjoyable. LIKE THE TT GAMES. TL;DR? The masses will mindlessly consume any and all TLM sequels and spinoffs, but I won't expect ANY of them to have the same impact the original did.1 point -

TT Games Explorer
le717 reacted to Ac_K for a topic
It´s a ASM dump (and patch) of the uncomp functions in the games executable. But I don't do the reverse, you can find this functions in the QuickBMS source, I just take and put them info a DLL. (Credited in "About" in my tool). I certainly do my tool open source and put the sources on GitHub but right now I prefere don't show you my ugly source code ^^, I need to clean them and rewrote many function more readable!1 point -
TT Games Explorer
le717 reacted to Ac_K for a topic
I need and I want help, to support me because I already do more Games Tools (OpenIV by example) and I know after few times alone, we are broke to code ^^! So if we do a team with many peoples who search files format or other things, it's will be good... Any people who can help me is credited in my tool, I don't want steal any informations or anything else! .nxg_textures files are DDS Library, there a stack of DDS files in it, but before there is filenames and other informations That's what I'm talking about! News of TT Games Editor: I be able to decompress DFLT files, so I can read .tex files an other formats who compress with. So, I wrote the DDS preview: You can extract the picture in PNG, to modify the picture just use Photoshop, I think I put a help message in the Preview Window... Tomorrow, I certainly check the main functions, to do what's missing and I release the first beta version after that!1 point -
Additional Brick Colors Mod
TheStranger reacted to UTF for a topic
I hope it's alright with you Oboe Shoes, but I went ahead and added a lot more colors using your modified .LEB files as a base. Here's an updated list of parts that are now included: Default Bricks: None Default Race: None Default Space: 5 "1x2 tile with Handle" bricks (Black/Light gray/Green/Beige/Brown) Default Castle: 4 castle flags (Beige/Brown/Light gray/Dark gray) Captain Redbeard: Racing brown flag King Kahuka: 2 Light gray corner bricks. Basil the Batlord: 15 brown bricks (Basic bricks, corner bricks, spoiler).. Johhny Thunder: 11 beige bricks. Beige corners, spoiler and flag in the next set. Baron von Barron: Beige corners, spoiler, and flag + 8 "3 x 6 without corner" bricks (Red/Yellow/White/Light gray/Dark gray/Green/Beige/Brown) Gypsy Moth: 7 inverted slopes (Blue/Red/Yellow/Black/Green/Black/Beige). Rocket Racer: 17 dark gray bricks (Basic bricks, corner bricks, inverted triangle, spoile, racing flag). Veronica Voltage: 16 green bricks (Basic bricks, corner bricks, spoiler, racing flag). Most notable are the inclusions of brown and dark gray colors! Download1 point -

The Greatest "Sonic the Hedgehog" MOC
Brigs reacted to PeabodySam for a blog entry
With the latest version of LEGO Digital Designer including some new pieces, I was finally able to truly capture the likeness of everyone's favorite blue hedgehog. Marvel at how incredible it is. Forget Mad Jack and Dino Attack Headquarters, this is easily the greatest MOC I have ever created. Possibly even the greatest MOC in the world. The greatest Master Builders only wish they were skilled enough builders to create something as incredible as this.1 point -
Intro Cutscene Mod - Paradise City
le717 reacted to Jimbob for a topic
Adding on to this, I've had a go at making a custom cutscene for the intro. It's nothing fancy though, it just shows that it can be done To test it out, copy the script below into any of the four 'TRACK#INTRO' files, which are located in all the world's script folders other than Sandy Bay's. Unfortunately, characters such as Sparky cannot be used in these cutscenes as they don't actually appear in them. But if you're hoping to do a track preview then you shouldn't need that anyway.1 point