
Leaderboard
Popular Content
Showing content with the highest reputation on 09/25/2014 in all areas
-

Makava (Bionicle MOC)
aidenpons and 2 others reacted to Ayliffe for a topic
MAKAVA. Makava is a very strange Toa. Not much is known about his origin, but according to him the first thing he remembers is a vision of an immaculate white boardroom, surrounded by 'set designers' talking about whether to release him as an 'exclusive set' or not, but in the end he was dropped, at which point he suddenly woke up in a cave with no memory of the rest of his life except for one crucial fact: that he was just a character in a popular toy range, and that he was axed at an early development stage for being 'too overpowered'. On that day he also gained a strange voice in his head, which only he could hear. This voice said he was a set designer for BIONICLE, and that only Makava could hear him because of a mental link between them for some reason. No-one really knows this Toa's element, but Makava himself claims he is "The Toa of fourth-wall breaking", but some Matoran believe he is actually "The Toa of Laziness" as he doesn't really do much other than relax and, in his own words "sit on his fat arse all day", but occasionally he does help the other Toa protect Mata Nui, mainly to prove to the voice in his head that he is worth producing as a proper set someday. More pictures of Makava looking awesome here! Enjoy!3 points -

The Vending Machine
STUDZ and one other reacted to le717 for a topic
You get *Inserts IXS CD*2 points -
Mr Phoenix: 'LLANFAIRPWLLGWYNGYLL'
Fush and one other reacted to Ayliffe for a blog entry
FUN FACT: Llanfairpwllgwyngyll in Wales has the longest placename in Europe. It's also the only interesting fact about Wales. :P2 points -
Insane Raiders [2022-12-29: Occasional updates are still happening!]
Starrocks923 reacted to Arthuriel for a topic
Update (2022-12-29): I don't know how often I will use this forum, but I just wanted to write that once in a while I still make Insane Raiders themed comics. They are simpler (more like a sketch) and without colour, but they are still full of dubious decisions related to dynamite and landslides! Since I posted those only in Discord chat rooms etc. so far (where they can go under) I wanted to put them in one place and so I added them to my existing Insane Raiders gallery on DeviantArt. I hope you enjoy them! https://www.deviantart.com/arthuriel/gallery/50994783/insane-raiders Note: It can take a few seconds to load all the comics (depending on your internet connection). Hi, this is a thread, where I will try to continue a comic series every or every second week (note: replace week with month(s)). Usually they are based on my experiences with the Rock Raider PC game and the behavior of the Rock Raiders (including a good portion of insanity and exaggaration). Number 1. Dynamite Number 2. Pathfinding Number 3. Reinforcement is for Losers Number 4. The Pain of Pictures Show Number 5. Badly needed professions and items Number 6. Job oppurtunities Number 7. Secrets Number 8. An unnormal day Number 9. Randompunk-Raiders Number 10. Alternative Ending Number 11. Mindless in space Number 12. Traffic Number 13. Lazor-Madness Number 14. Lazor-Madness II Number 15. The Dark Side of the Vector Number 16. Meet the Bandit Number 17. Dynamite-Madness Number 18. The Ultimate Punishment Number 19. Ore Wars Number 20. Announcements1 point -
LEGO Racers Custom Audio
Rock Monster reacted to le717 for a topic
History This post was written almost a year and a half before I came along and began expounding on his research. Around October 2, 2011 I started on my hunt for a convertor for .TUN files. I found out that is no such audio file. The file type had actually been known since bartvbl made that post: VOX. The LEGO Racers music is actually VOX audio with a TUN extension. I soon found a command-line program that was able to convert normal (MP3, WAV, such like that) to VOX, namely, Sound eXchange (SoX). I found a piece of music that I liked, and converted it. I sapped it in the game files, and gave it the proper name. I loaded the game, and the music played. But it was really low in volume, and it was really, really slow. I figured out that the file hertz was what made the file slow. I raised it, converted the music, and loaded the game again. This time, it was even slower. I lowered the hertz next, and to my surprise, the music went faster! I finally found the right hertz after a few more tries. During this process, I discovered an interesting... issue, for lack of a better word. The higher the hertz of your custom music, the slower it will play in game.The lower the hertz, the faster the music will play. The real music was produced at 44100 Hz, and it plays at the correct speed in Audacity when imported However, the custom music has to be produced at 22050 Hz to play correctly in-game. Once I figured that out, I started working on the volume. I said earlier that my music was way too low in volume in-game. Combined with the fact that the official music was loud in raw form, I deduced out that the game lowers the volume of the music. I tried amplifying the music in Audacity, but every time I did that, I got an error from the SoX that it was really loud, and that it lowered the volume. When that file was put in-game, the audio volume would be in flux: It would be loud for a second, then low for a while, the loud again. I found out that the convertor lowered the really loud parts, and the lower parts that were not too loud, it left alone. I tried to amplify the music using the tools built into SoX, but that did not work. Amplifying in both Audacity and SoX did not work either. The result was the same: the music volume was in flux. rioforce (my brother) had been watching me every now and then, and of course I told him what was going on and what was happening.. He said he might know what was going on. The raw files, are very load when imported but, the waveforms are all the same: flat on top and bottom. rioforce suggested this: Amplify the music, normalize it, then export the file and convert it. I did that, and the results were better than what I was doing before. SoX did not give me an error, and the music was not in flux in-game. I figured out a SoX command so the amplified music would not be clipped when being converted. Using that command, I got good results too, though not as good as amplifying then normalizing. In addition, with the command, the converted music was not distorted in-game, unlike the other method. In the end, I chose to use the command over the amplifying and normalizing. After being amplified and normalized, some of the music I choose was back to its original volume, and completely wiped out my changes. Fast-forward to the third week of February 2012. I had found out the month before that Audacity could export VOX files in addition to importing them, but it was very flaky. Sometimes it worked, sometimes it didn't. I had decided to wait for the next release of Audacity to update this tutorial to use only Audacity. But Audacity updates were spread far out, and I didn't really want to wait for the next one. So I started messing with VOX exports again, and I got it to export every time, even though I got a phony error message most of the time. I tested my files, and they did worked in LEGO Racers, a bit better than using SoX, but not perfectly. I proceeded to update this tutorial with the new info and method. On April 29, 2013, rioforce began looking at creating working custom music for Racers. He actually had been developing a method for a few months, and had actually uploaded a video showing off his WIP method. But on the 29th, he really began finalizing that method. Once he had the proper settings, he recorded a video showing how to do it, and wrote up a new tutorial on LEGO Racers Audio Modding, releasing it all on April 30, 2013. The next day, May 1st, I updated the tutorial here, ushering in a new and very nosy wave of LEGO Racers modding. Directions Note: the following tutorial was written in the voice of rioforce. Anytime "I" or a similar reference is used, he is referring to himself. Videos1 point -
Tutorial: Scene Modding and Object Moving
ShadowDraikana reacted to Brickulator for a topic
LEGO Racers scene modding tutorial In this guide I will explain how to edit the various scenes in the game, such as tracks and cutscenes. This will include placing and moving 3D objects and animated models. There are a couple of tools you’ll need so if you don’t already have them, download them here: LEGO.JAM file extractor Binary file editor You may also find this tool useful to help with positioning objects in tracks: In-game Coordinate viewer The first thing you’ll need to do, if you haven’t done so already, is extract the LEGO.JAM file. You can find instructions on how to do this in the LEGO.JAM file extractor thread I linked above. I’d recommend copying LEGO.JAM to another folder first and working on it there, since your computer might shout at you if you try to work within Program Files. Once you’ve extracted the JAM file, you’ll have a folder called LEGO, and inside it, 2 folders: GAMEDATA and MENUDATA. In terms of scenes, GAMEDATA contains the tracks and MENUDATA contains the cutscenes. The track folders are named as below: Imperial Grand Prix - RACEC0R1 Dark Forest Dash - RACEC1R0 Magma Moon Marathon - RACEC0R3 Desert Adventure Dragway - RACEC0R2 Tribal Island Trail - RACEC1R1 Royal Knight’s Raceway - RACEC0R1 Ice Planet Pathway - RACEC1R3 Amazon Adventure Alley - RACEC1R2 Knightmare-athon - RACEC2R0 Pirate Skull Pass - RACEC2R1 Adventure Temple Trail - RACEC2R2 Alien Rally Asteroid - RACEC2R3 Rocket Racer Run - RACEC3R0 Test drive track - TEST And the cutscene folders are these: Captain Redbeard intro - CIRCUIT1 King Kahuka intro - CIRCUIT2 Basil the Batlord intro - CIRCUIT3 Johnny Thunder intro - CIRCUIT4 Baron von Barron intro - CIRCUIT5 Gypsy Moth intro - CIRCUIT6 Rocket Racer intro -CIRCUIT7 1st place in circuit race - C_AWARD1 2nd place in circuit race - C_AWARD2 3rd place in circuit race - C_AWARD3 4th, 5th, or 6th place in circuit race - C_AWARD4 Win a car set - WINCAR Beat Rocket Racer - WINRRCAR Beat Veronica Voltage - WINVVCAR These are the main scene folders. The splash screen is also a cutscene (LEGAL) and there are cutscene versions of the standard FMVs in the PC demo and N64 version of the game (LEGOINTR, HVSINTRO, MAININTR). There are also a couple of other scenes from the character and car builders and the track selection screen (CB_SET, GARAGE, SINGRACE) if you want to do anything with those (every model of a track in the race selection screen, SINGRACE, is actually a cutscene as well). Now, there are a few important binary files contained within each of these folders, and you’ll need to edit these in order to make the modifications you want to. You can open and edit these files with origamiguy’s binary file editor that I linked to at the start. The types of binary files you’ll probably be working with are: 3D scenes (.WDB) Texture lists (.TDB) Material lists (.MDB) 3D models (.GDB) Skeleton structures (.SDB) Skeletal animations (.ADB) Material animations (.MAB) Cutscene files (.CDB) Cutscene event files (.CEB) You won’t need to edit all of these, and if you’re only modding tracks you won’t need the CDB or CEB files (although it may be possible to script events during the race by using cutscenes, but I haven’t tried anything like that yet). I’ll try to keep this simple. Once you start playing with these files you might realise that there’s a lot of cool stuff you could do so I’m not going to try to cover it all. 1. Moving objects This is probably one of the easiest ways to modify a track. I’ll go through an example of how to do this, and the same method should work for any object on any track. For every section of this guide, I’ll be working with Imperial Grand Prix. To demonstrate how to move an object, I’ll start with something small and simple - some boxes. There’s a few crates in the corner here. I’m going to try to move them to the right a bit. To do this, I need to open the .WDB file for Imperial Grand Prix. This is the “scene” file and it determines which objects are in the scene, and where they are placed. You may find that there is more than 1 WDB file, and in fact Imperial Grand Prix has 5. The one you want should be the biggest WDB file. You can see here that TEST.WDB is the biggest file, and this is the one I’ll be editing. Now you need to open the WDB file with origamiguy’s binary file editor. When you do, you’ll see something that looks like this: In the “GDB files” list, you should be able to find the model you want. I can see “boxes” in there, so I assume that’s the one I want. Underneath these file lists are “static models” and “animated models”. You need to find your model in there so either look for it yourself or press CTRL+F and search for it with the name listed under GDB files. You can see the listing for the “boxes” model in the middle here: The only part I’m interested in at the moment is the position of the boxes. This is determined by this part of the code: k_31 // Position (float)-316.3805 (float)-591.2501 (float)-66.41721 Those 3 numbers are the x, y and z coordinates of the model. To demonstrate this, I’ll borrow a couple of images from RobExplorien’s start and power-up position tutorial. All you need to do to change the position of an object is change these coordinates. I won’t be worrying about the z position because I only want to move the boxes along a flat surface. But how do I know how much I need to change the x and y values? Well, there’s a couple of ways to do it. The first is good old trial and error (and this is what you’ll need to do if you’re moving an object not on a drivable surface). I could just change the values a bit, then launch the game and see how it looks, then change them again until I’m happy. But a much easier way to do it is to use grappigegovert’s coordinate viewer that I linked at the start. I’m going to use the coordinate viewer. You need LEGO Racers to be running for it to display anything, so you can either run the game in windowed mode or ALT+TAB to switch to the viewer while you’re playing. I’ve driven a little bit further and I’m going to try to move the boxes to where I’m parked right now. You can still see the boxes in their little corner there. I’ve switched to the coordinate viewer: The location coordinates now show the x, y and z values for the position of my car. I’m going to copy the x and y coordinates straight across to the WDB file. Hopefully, this will move the boxes to the current position of my car. Let’s see if it worked. I’ll save and overwrite the WDB file, close the game and rebuild my JAM. Then I’ll launch the game again and see where the boxes are now... Well, the boxes are no longer in their original position. This looks promising (note - the collision mesh is unchanged, if you drive into that corner you’ll bump into invisible crates, you can edit the collision files if you want to try to change things like that but I won’t be covering it here). There they are! Exactly where I wanted them to go (note - because the collision files haven’t been changed, you can drive straight through the model). That’s pretty much all there is to it when it comes to changing the location of objects. You can change the z coordinate to move things vertically in the same way, and you can change the rotation values too. For example, this is the result of increasing the z coordinate and making up some random rotation values: Just try messing around with these values and see what you can do. 2. Copying objects Now that we’ve been able to move objects around the track, we can try duplicating them. I’ll go back to my Imperial Grand Prix boxes, still floating in the air from the first part of the tutorial. Because you can never have too many floating boxes, right? This, again, requires editing the main WDB file. Open it up and find the model you want to copy. In my case, that’s “boxes” under “static models” again. In order to copy the model, I need to copy the “boxes” entry and paste it as a new model listing. I’ll just paste it underneath the original. But now we have 2 models called “boxes” and the game won’t like that at all. So I’ll save it some confusion by calling the copy “boxes2”. You can call the model whatever you want. Now, you may think it’s just a case of repositioning this copy, but there’s one thing you need to remember to do. Scroll back up to the start of the “static models” or “animated models” list, depending on the type of model you’re using. You’ll see a code that looks something like this: k_2E // Static models [19] The number in square brackets tells the game how many models of that type are in the scene. By default, Imperial Grand Prix has 19 static models. Because I’ve just added a new one, I need to change this number to 20, like this: k_2E // Static models [20] These square bracketed numbers are very important and appear in all the binary files. If I left my static model number as 19, the game would insert the first 19 models in the list and ignore the last one. And if you set the number too high, the game will crash and you’ll get a syntax error message. It’s such an easy thing to forget, but it’s vital that this number is correct to ensure everything works properly. (Note - on the subject of error messages, pay attention to them. More often than not, when you crash the game by messing with these files, you’ll get an error message that should help you understand exactly what went wrong, or at least the file that caused the problem) Now that I’ve copied the model and updated this number, the level should load both copies of the boxes model. But they have the exact same coordinates so they’ll just be on top of each other and you won’t be able to tell there’s more than 1. So I’ll open up the coordinate viewer again and use the process I described in part 1 of the tutorial to move the second boxes model. Et voilà! 3. Copying objects from other tracks I’m quite proud of the floaty box environment that I’ve created so far. But wouldn’t it look much cooler with the addition of...a UFO? Of course it would! So let’s get to work. Now, this is where things start to get a little more complicated. So far the only file we’ve needed to edit is the main WDB file for the track we’re using. Unfortunately, the number of files we need to mess with to insert an object from another track is...well, more than one. Once you’ve decided on an object to copy into a track, you’ll need the files that make up that object. So open the folder for the track that this object was originally in (the folder names are listed in the first post) and start by finding the GDB file of the object. If you’re not sure what it is, you could use the process from part 1 to move objects around and work out which is which. The object I want to use is the big UFO from Alien Rally Asteroid that hovers in place just before the finish line. The ARA folder is RACEC2R3 so I’m going to open that and sort the files by type to find the GDB files. The one I want is UFOHOVER.GDB. Once you know which GDB file you need, open it with the binary file editor. You’ll see a list of “materials” at the top. These materials correspond to textures and solid colours that the model uses. Either leave this window open or make a note of the materials listed here. The list for my UFO looks like this: k_27 // Materials [7] { "araufo1" "araufo2" "araufo3" "araufo4" "araufolg" "arawndow" "plainmat" } Now that you know what materials you need, you’ll need to open the track’s main MDB file (the track you’re copying the object from). This will be called COMBINED.MDB, and it lists all the materials used in the scene. Look through the file (or use CTRL+F) for the materials listed in the GDB file and copy them into a word document or something (you can copy them straight into the other track’s MDB but it might be easier to do it this way first). You should end up with a list of materials like this: All of these apart from “plainmat” reference a texture. Plainmat appears to be a solid colour material that appears in other tracks but is not always the same colour in every track. Find the plainmat material in the COMBINED.MDB file for the track you want to copy the object into and see what values it has. In my case, Alien Rally Asteroid has the same plainmat colour as Imperial Grand Prix, so I don’t need to copy it into IPG. If your destination track has a different plainmat colour to your source track, try the following: 1. Copy the source plainmat material code into COMBINED.MDB for the destination track. Do not overwrite the existing plainmat. 2. Rename the plainmat you just copied to “plainmat2” 3. Copy the GDB file you’re using into the desination track’s folder and edit it so that its material list includes “plainmat2” instead of “plainmat” If you do have to do that, make sure you update the square bracket number in the MDB accordingly, and don’t overwrite your edited GDB file with the original when I tell you to copy the model files later. Now you’ll need a list of the textures that match the materials you just found. Each material lists a “texture name” and these are the things you’ll be looking for. The texture name and material name will not always be the same, so be careful. Open the COMBINED.TDB file in the source track. This lists all the textures used by the materials in the scene. You need to find all the texture files that correspond to your object’s materials, so go through the file the same way you went through the MDB file, and copy the texture codes. Here are the ones I need: You should have a list of material codes, and a list of texture codes. You now need to copy the material codes into the COMBINED.MDB file of the destination track, and copy the texture codes into the COMBINED.TDB file of the destination track. Remember, if the plainmats are the same you don’t need to copy that one, and if they’re different and you’ve already added a plainmat2 material, don’t copy it again. Make sure you know how many materials you’ve added, and how many textures you’ve added, because you need to update the numbers in square brackets at the top of each file. I’m copying 6 materials and 6 textures, so I need to add 6 to both numbers. Save both files when you’re done. Now the game will know which textures to look for when loading the model. But it doesn’t know how to load the model itself yet, so we need to start editing the main WDB file (for the destination track). Near the start of the file, you’ll see 3 lists - GDB files, SDB files, and ADB files. The GDB files are the 3D models. If you’re copying a static model (or an animated model that you don’t want to be animated), you only need to worry about the GDB. For an animated model, you’ll need all 3. I already opened my GDB file earlier to find the materials, so I know the one I want is called UFOHOVER.GDB. This means I need to add “ufohover” to the list of GDB files, like so: (make sure you add it to the bottom of the list or it will mess everything up) I also need to add 1 to the bracket number, so it’s now [21]. If you’re using an animated model, add the same filename to the SDB and ADB lists as well (and update the bracket number!). Once you’ve added the files to these lists, you need to add your model to either the “static model” or “animated model” section (and update the bracket number for that section!!!). You can type the code out yourself but it’s easier to copy it from the source track’s WDB file. This is similar to the “copying objects” part of the tutorial. This is what my model code looks like: k_2F // Animated model "ufohover" { k_33 // GDB/ADB/SDB reference 6 2 2 (float)800 k_31 // Position (float)-637.4066 (float)-124.6511 (float)219.7383 k_32 // Rotation (float)1 (float)0 (float)0 (float)0 (float)0 (float)1 k_35 0 } If you’re using a static model there will be a couple of parts missing - the ADB and SDB references, and the k_35 part which tells the object to animate (if you’re copying an animated model from a cutscene, it won’t have the k_35 code, so you’ll need to add this part yourself). The 3 numbers under the “GDB/ADB/SDB reference” heading determine which files the model uses. These will probably be wrong, so you’ll need to change them. They refer to the GDB, ADB and SDB lists at the start of the file. Each number is that file’s position in the list. But it is very important to note that in these lists (and other lists like these in these binary files), the first item in the list is number 0, the second is 1, the third is 2, etc. So if you wanted to use the 10th file in the list, that would be number 11. Work out which numbers you need by counting (starting from 0) the position of the files you’re using in each list. The ADB and SDB numbers should be the same. You should have added the filenames to the bottom of the lists, so the ones you want will be the number of files in the list - 1. If you added more than one model, you’ll need to work it out yourself. There are 21 files in my GDB list, and ufohover is at the bottom, so that’s number 20. Here is my model code with corrected file references: k_2F // Animated model "ufohover" { k_33 // GDB/ADB/SDB reference 20 8 8 (float)800 k_31 // Position (float)-637.4066 (float)-124.6511 (float)219.7383 k_32 // Rotation (float)1 (float)0 (float)0 (float)0 (float)0 (float)1 k_35 0 } Apart from moving the object around, that should be all you need to do with the WDB. All you need to do now to get the object into the scene is to copy its files from the original track. These will be the GDB file, ADB and SDB files if it’s an animated model, and the textures. If you can’t remember the filenames, have a look through the WDB and TDB files again to remind yourself which ones you added. These are the files I’m copying: Copy these into the folder of the destination track. Everything you need should now be in place, and the object should be loaded into the track. I won’t go over how to reposition it again. If everything worked, your model should now be in the track you want it to be. If something went wrong, like I said earlier - pay attention to the error messages. Check you’ve copied all the textures and check all the square brackets - it’s probably something small. You should be able to insert and move different models in tracks by using the information I’ve given so far, but there are a couple of things to note. Models will often not be textured all the way around, because they are usually only viewed from a certain angle. The bottom or back of objects may be invisible so you should keep this in mind when inserting them into tracks. Another thing is getting minifigs into tracks. They can be awkward to work with and position, much more than other objects. Some seem to be easier to use than others. I easily managed to get a dancing King Kahuka into a track, but the best I could do with Johnny Thunder was having him fly around in the sky. You might need to experiment a bit. 4. Cutscenes Now that I’ve been through how to modify scenes, let’s look at a special type of scene - the cutscene. There are several cutscenes in the game and I listed the folders for them in the first post. They contain WDB files just like the tracks, but they also have CDB and CEB files. CDB files include things like the models and cameras, CEB files contain transitions, sound effects and subtitle events. As this is a “scene modding” tutorial, I’ll be focusing on the CDB files. I’m going to copying a model from one cutscene and inserting it into another. Specifically, I’m going to copy King Kahuka from his circuit cutscene to Captain Redbeard’s circuit cutscene. It should work for any object, just like with the track models. Firstly, you’re going to need to copy the model’s files and edit the WDB, MDB and TDB files the same way as in the last part of the tutorial. As far as I can tell, when you’re working with a cutscene, the model location coordinates in WDB are completely ignored, so don’t bother trying to change them. They are controlled in the CDB file instead. The Kahuka model I want is located in CIRCUIT2, so I’ve copied his model files and textures into CIRCUIT1 and edited the binary files accordingly. The only issue I found was that CIRCUIT1 already had materials called “torso” and “legs”, so I renamed Kahuka’s materials to “torso2” and “legs2” in the MDB and GDB. If you’re copying a character model and you want the face to be animated the same way as it was in its original cutscene, you’ll need to edit the MAB file. This also applies to other animated textures, but so far I’ve only tried faces. It should be a similar process. If you don’t want/need animated textures, you can skip this step. The MAB files contain all the frames for animated textures used in a scene. King Kahuka wears a mask and so does not have a very visible face during the cutscene, but his face is animated nonetheless so I’m going to copy that animation across. To get your model’s original animated texture frames, open the MAB file for its folder in the binary file editor. You’ll see something that looks like this: You can see the names of different materials listed here, with frame numbers in between. This determines which texture is shown, and when. You can edit these if you want to but to keep things simple I’ll leave mine as they are. The bottom part of the file contains the animation sequences that use those frames. I’m going to copy the frame list and paste it into that part of the MAB for CIRCUIT1, and I’ll copy the animation sequence and paste it into the animations part of the MAB. Make sure you paste them at the bottom of their sections. You’ll need to update the square brackets for both parts. At the moment, my game would use Captain Redbeard’s expressions for King Kahuka, and I don’t want that. Have a look at the k_27 part of the animation sequence entry. It will look something like this: k_27 // Material Frame(s) 0 15 This tells the game which frames to use in the animation. The first number represents the first frame of the animation (again, starting from 0). The second number is the number of frames in the animation. To correct the first number, count the position,starting from 0, of the first frame of the list you just copied. It’ll be the one with a 0 underneath. Then count how many frames are in the animation, including the first. In my case, the first frame of Kahuka’s animation is 14. You shouldn’t need to change the second number unless you’ve added or removed frames. So now my k_27 looks like this: k_27 // Material Frame(s) 14 15 The game will still play the first sequence instead of this one, but we’ll fix that in a moment. Now you need to open the CDB file in the folder where your model came from. This is the one for CIRCUIT2: Scroll down until you find the entry for your model. It will look something like this: k_2E // Model(s) "dummy00" { k_30 // Model Name "dummy01" k_34 // Model Rotation (float)0.999048 (float)-0.043618 (float)0 (float)0 (float)0 (float)1 k_2D // Animation Sequence ID 0 k_33 // Model Location (float)33.26736 (float)-35.13164 (float)-8.161795 k_2B // Start Frame 0 k_2C // Duration (or end frame if this is on a light) 480 k_36 [1] { 0 0 0 1 0 } } Static models, and models without material animations will not have all of these sections. Copy the entry for your model and paste it into the CDB of your destination cutscene. Remember to update the square brackets under “k_2E // Model(s)” at the start of the model list. As I said earlier, the coordinates listed in the CDB file are the ones used to position the models. But before you do that, if your model has an animated material we’ll need to tell the game which sequence to use. Look at the k_36 part of the code: k_36 [1] { 0 0 0 1 0 } The number we’re interested in is the third one. This determines which sequence to use for the animated material (I don’t know what the other numbers do). If the animated you added to the MAB was the second in the list, you’ll need to use a 1 here. This is my updated K_36 code: k_36 [1] { 0 0 1 1 0 } Now the only thing left to do is to change the model’s position in the cutscene (not in the WDB!). We can’t use the coordinate viewer here because it’s not a track we can drive around, so look at the other models for reference. I’m going to copy Redbeard’s location and rotation values and paste them over Kahuka’s. Then I’ll change either the x or y coordinates slightly and see what that does. This is the result of having Kahuka +5 on the x-axis from Redbeard: And that concludes this tutorial. From what I’ve covered you should be able to add models into any scene. The possibilities of what you can do are much more than just the things I’ve shown here, so experiment with the files and see what kinds of crazy stuff you can do. By messing with the binary files you can remove or replace models, change camera angles and timings...there’s probably not much you can’t do with a bit of trial and error. I’m sure you can come up with something a bit more creative than a UFO in a pirate level If you have any questions or problems, feel free to ask, but I’m not sure if I’ll be able to help. It really is just a matter of experimentation.1 point -

New version of ROCK RAIDERS - update
coffins reacted to StewartG for a topic
I thought I would share some good news on the remake of Lego Rock Raiders, we were going to call it Block Raiders (due to Lego trademark on the RR name, however the good news is that the trademark has expired and also the extra time they have to renew it, and we have just registered the 'Rock Raiders' trademark ourselves. The name will live on.1 point -

LEGO Racers 1 Cheats
le717 reacted to Baz for a topic
The cheats in LEGO Racers 1, not unlike in many other games, were put in solely for the purpose of messing around. They can only be used in single races, so they can't be used to progress through the game (which is good, since you shouldn't need cheats to beat the game ). I've had a lot of fun with these and mashing up different combinations for some hilarious results. The way they all work is by creating a racer with a certain name, the name itself is the cheat code, the actual make of the racer and his car doesn't matter (I like to make a racer that matches the cheat, but that's just me). Simply making the racer will turn on the cheat (for that time you are playing the game at least). To deactivate the cheat and reactivate it again, simply edit the license (you don't have to make any changes). Certain cheats will overwrite others, but certain ones can be used simultaneously. They are as follows, in no particular order: pgllgrn - All Power-Ups Green (Boosts) pgllrd - All Power-Ups Red (Projectiles) pgllyll - All Power-Ups Yellow (Traps) mxpmx - All Power-Ups at maximum level (regardless of white brick's collected) rpcrnly - All Power-Ups are Grappling Hooks flyskyhgh - All Racers are constantly in Flying Double-Rocket Boost nchsss - Car Chassis are invisible/not rendered ndrvr - Drivers are nvisible/not rendered nwhls - Car Wheels are invisible/not rendered nslwj - Cars are not slowed down by off-road regions fstfrwrd - Game plays at double speed lnfrrrm - Rocket Racer Run becomes unused mirror-version nmrchts - Deactivates all activated cheats Fun combinations: pgllgrn, pgllrd, or pgllyll combined with mxpmx flyskyhgh combined with the above flyskyhgh combined with nwhls (and/or nchsss, ndrvr) flyskyhgh combined with rpcrnly (this leads to a fun bug: since all bot racers travel at constant speed while rocket boosting, grappling hooking enemies will send them flying backwards permanently, and them grappling you sends them flying forwards. Hilarity ensues.) fstfrwrd combined with any of the above ndrvr, nchsss, nwhls all at once, possibly combined with any of the above (shadows are still rendered though, which is a little annoying) These are all the cheats I know of, if anyone knows any others feel free to post them. (I know of the fabled "Truck Driver" cheat, but it's a myth as far as I know)1 point -

Makava (Bionicle MOC)
Ayliffe reacted to coffins for a topic
Looks pretty good... Even though I'm not a fan of Bionicles.1 point -
Mr Phoenix: 'LLANFAIRPWLLGWYNGYLL'
Seaborgium reacted to le717 for a blog entry
Every time I see the ending of this... word, my mind combines the LEGO Racers PGLLGRN and PGLLYLL cheat codes.1 point -
Mr Phoenix: 'LLANFAIRPWLLGWYNGYLL'
Seaborgium reacted to aidenpons for a blog entry
That's Maori. It's not a NAME so much as a STORY. I don't know how it translates, but basically each chief after the other added a couple more words to it, so we have this waffe-ly googly-goo left over from the years. Sources: I'm a New Zealander and I've done Maori for eight years.1 point -

Mr Phoenix: 'LLANFAIRPWLLGWYNGYLL'
Ayliffe reacted to Ben24x7 for a blog entry
The "RRU_Comics/Ayliffe/Mr_Phoenix_series/Static_Props/Nope_Bin.mdl" Bin. Of course.1 point -

What are you listening to right now?
Drill Master reacted to The Ace Railgun for a topic
https://www.youtube.com/watch?v=t6a5OHvhQTs1 point -

The Vending Machine
Seaborgium reacted to STUDZ for a topic
You get a future hoodie. I insert a Mixel.1 point -

Mr Phoenix: 'LLANFAIRPWLLGWYNGYLL'
Seaborgium reacted to mumboking for a blog entry
Or, how about this? http://en.wikipedia.org/wiki/Taumatawhakatangihangakoauauotamateapokaiwhenuakitanatahu1 point -
Mr Phoenix: 'LLANFAIRPWLLGWYNGYLL'
Seaborgium reacted to aidenpons for a blog entry
Ooh, it goes by another name for whom the original just was too boring... LlanfairÂpwllgwynÂgyllgoÂgeryÂchwyrnÂdrobwllÂllantyÂsilioÂgogoÂgoch. Does anybody even say "Oh, I come from LlanfairÂpwllgwynÂgyllgoÂgeryÂchwyrnÂdrobwllÂllantyÂsilioÂgogoÂgoch!" "What? Do you have a stutter?" "No, LlanfairÂpwllgwynÂgyllgoÂgeryÂchwyrnÂdrobwllÂllantyÂsilioÂgogoÂgoch. Can-you-hear-me-pro-per-ly?" It would be an interesting thing for those speeches where you have to speak for a set time... "Hello, I'm Aiden Pons and I come from LlanfairÂpwllgwynÂgyllgoÂgeryÂchwyrnÂdrobwllÂllantyÂsilioÂgogoÂgoch" There we are, time limit done with and you didn't even start the topic.1 point -

Mafia: The Game
Seaborgium reacted to noghiri for a topic
I blink, then nod. "Before I go... It is unwise to be too sure of one's own wisdom. It is healthy to be reminded that the strongest might weaken and the wisest might err." I stepped into my cabin for the last time. A crash was heard. this was the scene that greeted them when they entered the cabin: On my body, a letter to my mother, unfinished. Her eyes would never touch it. The key to my trunk, which was filled only with clothes and my glass cat collection. On the dresser, a bottle of 40-year single malt scotch, and a small vial that smelled faintly of mice. OoC: That was two votes me, one vote Boba. We could have had a Mexican Standoff.1 point -

LEGO Racers car
Ben24x7 reacted to grappigegovert for a gallery image
From the album: Misc
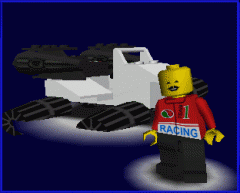
I think I broke it.1 point -
Make Me draw things!
Seaborgium reacted to I Am Not Here for a topic
Wow, that is amazing! Great job Thanks here's more fanart of my favorite LEGO Characters I been working on (the one on the right, I done too much on him XP) WIP guess who....1 point