
Leaderboard
Popular Content
Showing content with the highest reputation on 11/12/2014 in all areas
-

Small Transport Truck
MaelstromIslander and 10 others reacted to Jimbob for a topic
It is finally completed! Previews More views: YouTube video: http://youtu.be/tsvCOCttm68 Information This mod took... A very long time. But I'm proud of it, and now that I've made all these parts future models should take much less time to produce. Several binary files were modified, but the main one was CRCM.GDB, which now has: 12 textures 1542 Vertices 868 Indices 150 Indices Meta entries Over 17000 lines of code All custom made! Again, I'd like to give a huge thanks to WillKirkby for making the >Binary File Editor, and le717 for making >GDBump, without which I would not have been able to produce this mod. Download You can download the Small Transport Truck here: Small Transport Truck Installation instructions, along with a brief description of how to change the car to a different racer, are included in the contained Readme file. Note that the Binary File Editor doesn't save comments, so if you'd like to check out the commented code then click here. Want to Use This Mod? If you'd like to use this vehicle (or any of the parts within it) in your own mod, then feel free! This mod was made partly as an example after all. However, should you use it (or its parts) in your own mod, please give me credit for making it. Because it took a very long time to make.11 points -

Cafeteria 1.0 BETA 7 - Launcher & Mod Loader for LRR
Crystalyzer and 8 others reacted to Cyrem for a topic
I am extremely pleased to release the next version of Cafeteria which is the biggest update since it was released and possibly bigger than the initial release. There are too many changes for me to remember, it’s essentially an entire rebuild of the program, so I’ll list all the main things. - The way resolutions are applied is no longer edited in by memory, Cafeteria now modifies the Mode Selection window to insert your selected resolution and LRR does the rest. Essentially, this should mean any remaining issues with resolution being applied should be gone. - Oxygen bar + Message panel have been moved out of the way! Hurrah! (See Resolution Packs and Known Issues in OP) - Mod Loader. Cafeteria now includes a Mod Loader which applies WAD Patch files to original LRR WAD files to generate a new WAD file before the game launches. The way this is done allows you to add and disable mods easily and you never need to even extract a single WAD file to play LRR with modifications. You can add Cafeteria to a fresh install, add some WAD Patch files to the Mod folder, start Cafeteria and play your game, it really is that simple. - 30 Resolutions Packs! Cafeteria comes with 30 resolution patches for its resolution selector. You no longer need to do any CFG edits to make resolutions work. Just choose your resolution and play the game. Note that these packs are not 100% finished and updates packs will be released, these initial packs move the panels to the correct locations for in-game. (See OP for supported resolution pack list) - Mod Manager. Cafeteria also allows you to enable and disable mods through the program for the Mod Loader. It lists all the mods that will be applied when the game is launched. Any invalid patche files will not be listed and will not be applied. If you find a mod crashes your game, just disable it and run it without. - Custom Level Slot has been built into Cafeteria. This allows you to easily choose a level from the associated folder which has been designed to work with CLS and it will be installed along with all the mods. - Dev Tools have been added for advanced use, it contains features to Extract/Build & Merge WAD Files as well a Test Patches & check if your game is copy protected. - Additional launch options have been added: Debug Keys (now back again), FVF, FTM, NOM, Reduce Pro Meshes & Reduce Textures. - You can now play the next random song if you are using Cafeteria enabled music using a hotkey. (See below) - Added 2 HotKeys: - Ctrl + F9 = Take a screenshot - Ctrl + F8 = Play random music file (Cafeteria handled music must be enabled) Please READ notes on D3DRM in the first post to see why it has been bundled with it. With all these new features and possibilities, it is my hope that people will make these WAD Patches and make playing LEGO Rock Raiders mods finally easy to do, allowing modders and non-modders alike to play the things the community has created. I will be converting my mods to patches for Cafeteria as well as some of past members in the coming days. For the release I have two patches already done, you can download them here: No Splashes Bolt Molt (Level) See OP for download of new version. EDIT: Small fix released. Fixes a Patch Test error & Command AddFilesFromDirectory wasn't keeping the folder structure.9 points -

RRU Quotes 2: Reckoning
Alcom Isst and 7 others reacted to STUDZ for a topic
[6:23:44 PM] Hugh Wotmeigh: Do you think I could get LMB to write me a script for a really bad fan game? [6:23:45 PM] Hugh Wotmeigh: Like [6:23:51 PM] Hugh Wotmeigh: I don't tell them what it's for. [6:24:01 PM] Hugh Wotmeigh: I just tell them to make certain characters and lines like a roleplay [6:24:07 PM] Hugh Wotmeigh: And then I make a game out of it? [6:24:07 PM | Removed 6:24:15 PM] Triangle717: This message has been removed. [6:24:17 PM] Alcom Isst: [6:24 PM] Hugh Wotmeigh: <<< And then I make a game out of it?Please. [6:24:26 PM] Triangle717: I can almost say yes. [6:24:28 PM] Stan McStudz: Make it so [6:24:33 PM] Triangle717: Yes, you could. [6:24:40 PM] Stan McStudz: If you had lotsa time [6:24:40 PM] Triangle717: [6:24 PM] Stan McStudz: <<< Make it so*Make it so, Number 1. [6:24:41 PM] Hugh Wotmeigh: Then so shall it be. [6:24:45 PM] Triangle717: BUT [6:24:52 PM] Hugh Wotmeigh: What forum do I post it in? [6:24:53 PM] Hugh Wotmeigh: Video Games? [6:24:58 PM] Triangle717: You must say you need it by a certain date [6:25:06 PM] Triangle717: And be strict about it. [6:25:11 PM] Hugh Wotmeigh: alright [6:27:36 PM] Stan McStudz: One thing ben [6:28:02 PM] Stan McStudz: Make sure you have something barebones that people can see you're actually working on something [6:28:14 PM] Hugh Wotmeigh: This is the f****ing LMBs. [6:28:26 PM] Hugh Wotmeigh: You can arrive with an emoticon and people will be amazed at your project. [6:29:52 PM] Hugh Wotmeigh: "Hey guys (and girl :joking:)! I'm making my own LEGO game for a homework assignment due next week, but I'm having a few issues...i dunno what 2 do for the story? can you guys help me Out? All you gotta do is make some characters, a few cutscenes and some dialogue. Lets try and make something really coool! And funny!" [6:31:38 PM] Hugh Wotmeigh: Alrght, I'm submitting this [6:31:40 PM] Hugh Wotmeigh: 3 [6:31:41 PM] Hugh Wotmeigh: 2 [6:31:44 PM] Hugh Wotmeigh: 1 [6:31:53 PM] Hugh Wotmeigh: Oh alright [6:31:59 PM] Hugh Wotmeigh: What do I put in the intro then? [6:32:03 PM] Stan McStudz: sonofabitch, it's actually happening [6:32:32 PM] Stan McStudz: "Pls help me with my lego videogame!!!!! [6:32:42 PM] Alcom Isst: Childish as possible would be nothing at all. No intro. [6:33:38 PM] Triangle717: I was about it say I wasn't going to help because this is yours, but who cares. [6:33:50 PM] Triangle717: Try this for a title: [6:34:15 PM] Triangle717: "Making a video game, need story authors plz!!!!!!!!!" [6:34:26 PM] Hugh Wotmeigh: Works for me. Does anybody else find it crazy that we're trying to scientifically figure out how to write the best LMB post? [6:34:56 PM | Edited 6:34:59 PM] Triangle717: @Jobless One small edit: [6:35:05 PM] Triangle717: Remove "a". [6:35:13 PM] Hugh Wotmeigh: Alrighty [6:35:17 PM] Triangle717: Can't have perfect grammar, you know. [6:35:19 PM] Hugh Wotmeigh: Now just sprinkling more emoticons [6:35:28 PM] Triangle717: :P :P :P [6:35:31 PM] Noghiri: use lots of unikitty [6:35:31 PM] Triangle717: ^ [6:35:34 PM] Triangle717: ^ [6:35:34 PM] Triangle717: Cake [6:35:35 PM] Noghiri: they like lots of unikitty [6:35:39 PM] Noghiri: and cake [6:35:47 PM] Triangle717: [6:35:48 PM] Triangle717: ^ [6:36:02 PM] Triangle717: I don't see that many winks... [6:36:15 PM] Triangle717: Rio once said the : P emote is the LMB period. [6:36:25 PM] Triangle717: IT WAS TOTALLY FITTING. [6:36:34 PM] Alcom Isst: I prefer a more subtle approach, but okay. Fine. [6:36:44 PM] Triangle717: The LMBs are not subtle. [6:37:58 PM] Triangle717: Oh wait [6:38:03 PM] Triangle717: Where's Brigs? [6:38:12 PM] Triangle717: He studied the LMBs, remember? [6:38:22 PM] Triangle717: How else did Elimbier become a word? [6:38:39 PM] Hugh Wotmeigh: I got another one from him [6:38:41 PM] Noghiri: hold my root beer. I'm going in. [6:38:51 PM] Hugh Wotmeigh: "Reg-his-ter" = Register [6:41:16 PM] Hugh Wotmeigh: '> [6:41:23 PM] Hugh Wotmeigh: I don't want intelligence. [6:41:30 PM] Hugh Wotmeigh: I specifically want dumb posting. [6:41:38 PM] Hugh Wotmeigh: I want this game to represent the LMBs. [6:41:54 PM] Hugh Wotmeigh: Am I ready to rock my LMB outfit? [6:42:08 PM] Stan McStudz: [6:41 PM] Hugh Wotmeigh: <<< Perfect'>Perfect. No one will suspect you. [6:42:23 PM] Triangle717: ^ [6:42:29 PM] Triangle717: GO GO GO [6:42:38 PM] Hugh Wotmeigh: -launch- [6:42:44 PM] Stan McStudz: OPERATION ELEMBIER IS A GO8 points -
Cafeteria Patch Documentation
trigger_segfault and 4 others reacted to Cyrem for a topic
PATCH DOCUMENTATION FOR CAFETERIA If you do not have Cafeteria or don't know what it is, go to the Cafeteria Topic first. WADP Files A WADP file is a standard WAD file with the same format as LEGO Rock Raiders' WAD files. The extra "P" means "Patch". It's used to bundle all the necessary files for a patch into a single file for easy distribution. A WADP file has two necessary files for it to be identified by Cafeteria as a patch it can execute. These two required files will be covered in the next section. WADP Anatomy A WADP file must have 2 files in the root directory. These files must be called info.xml & script.txt (lowercase) so they are correctly identified. info.xml This file provides information about the patch for the patching system. Inside it contains information about the patch such as its name, author, version and more. It also contains information to help the patching system to prioritize your patch and IDs to check for any patches that may be incompatible with each other. script.txt This file is the script that Cafeteria will run in order to apply your patch. The contents contains commands, one per line similar and it will tell Cafeteria what to modify in the CFG and WAD. The format is similar to standard command line. Info.xml The required contents of an info.xml file (for version 1 of the patch system) are as follows. All these elements are REQUIRED. It is however best to create this file using the Developer Tools in Cafeteria itself, rather than writing your own. If this file cannot be found or if it is invalid, it will not appear in the Mod Manager of Cafeteria. Standard Format: <?xml version='1.0'?> <patch system="1"> <name>My Patch Name</name> <author>Username</author> <version>1.0</version> <description>This is a little info about my patch.</description> <uid>rru.lrr.username.mypatchname</uid> <priority>1</priority> <dependency>rru.lrr.username.myotherpatch,rru.lrr.username.someotherpatch </dependency> <incompatible>rru.lrr.username.badpatch</incompatible> </patch> System: This defines the patch system to use to apply this patch. In the future, changes to the system will occur and this number will increase, you should always use the latest version. Name: This is the human readable name of your patch. Do not include a version number here. Author: This should be your username. Version: This is a human readable version number of your patch. Description: This is information about what your patch does. UID: This is a unique identifier for you patch, it is used to internally identify your patch when processing. This is required to be in the format: rru.lrr.[username].[patchname] . This should be in lowercase and contain no spaces. You should never re-use across different patches, this is to say if you make a patch that changes textures and another patch that adds models, these should have different UIDs. Priority: By default this should always be 1. (This property is depreciated since Cafeteria 1.0 BETA 1). Dependency: This is a comma separated (no spaces) list of UIDs of other patches that a user needs for this patch. If a user does not have the patches in this list, your patch will not be applied. Incompatible: This is a comma separated (no spaces) list of UIDs of other patches that this patch cannot be installed with. If an incompatible patch has been installed before your patch, your patch will not be applied. Script.txt CFG Commands CFG:AddProperty - Adds a property to a block. CFG:AddProperty <block path> <property name> <property value> CFG:SetProperty - Changes the value of a property. CFG:SetProperty <property path> <value> CFG:RemoveProperty - Removes a property from a block. CFG:RemoveProperty <property path> CFG:RenameProperty - Changes the name of a property. CFG:RenameProperty <property path> <new name> CFG:AddBlock - Adds a new block { } CFG:AddBlock <parent block path> <block name> CFG:ClearBlock - Clears properties from a block and/or removes child blocks. This will not remove the block itself that you are clearing. CFG:ClearBlock <block path> <remove children TRUE/FALSE> CFG:RenameBlock - Renames a block CFG:RenameBlock <block path> <new name> CFG:InsertCFG - Inserts the contents of a CFG file from the Patch WAD into a block. CFG:InsertCFG <parent block path> <patch file path> WAD Commands WAD:AddFile - Adds a file from the Patch WAD to a directory. WAD:AddFile <patch file path> <wad file path> WAD:AddFilesFromDirectory - Adds a directory of files from the Patch WAD to a directory. WAD:AddFilesFromDirectory <patch directory path> <wad directory path> WAD:RemoveFile - Removes a file from a directory. WAD:RemoveFile <wad file path> WAD:RenameFile - Renames a files in a directory. WAD:RenameFile <wad file path> <new name> WAD:InsertReplaceFile - Replaces a file with another file or adds it as a new file if it doesn't exist. WAD:InsertReplaceFile <wad file path> <patch file path> WAD:ReplaceFileData - Replaces the data of a file in a directory with the data of a file in the Patch WAD. (No file names are changed) WAD:ReplaceFileData <wad file path> <patch file path> WAD:CopyDirectory - Makes a copy of a directory. WAD:CopyDirectory <wad directory path> <wad directory path of copy> WAD:RemoveDirectory - Removes a directory and all it's files. WAD:RemoveDirectory <wad directory path> WAD:MoveDirectory - Moves a directory to a new path. WAD:MoveDirectory <wad directory path> <new wad directory path> Block & Directory Paths These paths are formatted the same, and must finish with a final backslash. Block Path: Lego*\Main\ Directory Path: Interface\RightPanel\ Property & File Paths Again these are the same, however they do not feature a final backslash. File paths must include a file extension. Property Path: Lego*\Main\LoadingText File Path: Interface\RightPanel\CrystalSideBar.bmp If a parameter in your scripts contains a space, for example in a directory path, enclose the parameter in quotes e.g "This Folder Has A Space" Comments You can put comments in scripts. Comments should begin with a double forward slash. // This is a comment5 points -
LEGO Jurassic World?
ProfessorBrickkeeper and 3 others reacted to lol username for a topic
http://www.thebrickfan.com/lego-jurassic-world-teaser-in-lego-batman-3-beyond-gotham/ Well that's interesting.4 points -
Community Project: RRU: The Webcomic
McJobless and 2 others reacted to emily for a topic
'> i don't even know anymore3 points -

RRU Quotes 2: Reckoning
aidenpons and 2 others reacted to The Ace Railgun for a topic
[11/11/14 7:11:43 PM] Jamie: RRU is like a niche within a niche of a niche Later: [11/11/14 7:16:13 PM] Yeoldetriangle: Whizzywig, like a poofy, rainbow-colored clown wig. [11/11/14 7:16:27 PM] Yeoldetriangle: That's what I think when I hear that. [11/11/14 7:16:31 PM] Stan McStudz: I always thought Wizpig from Diddy Kong Racing3 points -
LXF to OBJ converter
eagleeyedan and one other reacted to bartvbl for a topic
Hey guys, I'm leaving on vacation in a couple of days from now, but before I go I'd like to give you an LDD tool that's actually useful. It converts LXF/LXFML models to OBJ. Mostly. Grab a build here: https://github.com/bartvbl/LDDModelConverter/releases2 points -
Official BZPower BIONICLE 2015 Review Roster
The Ace Railgun and one other reacted to Phantom Terror for a topic
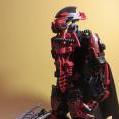
Hello everybody. As many of you probably know, BZPower has been sent all thirteen BIONICLE 2015 sets for reviewing purposes. They recently began doing so, and for your convenience, I've decided to keep them all neat and tidy here so you can easily jump to whatever set you'd like to learn about. You can either read a traditional review, or watch it through YouTube. The Masters of Okoto {} {} {} {} {} {} {} The Protectors of Okoto {} {} {} {} {} {} {} The Lord of Skull Spiders {} {} --Each image links to its respective set review--2 points -
Community Project: RRU: The Webcomic
The Ace Railgun and one other reacted to lol username for a topic
I don't have an appendix anymore2 points -
Tutorial: Scene Modding and Object Moving
ShadowDraikana reacted to Brickulator for a topic
LEGO Racers scene modding tutorial In this guide I will explain how to edit the various scenes in the game, such as tracks and cutscenes. This will include placing and moving 3D objects and animated models. There are a couple of tools you’ll need so if you don’t already have them, download them here: LEGO.JAM file extractor Binary file editor You may also find this tool useful to help with positioning objects in tracks: In-game Coordinate viewer The first thing you’ll need to do, if you haven’t done so already, is extract the LEGO.JAM file. You can find instructions on how to do this in the LEGO.JAM file extractor thread I linked above. I’d recommend copying LEGO.JAM to another folder first and working on it there, since your computer might shout at you if you try to work within Program Files. Once you’ve extracted the JAM file, you’ll have a folder called LEGO, and inside it, 2 folders: GAMEDATA and MENUDATA. In terms of scenes, GAMEDATA contains the tracks and MENUDATA contains the cutscenes. The track folders are named as below: Imperial Grand Prix - RACEC0R1 Dark Forest Dash - RACEC1R0 Magma Moon Marathon - RACEC0R3 Desert Adventure Dragway - RACEC0R2 Tribal Island Trail - RACEC1R1 Royal Knight’s Raceway - RACEC0R1 Ice Planet Pathway - RACEC1R3 Amazon Adventure Alley - RACEC1R2 Knightmare-athon - RACEC2R0 Pirate Skull Pass - RACEC2R1 Adventure Temple Trail - RACEC2R2 Alien Rally Asteroid - RACEC2R3 Rocket Racer Run - RACEC3R0 Test drive track - TEST And the cutscene folders are these: Captain Redbeard intro - CIRCUIT1 King Kahuka intro - CIRCUIT2 Basil the Batlord intro - CIRCUIT3 Johnny Thunder intro - CIRCUIT4 Baron von Barron intro - CIRCUIT5 Gypsy Moth intro - CIRCUIT6 Rocket Racer intro -CIRCUIT7 1st place in circuit race - C_AWARD1 2nd place in circuit race - C_AWARD2 3rd place in circuit race - C_AWARD3 4th, 5th, or 6th place in circuit race - C_AWARD4 Win a car set - WINCAR Beat Rocket Racer - WINRRCAR Beat Veronica Voltage - WINVVCAR These are the main scene folders. The splash screen is also a cutscene (LEGAL) and there are cutscene versions of the standard FMVs in the PC demo and N64 version of the game (LEGOINTR, HVSINTRO, MAININTR). There are also a couple of other scenes from the character and car builders and the track selection screen (CB_SET, GARAGE, SINGRACE) if you want to do anything with those (every model of a track in the race selection screen, SINGRACE, is actually a cutscene as well). Now, there are a few important binary files contained within each of these folders, and you’ll need to edit these in order to make the modifications you want to. You can open and edit these files with origamiguy’s binary file editor that I linked to at the start. The types of binary files you’ll probably be working with are: 3D scenes (.WDB) Texture lists (.TDB) Material lists (.MDB) 3D models (.GDB) Skeleton structures (.SDB) Skeletal animations (.ADB) Material animations (.MAB) Cutscene files (.CDB) Cutscene event files (.CEB) You won’t need to edit all of these, and if you’re only modding tracks you won’t need the CDB or CEB files (although it may be possible to script events during the race by using cutscenes, but I haven’t tried anything like that yet). I’ll try to keep this simple. Once you start playing with these files you might realise that there’s a lot of cool stuff you could do so I’m not going to try to cover it all. 1. Moving objects This is probably one of the easiest ways to modify a track. I’ll go through an example of how to do this, and the same method should work for any object on any track. For every section of this guide, I’ll be working with Imperial Grand Prix. To demonstrate how to move an object, I’ll start with something small and simple - some boxes. There’s a few crates in the corner here. I’m going to try to move them to the right a bit. To do this, I need to open the .WDB file for Imperial Grand Prix. This is the “scene” file and it determines which objects are in the scene, and where they are placed. You may find that there is more than 1 WDB file, and in fact Imperial Grand Prix has 5. The one you want should be the biggest WDB file. You can see here that TEST.WDB is the biggest file, and this is the one I’ll be editing. Now you need to open the WDB file with origamiguy’s binary file editor. When you do, you’ll see something that looks like this: In the “GDB files” list, you should be able to find the model you want. I can see “boxes” in there, so I assume that’s the one I want. Underneath these file lists are “static models” and “animated models”. You need to find your model in there so either look for it yourself or press CTRL+F and search for it with the name listed under GDB files. You can see the listing for the “boxes” model in the middle here: The only part I’m interested in at the moment is the position of the boxes. This is determined by this part of the code: k_31 // Position (float)-316.3805 (float)-591.2501 (float)-66.41721 Those 3 numbers are the x, y and z coordinates of the model. To demonstrate this, I’ll borrow a couple of images from RobExplorien’s start and power-up position tutorial. All you need to do to change the position of an object is change these coordinates. I won’t be worrying about the z position because I only want to move the boxes along a flat surface. But how do I know how much I need to change the x and y values? Well, there’s a couple of ways to do it. The first is good old trial and error (and this is what you’ll need to do if you’re moving an object not on a drivable surface). I could just change the values a bit, then launch the game and see how it looks, then change them again until I’m happy. But a much easier way to do it is to use grappigegovert’s coordinate viewer that I linked at the start. I’m going to use the coordinate viewer. You need LEGO Racers to be running for it to display anything, so you can either run the game in windowed mode or ALT+TAB to switch to the viewer while you’re playing. I’ve driven a little bit further and I’m going to try to move the boxes to where I’m parked right now. You can still see the boxes in their little corner there. I’ve switched to the coordinate viewer: The location coordinates now show the x, y and z values for the position of my car. I’m going to copy the x and y coordinates straight across to the WDB file. Hopefully, this will move the boxes to the current position of my car. Let’s see if it worked. I’ll save and overwrite the WDB file, close the game and rebuild my JAM. Then I’ll launch the game again and see where the boxes are now... Well, the boxes are no longer in their original position. This looks promising (note - the collision mesh is unchanged, if you drive into that corner you’ll bump into invisible crates, you can edit the collision files if you want to try to change things like that but I won’t be covering it here). There they are! Exactly where I wanted them to go (note - because the collision files haven’t been changed, you can drive straight through the model). That’s pretty much all there is to it when it comes to changing the location of objects. You can change the z coordinate to move things vertically in the same way, and you can change the rotation values too. For example, this is the result of increasing the z coordinate and making up some random rotation values: Just try messing around with these values and see what you can do. 2. Copying objects Now that we’ve been able to move objects around the track, we can try duplicating them. I’ll go back to my Imperial Grand Prix boxes, still floating in the air from the first part of the tutorial. Because you can never have too many floating boxes, right? This, again, requires editing the main WDB file. Open it up and find the model you want to copy. In my case, that’s “boxes” under “static models” again. In order to copy the model, I need to copy the “boxes” entry and paste it as a new model listing. I’ll just paste it underneath the original. But now we have 2 models called “boxes” and the game won’t like that at all. So I’ll save it some confusion by calling the copy “boxes2”. You can call the model whatever you want. Now, you may think it’s just a case of repositioning this copy, but there’s one thing you need to remember to do. Scroll back up to the start of the “static models” or “animated models” list, depending on the type of model you’re using. You’ll see a code that looks something like this: k_2E // Static models [19] The number in square brackets tells the game how many models of that type are in the scene. By default, Imperial Grand Prix has 19 static models. Because I’ve just added a new one, I need to change this number to 20, like this: k_2E // Static models [20] These square bracketed numbers are very important and appear in all the binary files. If I left my static model number as 19, the game would insert the first 19 models in the list and ignore the last one. And if you set the number too high, the game will crash and you’ll get a syntax error message. It’s such an easy thing to forget, but it’s vital that this number is correct to ensure everything works properly. (Note - on the subject of error messages, pay attention to them. More often than not, when you crash the game by messing with these files, you’ll get an error message that should help you understand exactly what went wrong, or at least the file that caused the problem) Now that I’ve copied the model and updated this number, the level should load both copies of the boxes model. But they have the exact same coordinates so they’ll just be on top of each other and you won’t be able to tell there’s more than 1. So I’ll open up the coordinate viewer again and use the process I described in part 1 of the tutorial to move the second boxes model. Et voilà! 3. Copying objects from other tracks I’m quite proud of the floaty box environment that I’ve created so far. But wouldn’t it look much cooler with the addition of...a UFO? Of course it would! So let’s get to work. Now, this is where things start to get a little more complicated. So far the only file we’ve needed to edit is the main WDB file for the track we’re using. Unfortunately, the number of files we need to mess with to insert an object from another track is...well, more than one. Once you’ve decided on an object to copy into a track, you’ll need the files that make up that object. So open the folder for the track that this object was originally in (the folder names are listed in the first post) and start by finding the GDB file of the object. If you’re not sure what it is, you could use the process from part 1 to move objects around and work out which is which. The object I want to use is the big UFO from Alien Rally Asteroid that hovers in place just before the finish line. The ARA folder is RACEC2R3 so I’m going to open that and sort the files by type to find the GDB files. The one I want is UFOHOVER.GDB. Once you know which GDB file you need, open it with the binary file editor. You’ll see a list of “materials” at the top. These materials correspond to textures and solid colours that the model uses. Either leave this window open or make a note of the materials listed here. The list for my UFO looks like this: k_27 // Materials [7] { "araufo1" "araufo2" "araufo3" "araufo4" "araufolg" "arawndow" "plainmat" } Now that you know what materials you need, you’ll need to open the track’s main MDB file (the track you’re copying the object from). This will be called COMBINED.MDB, and it lists all the materials used in the scene. Look through the file (or use CTRL+F) for the materials listed in the GDB file and copy them into a word document or something (you can copy them straight into the other track’s MDB but it might be easier to do it this way first). You should end up with a list of materials like this: All of these apart from “plainmat” reference a texture. Plainmat appears to be a solid colour material that appears in other tracks but is not always the same colour in every track. Find the plainmat material in the COMBINED.MDB file for the track you want to copy the object into and see what values it has. In my case, Alien Rally Asteroid has the same plainmat colour as Imperial Grand Prix, so I don’t need to copy it into IPG. If your destination track has a different plainmat colour to your source track, try the following: 1. Copy the source plainmat material code into COMBINED.MDB for the destination track. Do not overwrite the existing plainmat. 2. Rename the plainmat you just copied to “plainmat2” 3. Copy the GDB file you’re using into the desination track’s folder and edit it so that its material list includes “plainmat2” instead of “plainmat” If you do have to do that, make sure you update the square bracket number in the MDB accordingly, and don’t overwrite your edited GDB file with the original when I tell you to copy the model files later. Now you’ll need a list of the textures that match the materials you just found. Each material lists a “texture name” and these are the things you’ll be looking for. The texture name and material name will not always be the same, so be careful. Open the COMBINED.TDB file in the source track. This lists all the textures used by the materials in the scene. You need to find all the texture files that correspond to your object’s materials, so go through the file the same way you went through the MDB file, and copy the texture codes. Here are the ones I need: You should have a list of material codes, and a list of texture codes. You now need to copy the material codes into the COMBINED.MDB file of the destination track, and copy the texture codes into the COMBINED.TDB file of the destination track. Remember, if the plainmats are the same you don’t need to copy that one, and if they’re different and you’ve already added a plainmat2 material, don’t copy it again. Make sure you know how many materials you’ve added, and how many textures you’ve added, because you need to update the numbers in square brackets at the top of each file. I’m copying 6 materials and 6 textures, so I need to add 6 to both numbers. Save both files when you’re done. Now the game will know which textures to look for when loading the model. But it doesn’t know how to load the model itself yet, so we need to start editing the main WDB file (for the destination track). Near the start of the file, you’ll see 3 lists - GDB files, SDB files, and ADB files. The GDB files are the 3D models. If you’re copying a static model (or an animated model that you don’t want to be animated), you only need to worry about the GDB. For an animated model, you’ll need all 3. I already opened my GDB file earlier to find the materials, so I know the one I want is called UFOHOVER.GDB. This means I need to add “ufohover” to the list of GDB files, like so: (make sure you add it to the bottom of the list or it will mess everything up) I also need to add 1 to the bracket number, so it’s now [21]. If you’re using an animated model, add the same filename to the SDB and ADB lists as well (and update the bracket number!). Once you’ve added the files to these lists, you need to add your model to either the “static model” or “animated model” section (and update the bracket number for that section!!!). You can type the code out yourself but it’s easier to copy it from the source track’s WDB file. This is similar to the “copying objects” part of the tutorial. This is what my model code looks like: k_2F // Animated model "ufohover" { k_33 // GDB/ADB/SDB reference 6 2 2 (float)800 k_31 // Position (float)-637.4066 (float)-124.6511 (float)219.7383 k_32 // Rotation (float)1 (float)0 (float)0 (float)0 (float)0 (float)1 k_35 0 } If you’re using a static model there will be a couple of parts missing - the ADB and SDB references, and the k_35 part which tells the object to animate (if you’re copying an animated model from a cutscene, it won’t have the k_35 code, so you’ll need to add this part yourself). The 3 numbers under the “GDB/ADB/SDB reference” heading determine which files the model uses. These will probably be wrong, so you’ll need to change them. They refer to the GDB, ADB and SDB lists at the start of the file. Each number is that file’s position in the list. But it is very important to note that in these lists (and other lists like these in these binary files), the first item in the list is number 0, the second is 1, the third is 2, etc. So if you wanted to use the 10th file in the list, that would be number 11. Work out which numbers you need by counting (starting from 0) the position of the files you’re using in each list. The ADB and SDB numbers should be the same. You should have added the filenames to the bottom of the lists, so the ones you want will be the number of files in the list - 1. If you added more than one model, you’ll need to work it out yourself. There are 21 files in my GDB list, and ufohover is at the bottom, so that’s number 20. Here is my model code with corrected file references: k_2F // Animated model "ufohover" { k_33 // GDB/ADB/SDB reference 20 8 8 (float)800 k_31 // Position (float)-637.4066 (float)-124.6511 (float)219.7383 k_32 // Rotation (float)1 (float)0 (float)0 (float)0 (float)0 (float)1 k_35 0 } Apart from moving the object around, that should be all you need to do with the WDB. All you need to do now to get the object into the scene is to copy its files from the original track. These will be the GDB file, ADB and SDB files if it’s an animated model, and the textures. If you can’t remember the filenames, have a look through the WDB and TDB files again to remind yourself which ones you added. These are the files I’m copying: Copy these into the folder of the destination track. Everything you need should now be in place, and the object should be loaded into the track. I won’t go over how to reposition it again. If everything worked, your model should now be in the track you want it to be. If something went wrong, like I said earlier - pay attention to the error messages. Check you’ve copied all the textures and check all the square brackets - it’s probably something small. You should be able to insert and move different models in tracks by using the information I’ve given so far, but there are a couple of things to note. Models will often not be textured all the way around, because they are usually only viewed from a certain angle. The bottom or back of objects may be invisible so you should keep this in mind when inserting them into tracks. Another thing is getting minifigs into tracks. They can be awkward to work with and position, much more than other objects. Some seem to be easier to use than others. I easily managed to get a dancing King Kahuka into a track, but the best I could do with Johnny Thunder was having him fly around in the sky. You might need to experiment a bit. 4. Cutscenes Now that I’ve been through how to modify scenes, let’s look at a special type of scene - the cutscene. There are several cutscenes in the game and I listed the folders for them in the first post. They contain WDB files just like the tracks, but they also have CDB and CEB files. CDB files include things like the models and cameras, CEB files contain transitions, sound effects and subtitle events. As this is a “scene modding” tutorial, I’ll be focusing on the CDB files. I’m going to copying a model from one cutscene and inserting it into another. Specifically, I’m going to copy King Kahuka from his circuit cutscene to Captain Redbeard’s circuit cutscene. It should work for any object, just like with the track models. Firstly, you’re going to need to copy the model’s files and edit the WDB, MDB and TDB files the same way as in the last part of the tutorial. As far as I can tell, when you’re working with a cutscene, the model location coordinates in WDB are completely ignored, so don’t bother trying to change them. They are controlled in the CDB file instead. The Kahuka model I want is located in CIRCUIT2, so I’ve copied his model files and textures into CIRCUIT1 and edited the binary files accordingly. The only issue I found was that CIRCUIT1 already had materials called “torso” and “legs”, so I renamed Kahuka’s materials to “torso2” and “legs2” in the MDB and GDB. If you’re copying a character model and you want the face to be animated the same way as it was in its original cutscene, you’ll need to edit the MAB file. This also applies to other animated textures, but so far I’ve only tried faces. It should be a similar process. If you don’t want/need animated textures, you can skip this step. The MAB files contain all the frames for animated textures used in a scene. King Kahuka wears a mask and so does not have a very visible face during the cutscene, but his face is animated nonetheless so I’m going to copy that animation across. To get your model’s original animated texture frames, open the MAB file for its folder in the binary file editor. You’ll see something that looks like this: You can see the names of different materials listed here, with frame numbers in between. This determines which texture is shown, and when. You can edit these if you want to but to keep things simple I’ll leave mine as they are. The bottom part of the file contains the animation sequences that use those frames. I’m going to copy the frame list and paste it into that part of the MAB for CIRCUIT1, and I’ll copy the animation sequence and paste it into the animations part of the MAB. Make sure you paste them at the bottom of their sections. You’ll need to update the square brackets for both parts. At the moment, my game would use Captain Redbeard’s expressions for King Kahuka, and I don’t want that. Have a look at the k_27 part of the animation sequence entry. It will look something like this: k_27 // Material Frame(s) 0 15 This tells the game which frames to use in the animation. The first number represents the first frame of the animation (again, starting from 0). The second number is the number of frames in the animation. To correct the first number, count the position,starting from 0, of the first frame of the list you just copied. It’ll be the one with a 0 underneath. Then count how many frames are in the animation, including the first. In my case, the first frame of Kahuka’s animation is 14. You shouldn’t need to change the second number unless you’ve added or removed frames. So now my k_27 looks like this: k_27 // Material Frame(s) 14 15 The game will still play the first sequence instead of this one, but we’ll fix that in a moment. Now you need to open the CDB file in the folder where your model came from. This is the one for CIRCUIT2: Scroll down until you find the entry for your model. It will look something like this: k_2E // Model(s) "dummy00" { k_30 // Model Name "dummy01" k_34 // Model Rotation (float)0.999048 (float)-0.043618 (float)0 (float)0 (float)0 (float)1 k_2D // Animation Sequence ID 0 k_33 // Model Location (float)33.26736 (float)-35.13164 (float)-8.161795 k_2B // Start Frame 0 k_2C // Duration (or end frame if this is on a light) 480 k_36 [1] { 0 0 0 1 0 } } Static models, and models without material animations will not have all of these sections. Copy the entry for your model and paste it into the CDB of your destination cutscene. Remember to update the square brackets under “k_2E // Model(s)” at the start of the model list. As I said earlier, the coordinates listed in the CDB file are the ones used to position the models. But before you do that, if your model has an animated material we’ll need to tell the game which sequence to use. Look at the k_36 part of the code: k_36 [1] { 0 0 0 1 0 } The number we’re interested in is the third one. This determines which sequence to use for the animated material (I don’t know what the other numbers do). If the animated you added to the MAB was the second in the list, you’ll need to use a 1 here. This is my updated K_36 code: k_36 [1] { 0 0 1 1 0 } Now the only thing left to do is to change the model’s position in the cutscene (not in the WDB!). We can’t use the coordinate viewer here because it’s not a track we can drive around, so look at the other models for reference. I’m going to copy Redbeard’s location and rotation values and paste them over Kahuka’s. Then I’ll change either the x or y coordinates slightly and see what that does. This is the result of having Kahuka +5 on the x-axis from Redbeard: And that concludes this tutorial. From what I’ve covered you should be able to add models into any scene. The possibilities of what you can do are much more than just the things I’ve shown here, so experiment with the files and see what kinds of crazy stuff you can do. By messing with the binary files you can remove or replace models, change camera angles and timings...there’s probably not much you can’t do with a bit of trial and error. I’m sure you can come up with something a bit more creative than a UFO in a pirate level If you have any questions or problems, feel free to ask, but I’m not sure if I’ll be able to help. It really is just a matter of experimentation.1 point -

Hi!
coffins reacted to unison for a topic
I'm Ricky, but please call me Unison. I hate my first name. . I love music, games, writing, and drawing. I do a dabbling in programming, a project here and there; but nothing too big or serious. I'm not a good modder. I have no clue how to do any of that jazz, but I think it's coo. Just like everyone here, I'm a hardcore LEGO-er. Been buildin' for 10 years and counting. Anyway thats me. Oh and I'm a South Parkaholic.1 point -
Cafeteria 1.0 BETA 7 - Launcher & Mod Loader for LRR
Cyrem reacted to LimeKiller for a topic
Cyrem.... Cyrem I love you. Oh I just saw that it's Cerym. I still love you.1 point -
LXF to OBJ converter
bigFigure reacted to bartvbl for a topic
LDD keeps two versions of its LIF files around. One is located in Program Files (on windows), and the other in AppData (%APPDATA%LEGO CompanyLEGO Digital Designerdb.lif). The one in program files contains all files the program needs, plus an initial version of the brick database. The one in appdata contains all bricks that were added with updates after you installed the program. This is the LIF file you should be using for the conversion There are also some bricks called "assemblies" that consist of a few smaller bricks. The converter *might* not support these.1 point -
Brock Raiders
phenix8fr reacted to Fush for a topic
Make your Raiders look like Brock. Sorry, I had to. Download (Alt) To install just merge the 'Data' folder with the one in the LRR directory. You need to extract your WADS first as with any mod. Not guaranteed to work with other mods. If this breaks your game please return it for a full refund. I have no idea what I am doing.1 point -
Brock Raiders
MrBeingcool reacted to Cyrem for a topic
Inb4 drying pan helmet mod to go with it. Now all we need is some weather effects. Oh wait, we're underground.1 point -
Robocraft
Drill Master reacted to The Ace Railgun for a topic
Robocraft is a game where you build your own robot using blocks of armor, and other items like wheels, crawler legs, airfoils, and weapons, etc. Once you find a suitable design you go and annihilate the the other players (or die millions of times) and level/Tier up. I've seen a flying nazi symbol bot, the USS enterprise, a flying troll face etc. the bots can be pretty cool. Does anyone else play/want to play? I've heard talk of a 1v1/choose your own team feature being added to the game later on, so it might be fun to have competitions. One of my bots: Link to game: http://robocraftgame.com/1 point -
Robocraft
Drill Master reacted to KevinVG207 for a topic
It lagged a lot on my previous pc. Now that I have a new one, I'll give it another try. Nice designs guys! :P1 point -
SMT Progress 06
aidenpons reacted to Jimbob for a gallery image
From the album: LEGO Racers Stuff
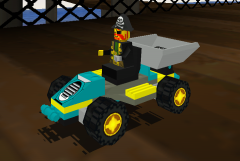
Just the steering wheel left to go!1 point -
RRU Quotes 2: Reckoning
aidenpons reacted to Alcom Isst for a topic
[11:14:37 PM] Jamesster: http://www.bricknave.net/Game_The_Bravest_Minifig.html [11:15:53 PM] High Weedmeigh: Those fire particles on entry... [11:16:32 PM] High Weedmeigh: The thing is, like [11:16:52 PM] High Weedmeigh: I can explain this in terms of psychology and game mechanics why things are the way they are. [11:16:57 PM] High Weedmeigh: But instead I'll make it simple. [11:17:11 PM] High Weedmeigh: MY CHARACTER IS A GIANT MARSHMELLOW THAT HOVERS IN LOW GRAVITY.1 point -
RRU Quotes 2: Reckoning
dead_name reacted to lol username for a topic
[2:50:25 AM] Hugh Wotmeigh: Goddam Kirk?by. [2:50:38 AM] Hugh Wotmeigh: Some of us collect stamps. [2:50:43 AM] Hugh Wotmeigh: Build sandcastles. [2:50:49 AM] Hugh Wotmeigh: Pull pranks on juniors. [2:50:57 AM] Hugh Wotmeigh: You build motherf****ing graphic engines. [2:51:00 AM] Hugh Wotmeigh: Goddam.1 point -

Can't Install Lego Stunt Rally - Windows 7
Sommanker reacted to le717 for a topic
That is an amazingly accurate description of Vista UAC. I guess we know where Microsoft got their concept from.1 point -
Baz's Mod V1.5
Cyrem reacted to Ethribin for a topic
Sorry for the late answer. But after some time I finally went through, learned what I had to to get it done and did it My game has now french voices again^^ Even the Tunnel Transport has a french name and voice calling it that It was already in the game Thanks so much again for your help1 point -
LXF to OBJ converter
bigFigure reacted to bartvbl for a topic
I've added a command line version of the tool. Get it here: https://github.com/bartvbl/LDDModelConverter/releases/tag/0.21 point -
Custom LEGO Universe Skins/Models
Alcom Isst reacted to Mythrun for a topic
Successfully modded the Nexus Astronaut shirt on the 1.10.64 client.1 point