
Leaderboard
Popular Content
Showing content with the highest reputation on 03/02/2015 in all areas
-
From the album: Glitch City
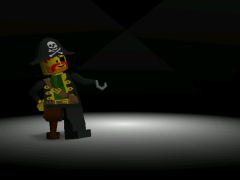
This game REALLY doesn't tolerate cheating.2 points -

RRU Minecraft Server
le717 reacted to Jimbob for a topic
I’ve given it a lot of thought and have finally made a decision on whether or not to implement a modded JAR to our server. I would happily write the answer in a single word, but the fact that quite a few people play the server frequently and are passionate for/against the subject deems it worthy of a more substantiated response. As older players of the server will know, it used to be Bukkit(1) until both the server was lost/recreated and Bukkit was taken down (along with other custom servers too). Thus the new server has remained Vanilla in the absence of a decent Bukkit alternative. Recently CanaryMod(2) has been pointed out as a viable candidate, however Mojang has been working on an official Plugin API(3) for the past five years, and as such I have been considering whether to wait until the official one is released – playing it safe if you will, relying only on the official server JAR to avoid any possible complications – and shifting over to CanaryMod in the mean time. As managing and modding Bukkit put a lot of unnecessary stress on me, which may seem pathetic but actually given my health condition isn’t at all, I’ve been skeptical to the inclusion of a new server. Additionally, the taking down of multiple fan-made server softwares (e.g. Bukkit) has forced developers to design workarounds, such as Spigot which has players build their own server software instead (I’m not sure on the legality of that). This pushing of fan developers onto the backfoot is a bit of a turnoff in itself. Finally, when Bukkit was installed, a great many plugins were installed – around 20 at one point, I believe – which very much enhanced the server experience beyond Vanilla. Don’t get me wrong, it was brilliant that we had two separate Survival and Creative worlds hosted on the same server, it’s just the Vanilla is simple and Bukkit complicated things. In conclusion, I’ve decided against modding the server. I’m going to wait for the official API to come out, and until then will leave the server in its official JAR version. If anyone really wants a modded server then that’s great, I’ll happily help you set up a second (or replacement) RRU server which will cost you just $4.00 a month. But so long as I’m paying for this server and it has many players on it, I’m keeping it Vanilla. Wow, that went on a bit much and sounded more formal than I’d hoped... I hope you will all be okay with this and it doesn’t stop anyone playing the server. (1) Bukkit Website (2) CanaryMod Website (3) Minecraft Plugin API Explanation To alleviate any potential awkardness as a result of this post I have recorded a tour of the server. Check it out here! Hopefully I've covered the majority of the server, having not played it much myself I'm not sure who's made what and where. P.S. It's still processing and will be 1080p soon.1 point -

RRU Minecraft Server
Ben24x7 reacted to Sparks8805 for a topic
That's exactly why Mojang made it so that you can turn clouds off, and turn transparent leaves to opaque leaves, and turn off smooth lighting. What I'm saying is, why add more stuff just to add more suff? If you want to build a structure 265 blocks tall, dig yourself a hole, start at 0, and go all the way up. It'll still lag due to the rendering however. I don't see why people think we need to remove the 265 limit. And I say again It IS there for a reason. We all need to stop thinking of ourselves and think of each other first in order to prosper as a decent community. I know for a fact that I am not the only person who doesn't have a supercomputer, and I'd like to keep the Mods that can stress your computer, to a minimum. Obviously JJ has the final say in all this, but I still think that keeping everything perfectly Vanilla is a viable option.1 point -

Drome Racers in-game-only models in LDD
lol username reacted to Toa_Of_Justice for a topic
@MvdL95: Very well done on the Hornet and the G-Force Street. Thank you for your help. (The G-Force Street, by the way, is the alternate model of set #8470 Slammer G-Force, so if you have that set, you have the pieces and instructions for either model.) For the tubes in the fairings, I have an LXF template that has scaffolding which will take care of the alignment for you. Just attach your desired fairings to the black pins, then the axles will be lined up for you to slide the tubes onto. (All parts in that file are color-coded according to the reasons in this post on Eurobricks.) To fit the steering gear in some of my other LDD models in this topic, I cheated a bit and lifted the gray axle/pins in their sockets a little, as well as adding a 1x4 plate to the steering rack. I don't think I'd need to do that in real life though. @jamesster: Thanks for the screenshots. I see a few spots where the 3D modelers seemingly defied the geometry and/or physics of LEGO elements, especially near the back and in the middle. I like how MvdL95 built those areas. EDIT: Here's my version of the Hornet. Click any picture for a larger version. LXF File Color variants: The darker green and orange versions are not possible to build in real life, but the others are. Here is another version with headlights and taillights. LXF File Next up will be the Tsunami Street! That one may take me a little longer than the others, since the #6 pull-back motor (in either variant) does not exist in LDD and therefore I will need to make it. Unless someone else wants to volunteer, that is. Also, I shall let everyone know in advance that the rear wheels and tires used on the Tsunami Street also do not exist in LDD, so I will need to consider alternate rear wheels and tires. jamesster, please provide screenshots of the Tsunami Street whenever you get a chance.1 point -

The LEGO Media Press Room and completely useless LRR concept info
aidenpons reacted to Car CrazeXVI for a topic
I don't know if anyone ever noticed this before, so here goes. LEGO apparently had a short-lived site about… well, just you guess. https://web.archive.org/web/19991008205911/http://press.legomedia.com/ https://web.archive.org/web/*/http://press.legomedia.com/news/* Unfortunately, a good deal of EVERYTHING is missing. So apparently, we could have had melting plastic (oh wait,) poisonous gas, freaking teleporter guns, dynamite as a weapon and actual vehicle repairs? What happened to that last bit? I hate deadlines. Oh well. And I don't except helmets to have worked too well. Too many polys. Full articles (In case the archive dies, which it won't) LEGO Racers Rock Raiders LEGOLAND There are also three missing articles, "LEGO Friends Software To Co-Launch With New Girl Band," "LEGO Media International to Unveil Four New Software Titles at E3," and "LEGO Media creates a hit for the girl's software market" (lol) I bet it's the same band mentioned in the game. (Or at least, the demo.) In addition to that, there were downloads, nearly all of which are gone, save for the LEGO and LEGO Media logos. https://web.archive.org/web/20001029072122/http://press.legomedia.com/downloads/lmi/legologo.tif https://web.archive.org/web/20001029073856/http://press.legomedia.com/downloads/lmi/lmilogo.tif The downloads page appears to have broken since I last visited. And why yes this is long overdue how did you know.1 point -
Um…
aidenpons reacted to Car CrazeXVI for a gallery image
From the album: Glitch City
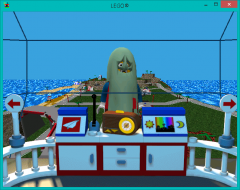
After force-changing the infodude's hat I tried clicking on him to see if it would cycle. In the seventy zillion years I have lived on LEGO Island, I never would have excepted this to happen.1 point -

Tutorial: (semi-)Transparency in textures
Sluicer reacted to RobExplorien for a topic
Alpha compositioning in LEGO Racers textures You probably already know how to work with the .BMP files, how to edit them and implement them in the game. If you don't know this, I advise you to check out >this tutorial. What hasn't been explained yet (in a more thorough way), is the use of alpha channels (also known as transparency) in these .BMP formats LEGO Racers uses. Alright, to start off with, you cannot set a colour transparent/opaque in the .BMP files via the editing program you use. A pixel is either filled or clear in LEGO Racers. The alpha channel a .BMP file uses is defined in the files using the .TDB extension in the .JAM archive. Below follow some examples of the structure of a section of a .TDB file: Example taken from MENUDATAPARTDBBODYPART.TDB k_27 // Textures [104] { k_27 // Texture "il_dflt" { k_2A // Bitmap (remove this to denote a TGA texture) k_28 } k_27 // Texture "kk_chst" { k_2A // Bitmap (remove this to denote a TGA texture) k_28 } ... // Other 102 entries cut } This binary file structure is pretty common in the .JAM archive, when viewed with origamiguy's >Binary File Editor. It starts with k_27, which probably functions as to define what we're talking about in the file (which are textures). Under k_27 is a number, placed in square brackets. It defines the amount of entries that will follow between the (mandatory) curly brackets. In our example, we have the IL_DFLT.BMP and KK_CHST.BMP texture files. You already know what these abbreviations mean if you read the skin texturing tutorial. The texture specifications are placed between curly brackets again, to indicate where these specifications refer to (in our case, IL_DFLT.BMP or KK_CHST.BMP). We won't go too much into the k_2A and k_28 now. Just a brief explanation of k_2A: "Denotes the use of a bitmap image, and can be replaced by a TGA (which is a(nother) raster graphics file format).". So this structure is relatively simple to understand. I cannot spot any specified use of alpha channels here, can you? Indeed you can't, because we need a special statement to denote the use of a transparent colour in the designated .BMP file. Take a look at the next example. Example taken from GAMEDATARACEC0R0IGD_MAP.TDB k_27 // Textures [1] { k_27 // Texture "igd_map" { k_2A // Bitmap (remove this to denote a TGA texture) k_28 k_2C // Transparent Color // CONFIRM THIS ONE 0 0 0 } } This .TDB file is much smaller than the former one we've discussed, but that isn't of any issue here. Aside from the specifications 'pointing' to another .BMP file (which is IGD_MAP.BMP in this case), there is an extra statement for this texture. Ofcourse I'm talking about k_2C, and the comments in the code already hint this. The k_2C statement is not hard to understand either. In the .TDB file it is referred as 'transparent color'. Below k_2C are three integers, and you always have to define these integers, when using the k_2C statement (hence the //CONFIRM THIS ONE comment). These three integers stand for an RGB colour code, where the first is for R, the second for G and the third for B. That's right, you can set a specific colour for a .BMP file to be used as transparent. A quick sidenote, the integers defined below k_2C cannot be lower than 0 or higher than 255, because RGB colour codes do not extend beyond these values. In our example, we have IGD_MAP.BMP, which is the texture for the track map displayed in the lower right corner of the race screen. As you can see, the transparent colour for this texture is pure black. Therefore, all colours in the .BMP with pixels of this RGB value are, to simply put it, invisible for the user. Compare the two images below and you see that the blackness in the .BMP is not shown in the actual game. --> in-game --> So, in order to use transparency for a texture, use the k_2C statement. To summarize it shortly: 1. Open the .TDB file and search for the texture (name) you desire to set (partially) transparent. 2. Use/Add the k_2C statement to define the RGB colour code (thus defining which colour will be used as transparent in the designated .BMP file), and save it again. 3. Open the .BMP you wish to texture (partially) transparent with an editor. 4. Select the RGB colour code you defined as to be used as transparent for this specific texture, and edit the texture with this colour to your likings. 5. Save the .BMP (in the right folder) using indexed color (to have the game 'notice' any possible transparency) and recompile and stuff (you know the drill). Now we also have a method for applying semi-transparency to textures, which Brickulator discovered. For applying this we have to include another file, the .MDB file. So, what does the 'inside' of this file look like? Here we have the code for Veronica Voltage her chestpiece. k_27 // Materials [128] { k_27 // Material "vv_chst" { k_29 // Diffuse Color 100 100 100 255 k_28 // Ambient Color 100 100 100 255 k_2C // Texture Name "vv_chst" k_2D k_2B } ... // other 127 entries cut I can see similarities with the .TDB; both start with the k_27 statement, define the amount of entries to follow and denote the texture. So, where and how to apply semi-transparency? For that, we make use of the k_46 statement. Below this statement, we have to set a value ranging from 0 to 255. This value defines the opacity of the texture. The 255 value would be a solid-looking texture, and 0 would be a full transparent texture. Any value inbetween will result into a semi-transparent texture. Note that it is not clear whether it is possible to add 'regional' semi-transparency, e.g. only setting those with RGB values 240;220;0 semi-transparent. So, in order to use this, write the statement below like this: k_27 // Materials [128] { k_27 // Material "vv_chst" { k_29 // Diffuse Color 100 100 100 255 k_28 // Ambient Color 100 100 100 255 k_2C // Texture Name "vv_chst" k_2D k_2B k_46 // Alpa (0-255) 127 } ... // other 127 entries cut Ofcourse you can use another value than 127, but this serves as an example. For her chestpiece, it results into the following output: So, use the k_46 statement to apply the use of semi-transparency to a .BMP in-game. To summarize it shortly: 1. Open the .MDB file and search for the texture (name) you desire to set semi-transparent. 2. Use/Add the k_46 statement to define the opacity of the texture, and save it again in the correct folder. 3. Recompile the .JAM and stuff (you know the drill). If you still have questions, or if you spot a mistake I might have made in this tutorial, I'm open for it.1 point -
Alpha channel and semi-transparency
Sluicer reacted to Brickulator for a topic
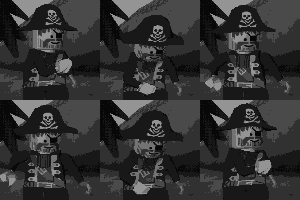
So I just worked out how to do semi-transparency, I haven't seen it posted before so forgive me if this has already been discussed I think you can only make whole objects semi-transparent, rather than just parts of the texture like with alpha channels. To do it, you need to go into an MDB file, like BODYPART.MDB, and add the following to one of the material entries: k_46 [number from 0-255] 0 is fully transparent, 255 is opaque. So for example, I added this: k_46 127 To the entry for vv_chst, which produced this:1 point