
Leaderboard
Popular Content
Showing content with the highest reputation on 12/12/2017 in all areas
-

3DXML to OBJ - Converts LDD model captures to OBJ
LegoLoco7 reacted to lol username for a topic
3DVIA Printscreen can capture LEGO Digital Designer models and save them as 3DXML files. It was discontinued years ago, but can still be downloaded from the web archives (direct installer link). Not many programs can load 3DXML files, so I made a program to convert them to OBJ. It does some other helpful things too. Download The resulting models are far more optimized than exports from other LEGO building software, thanks to LDD's hidden stud/tube removal. For example, a small house model that's 50350 tris exported from LeoCAD is only 13548 tris with this method - and with some additional tricks, only 2586 tris. More info here. I've only made this to work with LDD captures, compatibility with captures from other programs is not guaranteed. It will automatically name materials and textures with their official LEGO names/IDs. Setup: 3DVIA Printscreen should be configured so "Capture of textures" is on, and "Group by textures" is off. LDD should have high-quality rendering options disabled. 3DVIA Printscreen must be launched BEFORE LDD. Usage: Save your LDD model in 3DXML to OBJ's "Models" folder. Launch 3DXML to OBJ and enter your LDD model name in the first text box, then click "Move camera". This saves a new LDD model with the camera set in the proper position for 3DXML capturing. Open the new LDD model (it will have CAM_SET in the name) and capture it to a 3DXML file with 3DVIA Printscreen. Make sure it's saved in 3DXML to OBJ's "Models" folder, like the LDD models. Enter the name of your 3DXML file into the second text box in 3DXML to OBJ. I recommend leaving "Weld duplicate vertices" enabled. Choose a new color palette if you'd like, and click "Convert". It sounds more complicated than it is. Here's a model being converted and imported into Unity: And now, the advanced features, which are mostly for LEGO Universe-style color variation, but keep reading for some geometry removal tricks too. For color variation, we need to randomly adjust the color of each brick... But, LDD often batches bricks of the same color together into one mesh. Thus, we can't do it after capturing a model. We have to have the randomized colors displayed in LDD itself. So, it's LDD modding time! Setting up color variation: Download this LIF Extractor. Extract db.lif, found at C:\Users\YOURNAMEHERE\AppData\Roaming\LEGO Company\LEGO Digital Designer Put the resulting db folder where the original db.lif file was, and rename db.lif to something else so LDD will use your extracted data instead of the original file. Inside your db folder is Materials.xml. Put a copy of it in the same folder as the 3DXML to OBJ EXE. Launch 3DXML to OBJ and click the "Advanced" button. In the "Edit Materials.xml" box, choose what changes to make. You can add color variation and also apply changes to the base color palette. Click "Edit" and it will create a new XML file. Now you'll want to update the program's own internal color definitions. Enter the name of the XML file you just created in the box below, and click "Update color definitions". Replace LDD's Materials.xml with your new version. Again, this all sounds more complicated than it is. There's a video further below showing how it's done. Adding color variation to LDD models is simple enough; in advanced mode there's an option for it in the same box where you set the camera position in your LDD model. Just choose how strong you want the variation to be. I strongly recommend converting all the materials to vertex colors for models with color variation. How you do this will depend on what software you prefer; in the video below I'm using Ultimate Unwrap 3D. There's one more advanced feature: You can keep meshes of certain colors from receiving color variation and/or being exported. This is useful for "dummy bricks" only placed in the model to trip LDD's hidden geometry removal. In 3DXML to OBJ_Data\StreamingAssets, you will find "Color Export Exclusion.txt" and "Color Variation Exclusion.txt". Add the desired color IDs here, one per line. Covering studs is obvious enough, but tubes are a bit more finicky. Original LDD model, vs export with the dummy bricks excluded: A simple brick has the entire underside present. These quickly add up to loads of polygons. Placing 1x1 round plates across the surface causes LDD to replace the underside with two triangles. Nice! There's a small handful of other parts with this effect, but 1x1 round plates are the best. In fact, even just one 1x1 round plate can trigger this so long as the rest is still covered. Covering the bottom entirely will cause LDD to remove it 100%. Beware: Some bricks, like those rounded 2x2 pieces, will look like they have the same effect as 1x1 round plates, but actually don't... They still leave much of the tubes intact. And finally, here's a video showing all of the advanced features, if the text wasn't clear enough: More tips and tricks! If 3DVIA Printscreen is causing LDD to freeze and/or not launch, see this post. If you have developer mode enabled in LDD, you can press Shift W to toggle wireframe mode. You can also turn rendering of different parts of bricks on and off. LDD's bricks come in four sections, and can be toggled as such: K: Toggles studs Shift K: Toggles bottom and inside of tubes Q: Toggles outside of brick Shift Q: Toggles bottom and inside of brick You can use this to, for example, capture a model without studs, and use that as a lower LOD. Don't have developer mode enabled? Go to the same AppData folder as db.lif and developermode=1 to preferences.ini. If you've modded LDD's decorations, or LDD has updated, you can update 3DXML to OBJ's internal texture definitions - just copy the Decorations folder from db to the same folder as 3DXML to OBJ's EXE, and click the button for it in advanced mode. (In case you're curious what this does: The program keeps a list of MD5 hashes of texture data, along side their file names/IDs. This allows the program to identify what textures are what in a 3DXML file, without actually containing any of the texture data itself.) You can add your own custom color palettes, just go to 3DXML to OBJ_Data\StreamingAssets\Custom Palettes and use the existing files as examples of how they work. If for some reason you need to, Shift R resets 3DXML to OBJ's saved preferences (resolution, most recent conversion options, etc). Replacing colors when converting a 3DXML with color variation will work... But look very strange, as it'll only affect bricks that happen to be the original color values. The ones that have been slightly lightened or darkened won't be changed. You can mod lower LODs of bricks from LU into LDD... But that'd be its own topic.1 point -

Custom Rock Raiders Building Instructions
JohnnyBricks reacted to Jimbob for a topic
I thought I'd try and put together a complete set of instructions for every unreleased Rock Raiders set which anyone can print off and utilise. Each model then has two instructions links to choose from: LDD, a PDF instruction manual auto-generated in LEGO Digital Designer. This means the steps are at times illogical in order, and difficult to understand. However, I have included this version because it contains a parts list, but keep in mind that parts with decals will be counted the same as identical blank parts in the list, and unsupported parts won't appear. LeoCAD, a PDF instruction manual that I created myself. The models were made in LeoCAD and the instructions designed with LPub, allowing me to define the order of the instructions. For this reason I recommend using the LeoCAD instructions. All-in-One Downloads Here are zip files containing all the instructions together. LDD Instructions Pack LDraw Instructions Pack Alternatively, preview and download individual models in the spoilers below. Buildings Docks Geological Centre Ore Refinery Power Station Super Teleport Support Station Tool Store Vehicles Cargo Carrier Large Mobile Laser Cutter - Not started yet Small Mobile Laser Cutter - This was kindly provided by Oboe Shoes but unfortunately the link's now dead Tunnel Scout Miscellaneous Electric Fence I'd like these to be as good as they can in terms of accuracy to the game/theme, and understand that I may have reproduced certain areas wrong. When the in-game model differs from the models in the booklet, I've generally prioritised the in-game model. A big thanks goes to PeabodySam for his recreations. The programs used to produce these models were LEGO Digital Designer, LeoCAD, LPub, LDView and POV-Ray. Also thanks to Arthuriel for introducing me to the LDraw suite. Note: Please do not edit and/or redistribute these without my prior permission (I've heard that people take freely distributed LEGO instructions and sell them).1 point -
LDraw vs Mecabricks vs LDD for game models
eagleeyedan reacted to lol username for a topic
Let's say you're working on a model for a new Rock Raiders vehicle, or making a fan game, whatever. Often times people just use exports of LDraw models or similar things, without thinking about it too much. They'll also probably be told this isn't a very good idea, because the results will be highly inefficient. But just how inefficient? Let's find out. For those who may be new to all this: When you create a model with LDraw-based software, LDD, or Mecabricks, the saved model doesn't contain the actual geometry of the pieces. Rather, it's a list of what pieces to put where, in what colors, etc. The three systems mentioned above actually have their own libraries of 3D LEGO pieces. So, while these systems have some level of cross-compatibility (LDD can import and export LDraw models, and Mecabricks can import LDD models), this has no bearing on the brick geometry used. For example, if you build a model in LDD, then export to OBJ with an LDraw-based program, the geometry in the OBJ will be of LDraw's pieces, as if you had built it in LDraw to begin with. For these tests, I built a simple test model in LDD, which I was then able to also work with in LDraw-based programs (in this case, LeoCAD) and in Mecabricks, thanks to the cross-compatibility mentioned earlier (though Mecabricks lacked the specific window pieces I'd used, so I had to swap them out with a very similar part it did have). Option 1: LDraw LDraw is a (mostly) fan-created library of 3D LEGO pieces and software for doing things with them. Its origins go back to 1995, and the accuracy of the brick models is often hit or miss (there's an especially notable problem where all the holes in Technic bricks are at the wrong height). The brick models also aren't built with realtime rendering in mind; they favor sharing as much geometry between multiple parts as possible, but this leads to a lot of inefficiencies on exported models. It's also worth noting that studs, tubes, etc are 16 sided, and studs are 4.8 mm wide. There's a few ways of exporting LDraw models to other formats, but they generally give similar results. For this, I exported the test house to 3DS with LeoCAD. There are some issues with faces being flipped the wrong way and smoothing/normals being messy, but in the end, that's the least of your concerns: the triangle count for this simple model is 50350. Most of these tris come from the studs and tubes inside the walls and such; a complete waste. Model - Wireframe Option 2: Mecabricks Mecabricks is relatively new, web-based, and has its own unique brick library made in Blender (with occasional brick geometry borrowed from LDD, though not much, and those cases are gradually being replaced with custom geometry - more on that later). As you can read in that topic, the basic part dimensions are similar to LDraw, but additionally, the outside dimensions of the bricks are reduced slightly to leave gaps between them, like on real LEGO pieces. I exported the house to OBJ with Mecabricks, and the resulting model was 42927 tris - better than LDraw, but still not well suited to a game. Still lots of waste on hidden studs and tubes. Model - Wireframe Option 3: LDD, LXF to OBJ This method uses an old tool by bartvbl that is no longer available, however, I still have a copy and thought I'd include it in these tests. It assembles LDD's bricks together into your model and saves it as an OBJ (though it doesn't support things like flexible elements and decals). LDD's studs are 4.9 mm wide (the official LEGO measurement), but more importantly they're 12 sided rather than 16, and the bricks are generally far more optimized for realtime rendering: the resulting model is 30586 tris. There's still the major issue of hidden studs and tubes, though. Model - Wireframe Option 4: LDD, 3DVIA Printscreen capturing This method works differently than the others: It captures directly from LDD as it's running. Why does this matter? LDD has a system that automatically removes studs, tubes, etc that cannot be seen. It doesn't remove everything, but it does a lot - in fact, LEGO patented it. Capturing with 3DVIA Printscreen, then converting the resulting 3DXML to OBJ with my tool, results in the test house model only having 13548 tris, while looking identical to the previous method! (It also supports flexible elements and decals, if your model has them.) Model - Wireframe Option 5: LDD, 3DVIA Printscreen capturing, with "cap" bricks This is a strategy Hollis/cdmpants came up with. I'll write a topic with specifics later, but in short, you place bricks in your LDD model that serve no purpose but to trigger geometry removal. The bottom of the roof has many tubes that aren't covered, so LDD doesn't remove them - but, if this were in a game, the player would likely never see or care about them. So we put caps there (and on the bottom) to get rid of them. Then, once the model is converted, we delete them, leaving the more optimized bricks they were covering behind. Doing this reduces the model to 2586 tris. Model - Wireframe Option 6: Remodel it yourself The inevitable conclusion. Any model can be optimized further with some manual work; I decided to use the LDD 3DVIA Printscreen rip as a base and work from there. I was easily able to get it down to 884 tris. Model - Wireframe There's another difference between brick libraries: LDraw and Mecabricks are fan-created (well, mostly - we'll get to that in a moment), and LDD's brick geometry is owned by LEGO. So, can you use LDD geometry in game mods, fan games, or other unofficial software? Up until recently, I was under the impression that LEGO was strongly against it. The only major fan-created software (that I knew of) to contain LDD geometry - or rather, enhanced versions of it - was the LDD to POV-Ray Converter: More information was given in this Eurobricks post: In May, I contacted LEGO Customer Service to ask if there were any way for other fan-created projects (such as my own) to use LDD geometry with the official blessing of LEGO, as the LDD to POV-Ray Converter had. Here's their reply: So, using LDD geometry with direct, official approval from LEGO is unlikely to happen these days. The only exception seemed to be a collection of LDD parts that the LEGO Universe developers had shared with LDraw, to "ease up the conversion between LDraw and LEGO Digital Designer". The LU team sent part geometry to LDraw in several batches, the first in 2007, and the last in 2010. But then I found out something unexpected: From 2011 to the present day, LDraw has been adding LDD bricks to their library even beyond the ones officially given by the LU team: https://forums.ldraw.org/thread-800.html https://forums.ldraw.org/thread-1145.html https://forums.ldraw.org/thread-5310.html LDraw's files are plain text, and part files contain information on their history/authors. LDD-derived LDraw parts credit "LEGO Digital Designer" as the author, and searching for that through all files in the current LDraw parts library reveals 542 files which are sourced from LDD. Up until I found this out, I had been basing models in my game project off of LDraw geometry, to avoid using LDD geometry without approval from LEGO. But it turned out that many of the LDraw parts I'd been using were just slightly modified LDD parts, ripped by LDraw parts authors! I then checked Mecabricks, and what do you know, they also have some parts that come from LDD (the ones I specifically checked were some minifig hair pieces). It's a low amount and they're gradually being replaced with custom geometry, but it goes to show LDD ripping isn't a dark forbidden practice or anything. So both LDraw and Mecabricks (and thus their users) have been using LDD geometry, and LEGO doesn't seem to care. And LDraw has been doing this for six years as of when I write this, for hundreds and hundreds of parts. Thus, I think it's safe to say LEGO probably won't care if you were to do something similar in a mod or fan game. Just don't go running around screaming "THESE ARE LDD MODELS, I AM DISTRIBUTING OFFICIAL LDD GEOMETRY EN MASSE, HERE, DOWNLOAD THEM", and chances are you'll be fine.1 point -
Tunnel Scout Render
Fifi La Fume reacted to Jimbob for a gallery image
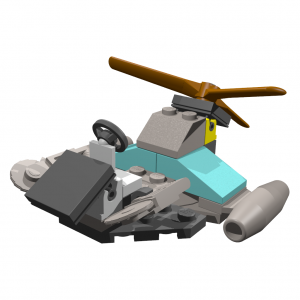
From the album: Rock Raiders
1 point -
Tool Store Render
mistermuck reacted to Jimbob for a gallery image
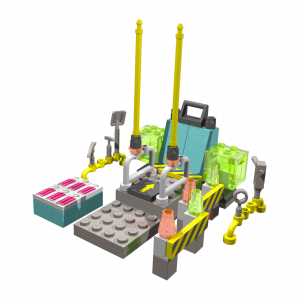
From the album: Rock Raiders
1 point -

Gephyrophobia
Cyrem reacted to ShadowDraikana for a topic
@RockmoddeR I was kind of confused and slightly disoriented on this level; height map needs some work. Other than that, it was a fairly straightforward mission. Build a base, collect 200 crystals. Piece of cake. Something I felt that needs to be added to the download is a level cfg. Would make it a lot easier to install the map. This would have also avoided me somehow forgetting to link up the erosion map properly. No harm done, as there isn't much going on there anyway. One big problem I saw when looking at it with Cyrem's map creator was with the emerge map. All of the emerges are in solid rock walls. I was wondering where the monsters were, and this was my answer. One simple solution would be change all the solid rock walls where the emerges are to hard rock or something. Regardless, this is something that really should have been caught in the development of the map. There is also a cave directly to the southeast of the starting cavern that is revealed at the start. Not sure why this is the case, since there is no reason for it to not be hidden in the dugg map. Other than those issues, the map was pretty involved with the puzzle-solving and everything. Nice, fun little challenge of a map. As a bonus, I also learned a new word by finding this map1 point -

Cafeteria 1.0 BETA 7 - Launcher & Mod Loader for LRR
ShadowDraikana reacted to Cyrem for a topic
Screenshot of next version when it comes... Thank you.1 point -
Background visible through embedded photos/videos
aidenpons reacted to Cyrem for a topic
@aidenpons! I thought it would be very important to inform you about the caos that occured regarding the follow on from the beginning of the orginal post given at a time that a member that joined many years ago posted about this website of recent times that since a certain Jimbob on no particular variety made a pience known as a form of artwork by the human species and how it was added to another form of medium used for conveying technical information such as it's been fixed. wot.1 point -
Rock Raiders Stylized Wallpapers
Cirevam reacted to Cyrem for a topic
New Wallpaper Added Wire Driller Night Download: https://mega.nz/#!UwVhyLpb!WsQ5TF-Dysb4c3ouTOv4m_NqlvBUwd8aSGWgXQNPQeg1 point -
JimbobJeffers' Maps
Jimbob reacted to ShadowDraikana for a topic
Since nobody reviewed either of these maps as far as I can tell, I feel obligated to do so: --------------------- Crystal Catastrophe First off, I had to mod my Raiders to be able to drill Loose Rock after I couldn't make it to the base without running into that wall type. The setup with the multiple paths (and lost raiders) reminded me of Run the Gauntlet, Split Down the Middle, and Rock Hard. Had no trouble finding the base, and met no resistance from the local wildlife whatsoever. That doesn't count the one monster emerge you put in the maze. Kind of stuck out like a sore thumb, but that might be me. On top of this, the Docks building is utterly useless. Why? The Raiders use the edge of the wall on the right hand side of the "lake." If you intended the player to need to utilize the Docks, then consider partially redoing that cavern so that the Raiders won't do this. Then there are those potholes under the Super Teleport and Geological Center... not your fault, though. After strip-mining the maze (and dealing with Idleness Syndrome), I opened up the caverns near the base. As expected, there were plenty of monsters emerges. Didn't take me long to tear through into the crystal cache, and from there it was just a matter of getting the crystals back. Pretty easy map overall, as there aren't enough monsters to be a legitimate threat. Not taking away from the design of the level as a whole, as I thought it was very nicely done. Really enjoyed playing through it. EDIT 12/10/2017: There are a bunch of emerges in the maze, but only one seems to work. This is because several triggers and emerges were put under the same number such as 1. In Cyrem's map creator, there are only 20 emerges allowed. Apparently only one trigger number will work with one emerge point of the same number. So, if an update is made to the creator to allow more than 20 emerges, or there is a way to make the existing triggers/emerge work, the maps need to be fixed. -------------- Hard Luck Reviewed on 12/10/2017: First off, I was a bit worried I'd need to mess with a few things to get the mission to work in my mod. Turns out there are just enough crystals on the island for it to function. I was extremely stingy with the crystals I initially found (since I didn't know how many there were) until I discovered the second seam. From there, it was pretty much smooth sailing (pardon the pun). It didn't take me long to strip-mine the island and get my Cargo Carrier + Small Digger team together. Then it became a matter of figuring out which path lead to the large cavern where I needed to move my base. Admittedly, I found it on my second path choice. Still, I felt obligated to check out the other areas just in case . Unfortunately, I ran into the dreaded Idleness Syndrome when I tried getting my second base set up. To try to fix this, I beamed up everything on the island (save the Tool Store, Power Station, and Support Station) and collected the resources left behind. Then I beamed up my Raiders and Tool Store. Reason I left my working Support Station on the island was just in case I couldn't get one built in my new base. I was going to perform this process anyway, but I did it sooner so as to try to get rid of the idling problem. After several mind-numbing minutes, I finally got a base built and some defenses in place. I then proceeded to strip-mine the cave up to the hard rock (which obviously marked a new cavern). It wasn't too hard to figure out that any monster resistance was going to be in that last cavern. To my disappointment, only two emerge points worked for me. This mission suffers from the same emerge map trigger problem as in Crystal Catastrophe (see my edit above). Since the monsters weren't working, I found it too easy to get the remaining needed crystals. Overall, it was very clear to me that there was some serious thought put into the designing of the map. What I personally loved about the mission was the fact that you need to use the Cargo Carrier, something you rarely needed to use in the main game (or even in Baz's levels). This alone scored points immediately in my playbook, as did the island aspect of the level. A problem that did I notice with the level: when I opened the map with the aforementioned creator, I saw trigger/emerge points in the other paths around the lake. I'm sorry, but these are completely pointless in having unless the user manually changes the used textures in the level to ice. Oddly enough, none of them even worked anyway on my playthrough. Furthermore, some of the triggers were placed in solid rock walls. This a big no-no. This doesn't detract from the level in any way, as it is a minor issue. --------- Both of these were very well thought out and designed maps, and I thank @JimbobJeffers for sharing them. Excellent job! I'm hoping you eventually try making more, as I enjoyed playing through these. One last thing: making your own menu bmp images for the levels is a huge bonus and adds that much more to my assessment of the maps. Shows that you put a lot of effort into them.1 point -
The FREE GAME notification thread!
Supersonic reacted to TheBillionTonBrick for a topic
Can we talk about open source games here? SuperTux (A mario clone with a penguin in the place of a plumber; the deveolpment version has its own level editor) Super Tux Kart (basically another racing game) Neverball (a puzzle game where the player controls a ball by tilting the board in different directions; it has no relation whatsoever to Wild Tangent's Overball) Pingus (a lemmings clone with penguins replacing the titular "lemming" characters; no mention of the popular childrens' show character of the same name is ever made)1 point -
Cafeteria 1.0 BETA 7 - Launcher & Mod Loader for LRR
le717 reacted to Cyrem for a topic
Ok another update with more news. I'm going to change how it works so that it uses the Data method as it's primary. This is how it's going to work (I have it losely working). On initial install of Cafeteria it will make a backup of your wads, placing them in the Cafeteria folder, it will then extract them into a folder called "DataSource". Cafeteria will grab the files out of DataSource, apply the mods then transfer the modified file into the final "Data" folder. From there you can run the game. DataSource is the basing, they can be vanilla files or an extracted overhaul. The Launch button will be separated into 2 buttons, one called "Build" the other "Play". This means the building does not need to take place every time you start RR even if you didn't modify anything. Instead, whenever you add mods to cafeteria, change a resolution or install a custom level... only then would you perform a build. (I could potentially allow you to keep backups of each build you do as a WAD) You can now also do experimental mods that you don't intend on keeping by modifying the final files in the "Data" folder. The next time you do a build, all those files will be overwritten. To make any permanent changes, you can modify the DataSource files, or make a Cafeteria Patch. This does mean you can use only the resolution mod if you wish. WAD output instead of Data will remain an option if you wish.1 point -
Rock Raiders Stylized Wallpapers
ShadowDraikana reacted to Cyrem for a topic
Haha. How awesome would RR would be if it was made today.... New wallpaper: Download in First Post.1 point -

High-Poly Energy Crystal
ShadowDraikana reacted to PWNZOR for a topic
Well, it hasn't been documented yet, so I might as well go ahead and do it. First, go to the Lego.cfg, about lines 68-69, and change those to: PowerCrystalRGB 0:80:0 UnpoweredCrystalRGB 60:0:60 Next, follow one of the two methods: Method 1: Go to about line 1014 and change that to: Crystal World\Shared\crystal Method 2: Go to the world/shared folder, and copy the crystal.lwo file out of there. Paste it in the Miscanims/crystal folder, and rename it to VLP_Greencrystal.lwo (overwriting the previous file). And that's it.1 point